> ## Documentation Index
> Fetch the complete documentation index at: https://docs.cassidyai.com/llms.txt
> Use this file to discover all available pages before exploring further.
# Deploy to Google Chat
> Deploy your Agent to Google Chat so your team can access it in Google Workspace.
Deploy your [Agent](/agents/overview) to Google Chat so team members can interact with it in direct messages and Spaces within Google Workspace.
**Prerequisites:**
* An Agent created in Cassidy
* Google Workspace admin access
* A [Google Cloud](https://console.cloud.google.com/) project (or the ability to create one)
## Connect Cassidy to Google Chat
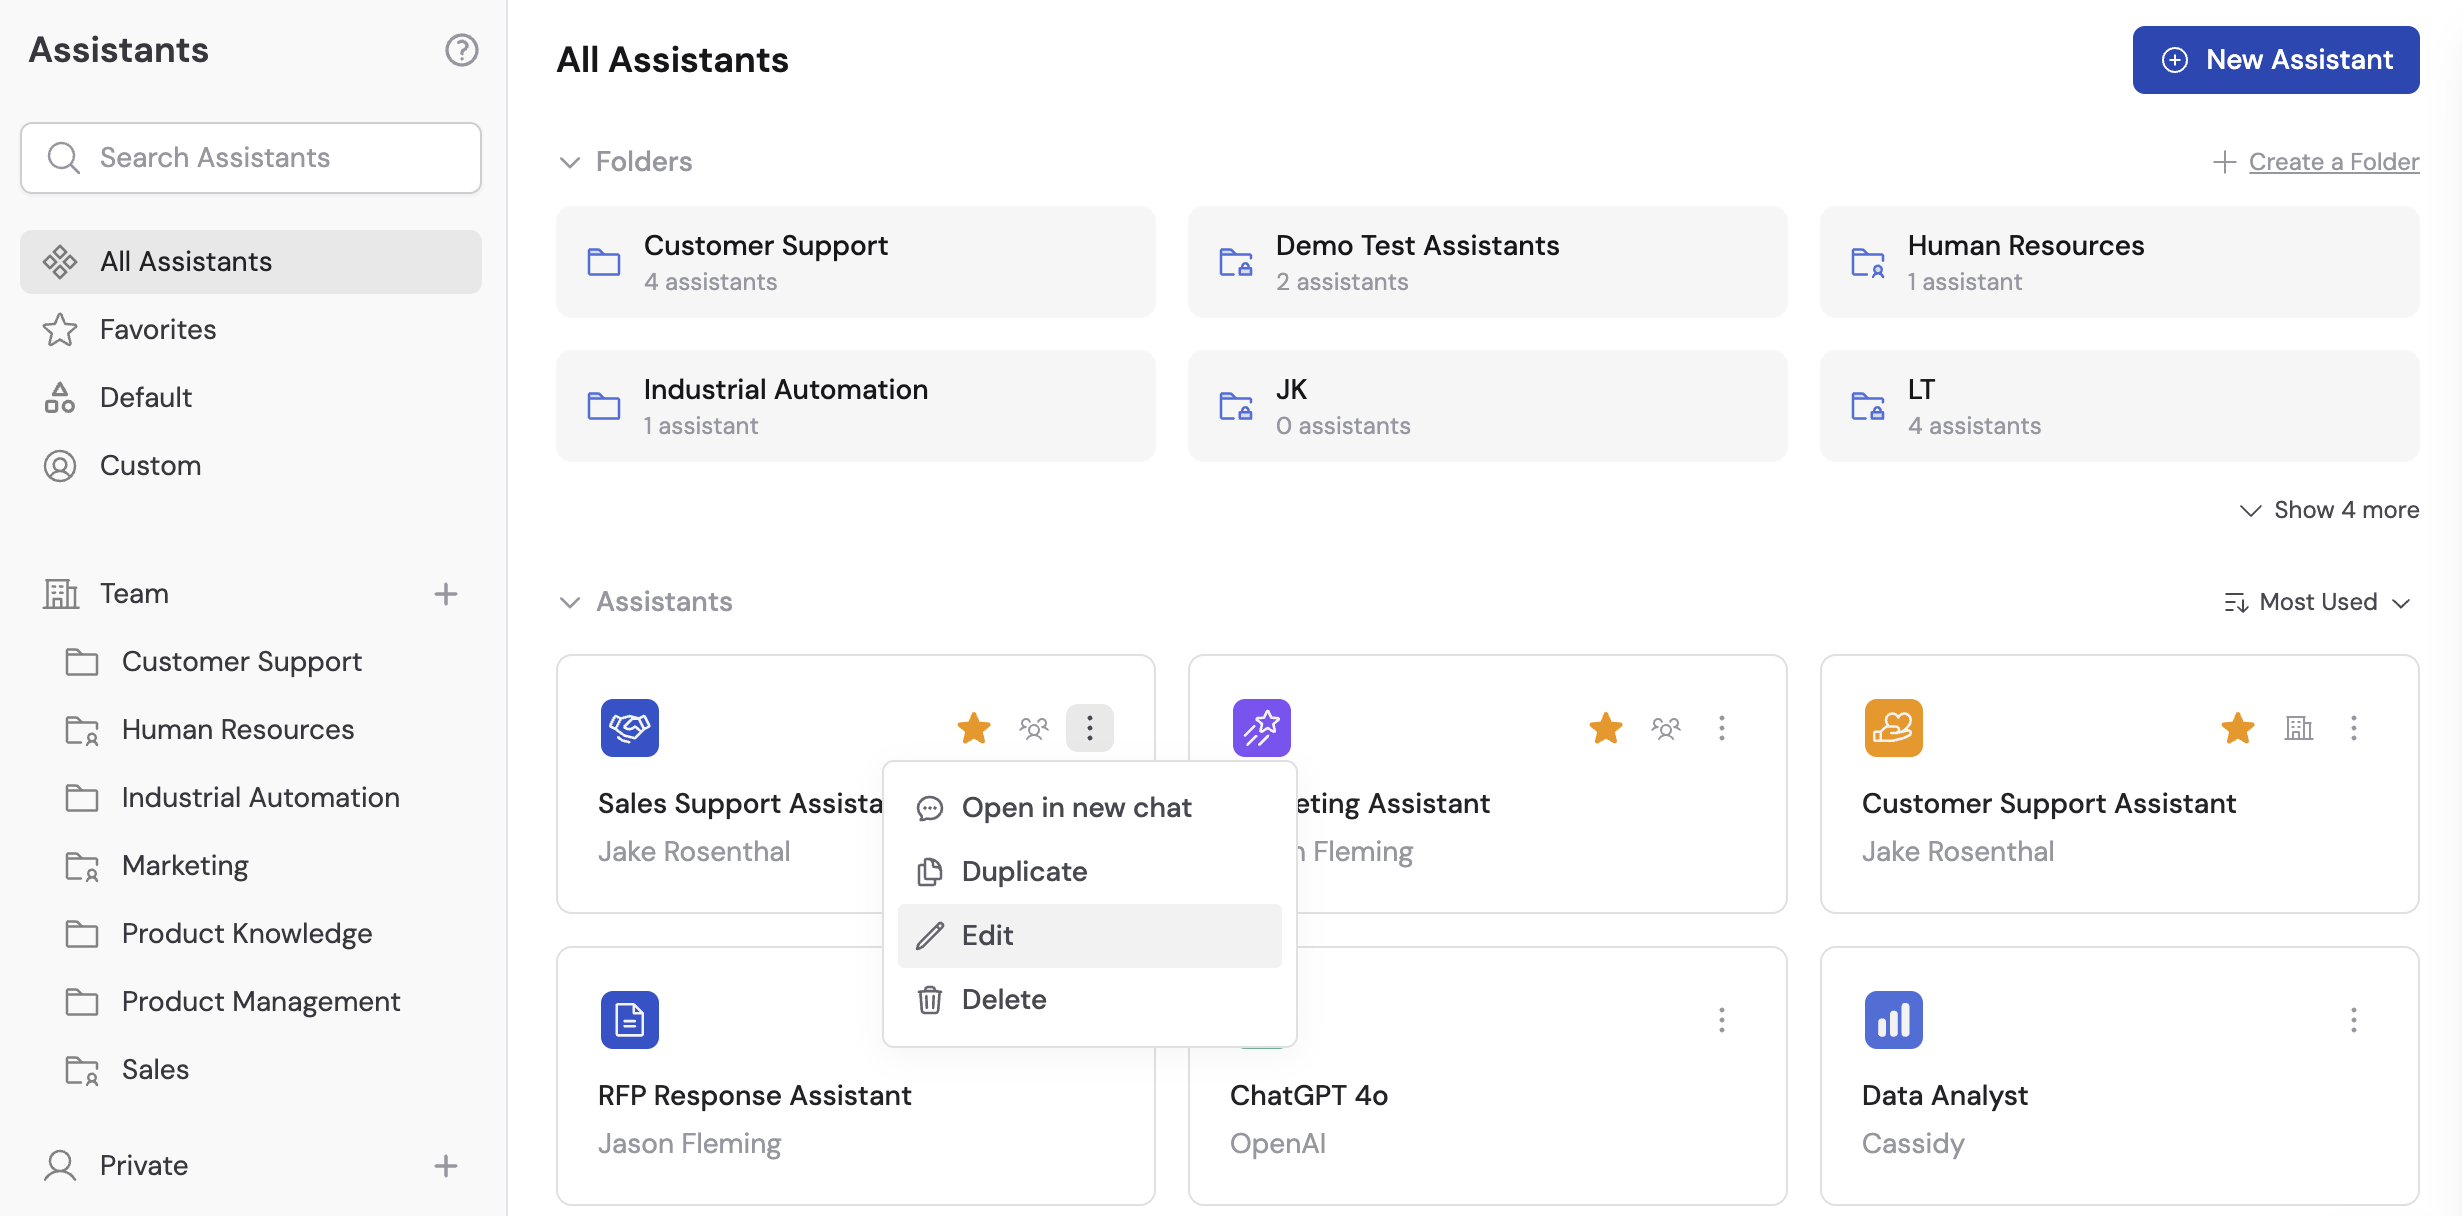
Go to **Agents** and select the Agent you want to deploy. Click **Edit** to open the Agent settings.
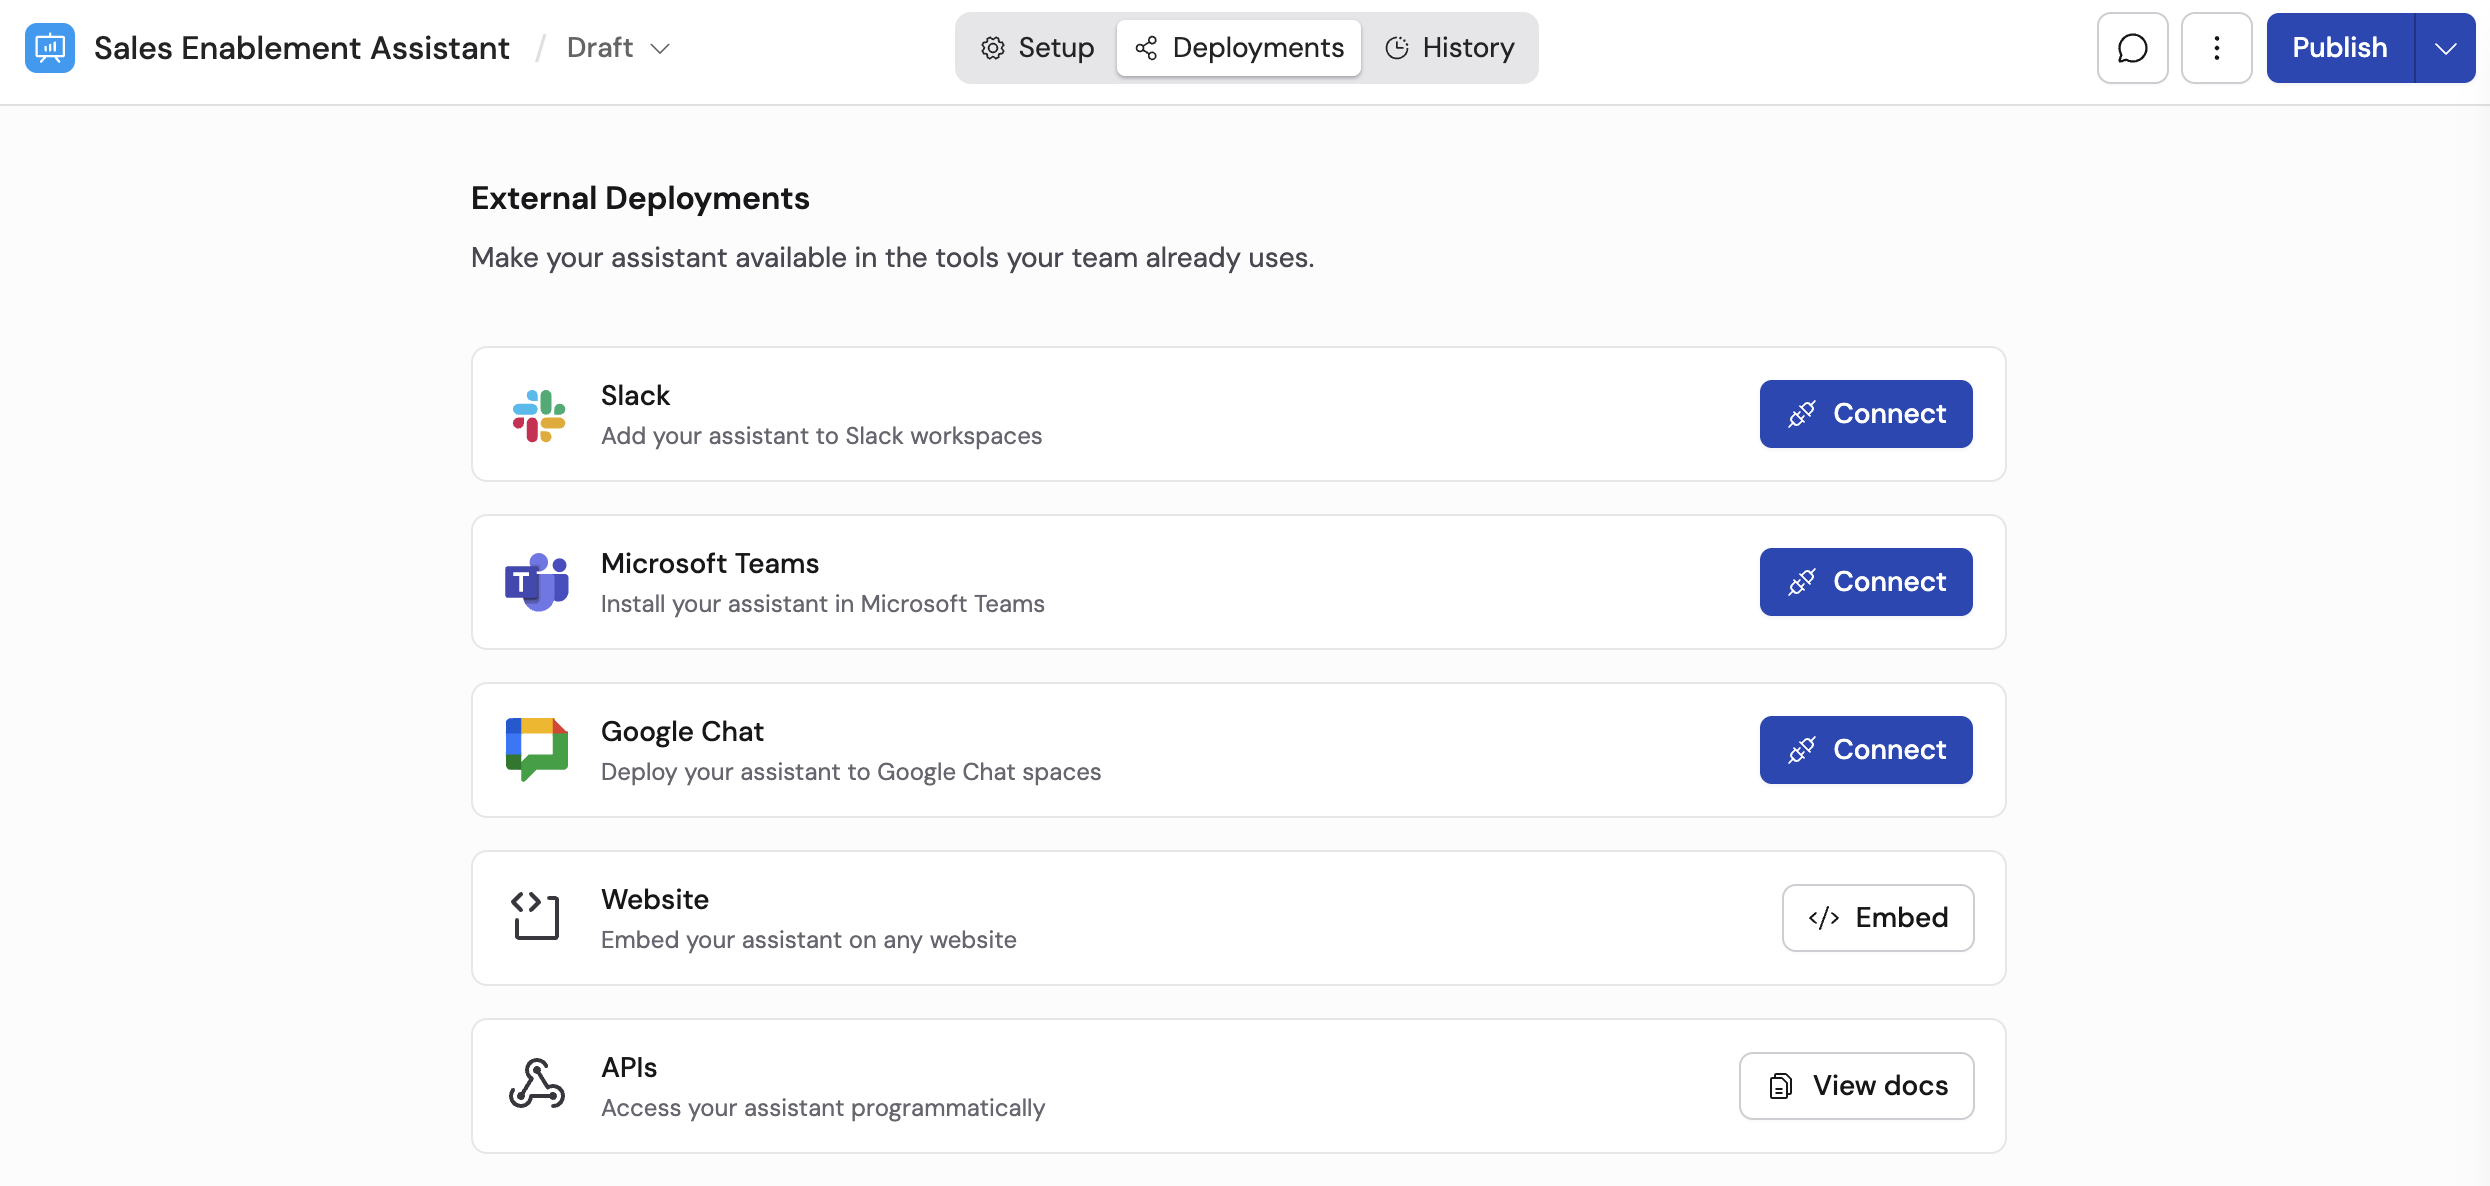
 Navigate to the **Deployments** tab and select **Google Chat**.
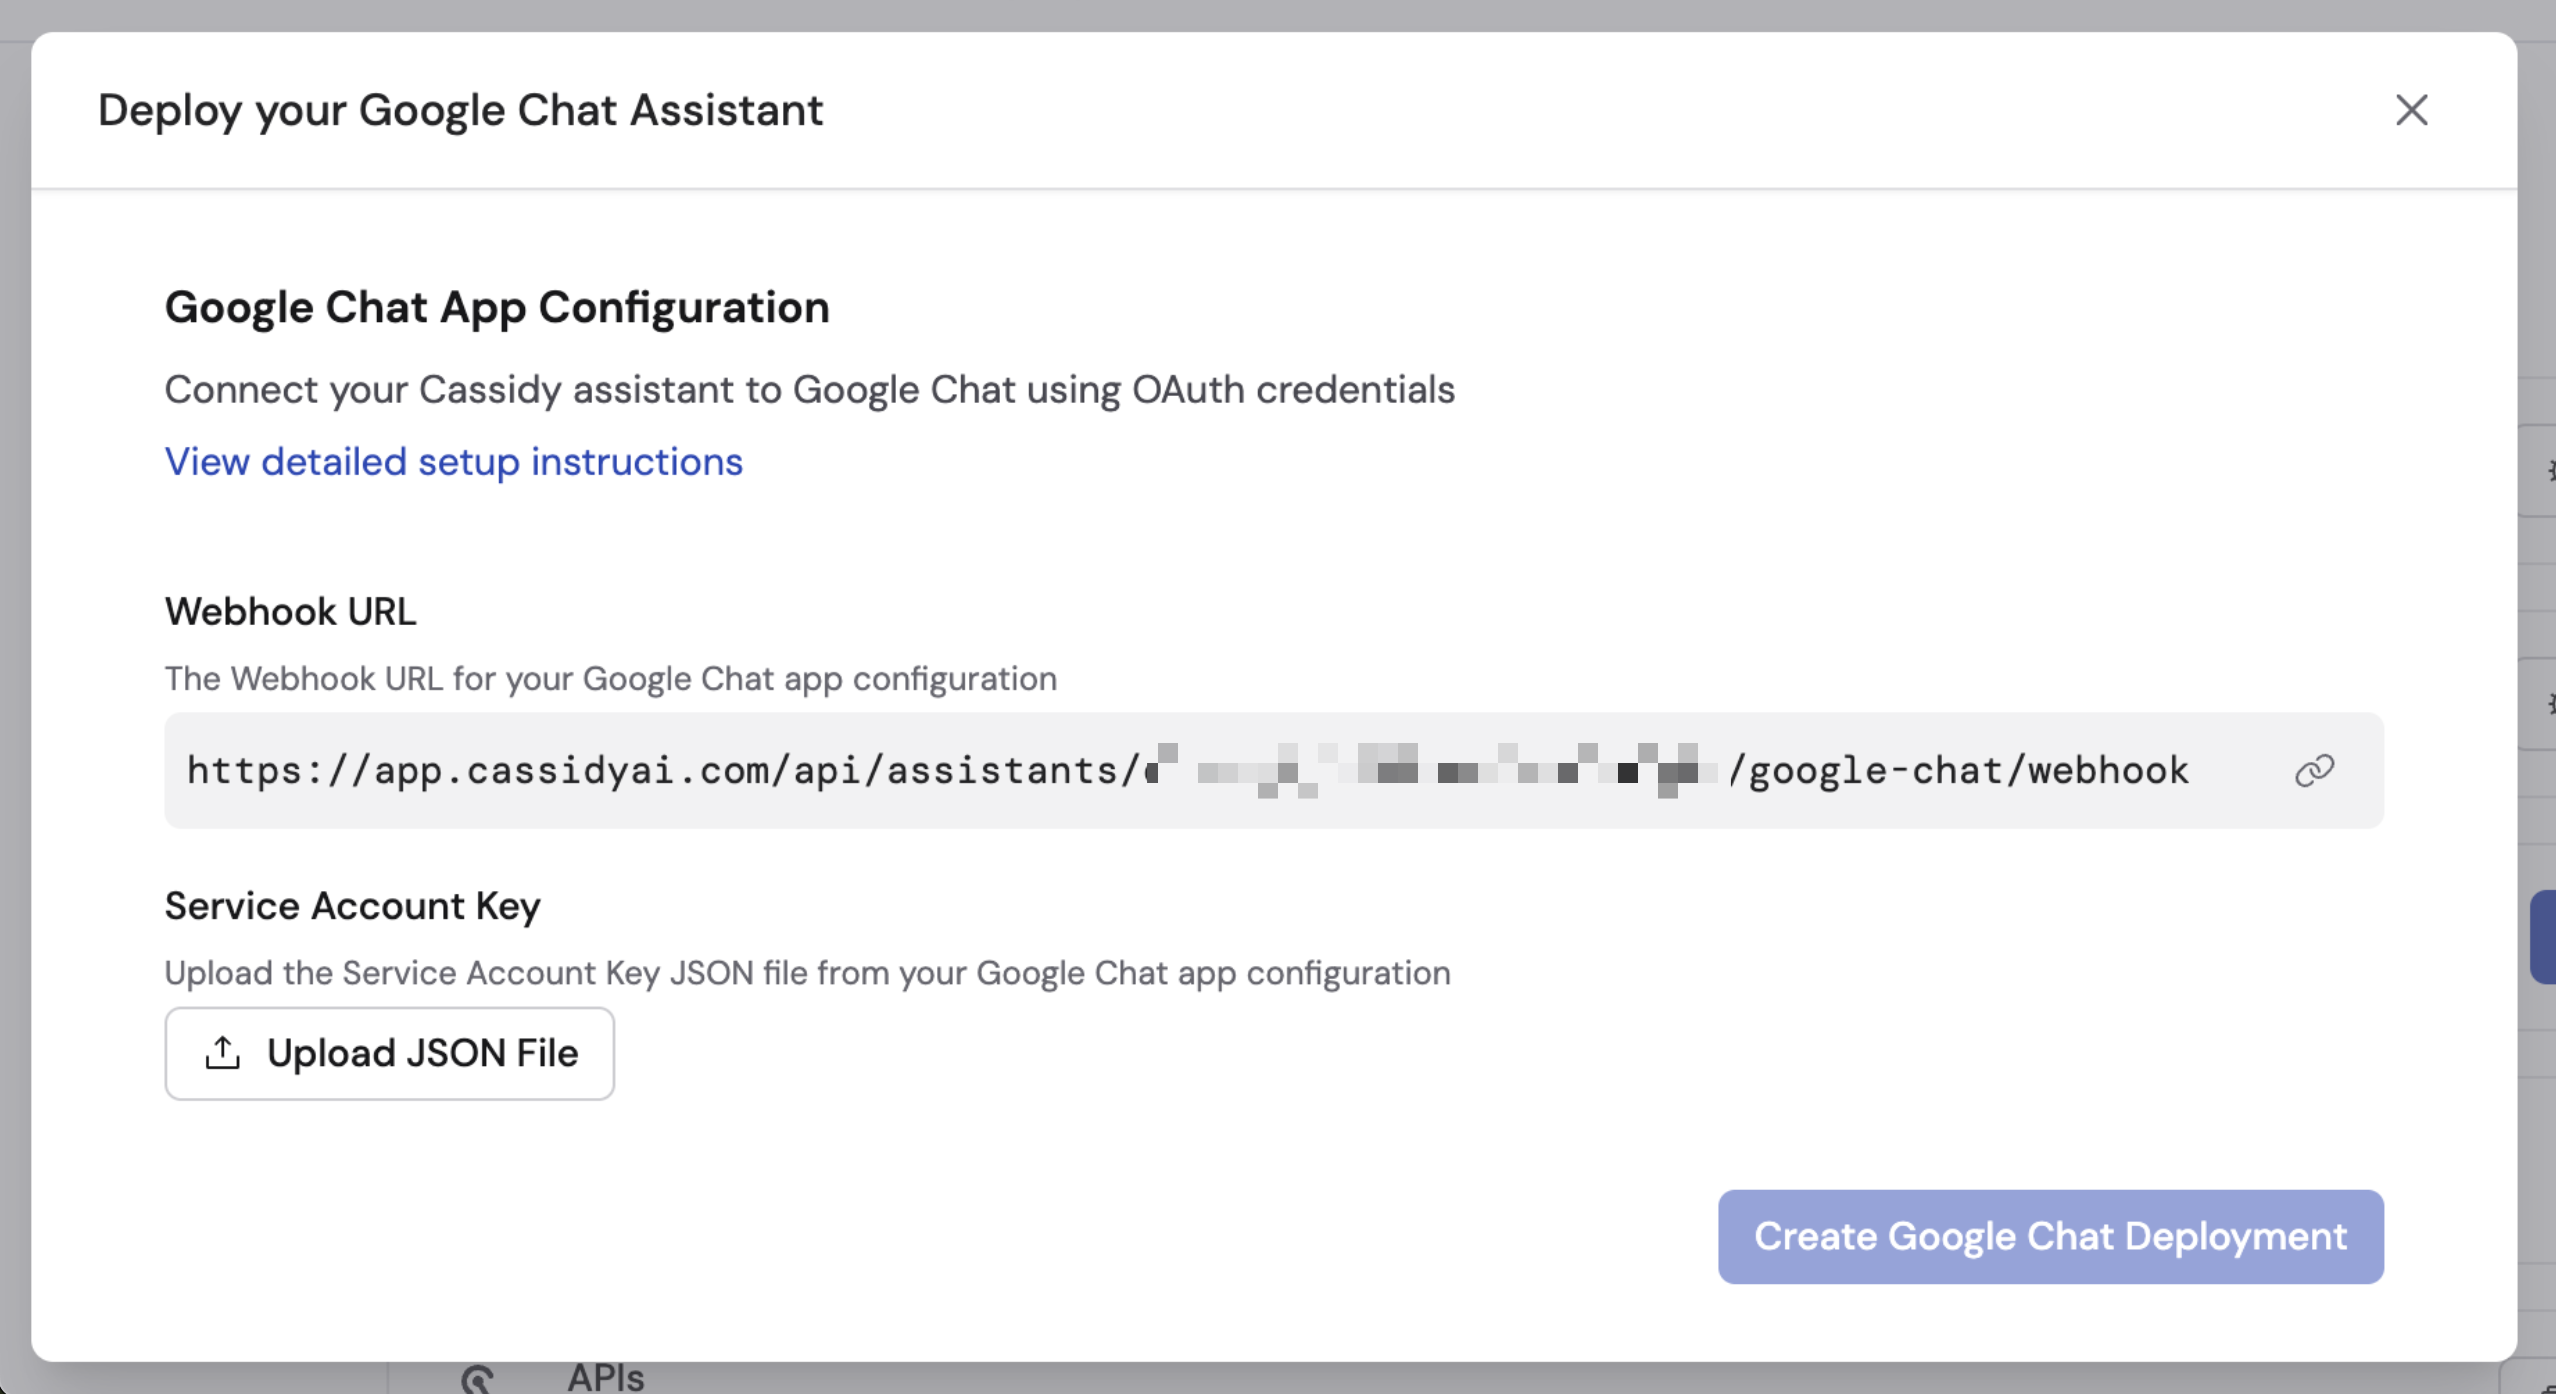
 Copy the **Webhook URL** provided by Cassidy. You'll need this when configuring the Chat bot in Google Cloud.
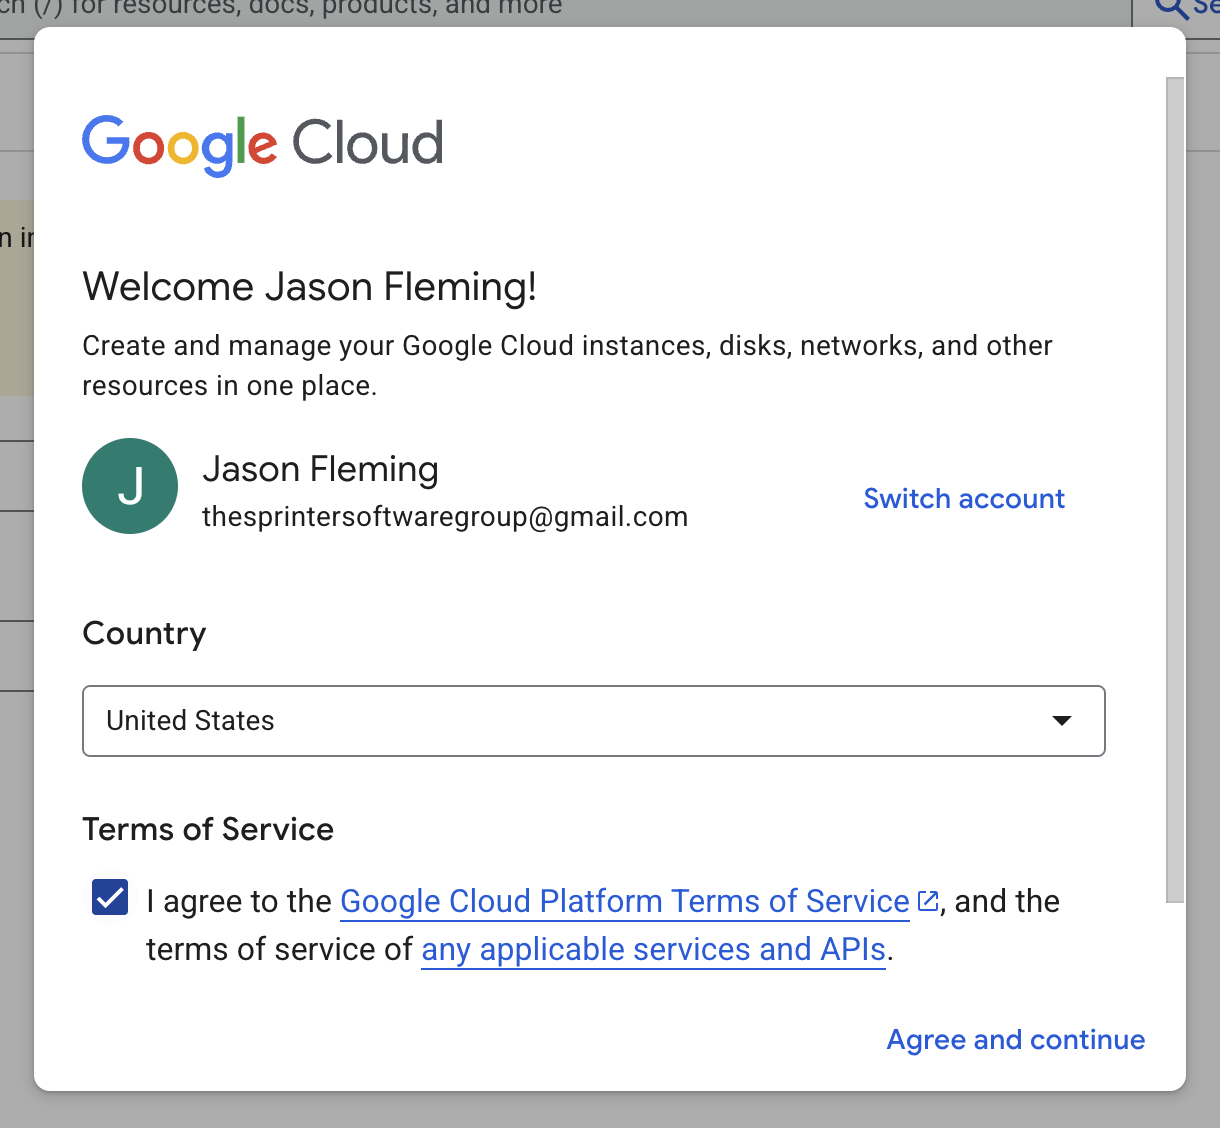
 Go to the [Google Cloud Console](https://console.cloud.google.com/). If you don't have an account, select your country, agree to the Terms of Service, and click **Agree and Continue**.
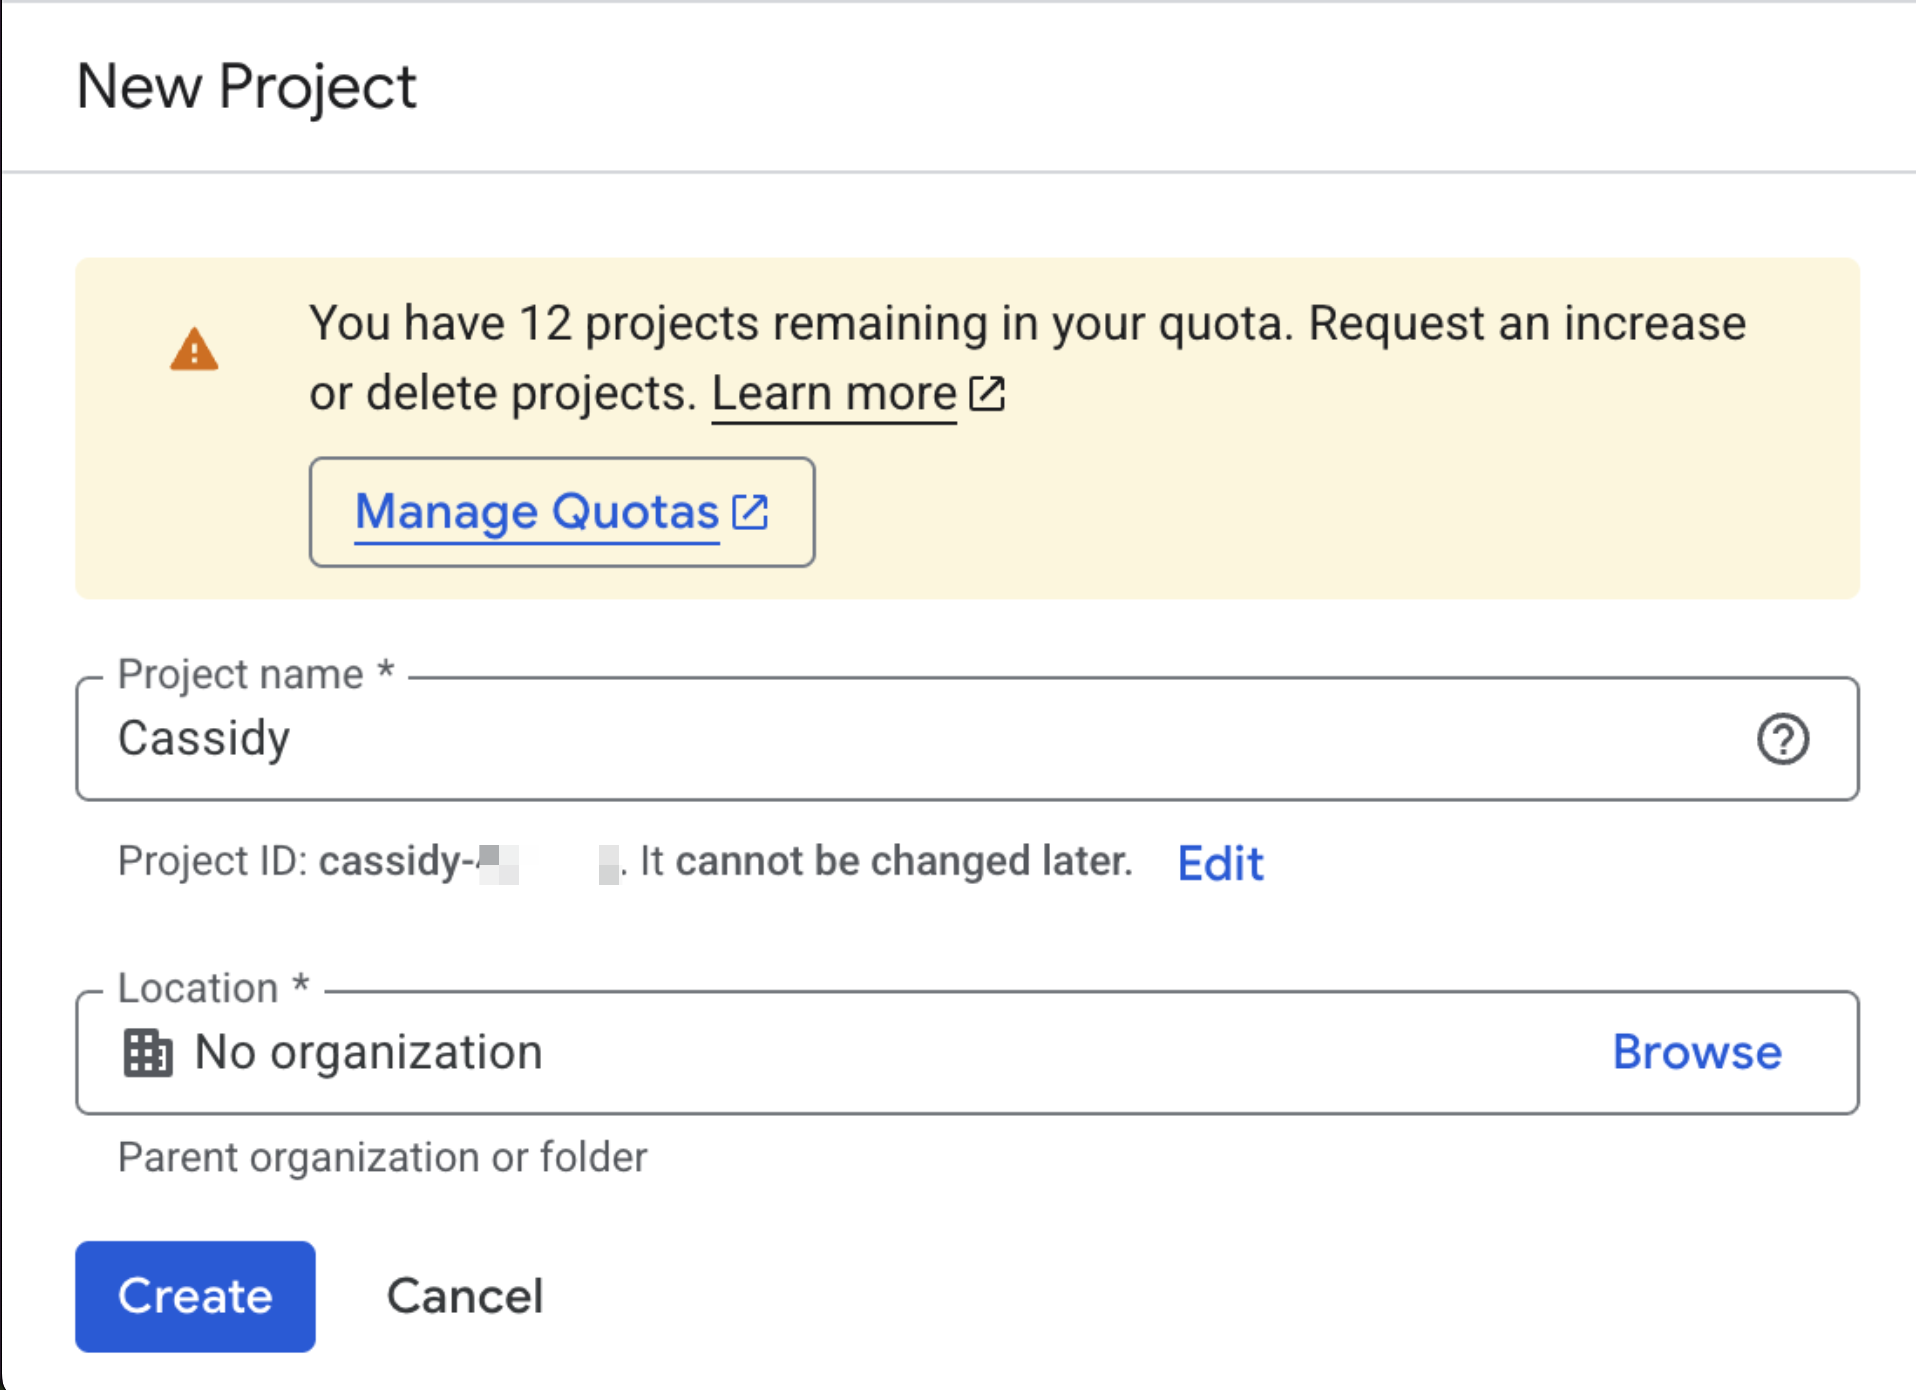
 Go to [Create a Project](https://console.cloud.google.com/projectcreate). Enter your project name and organization, select a location, and click **Create**.
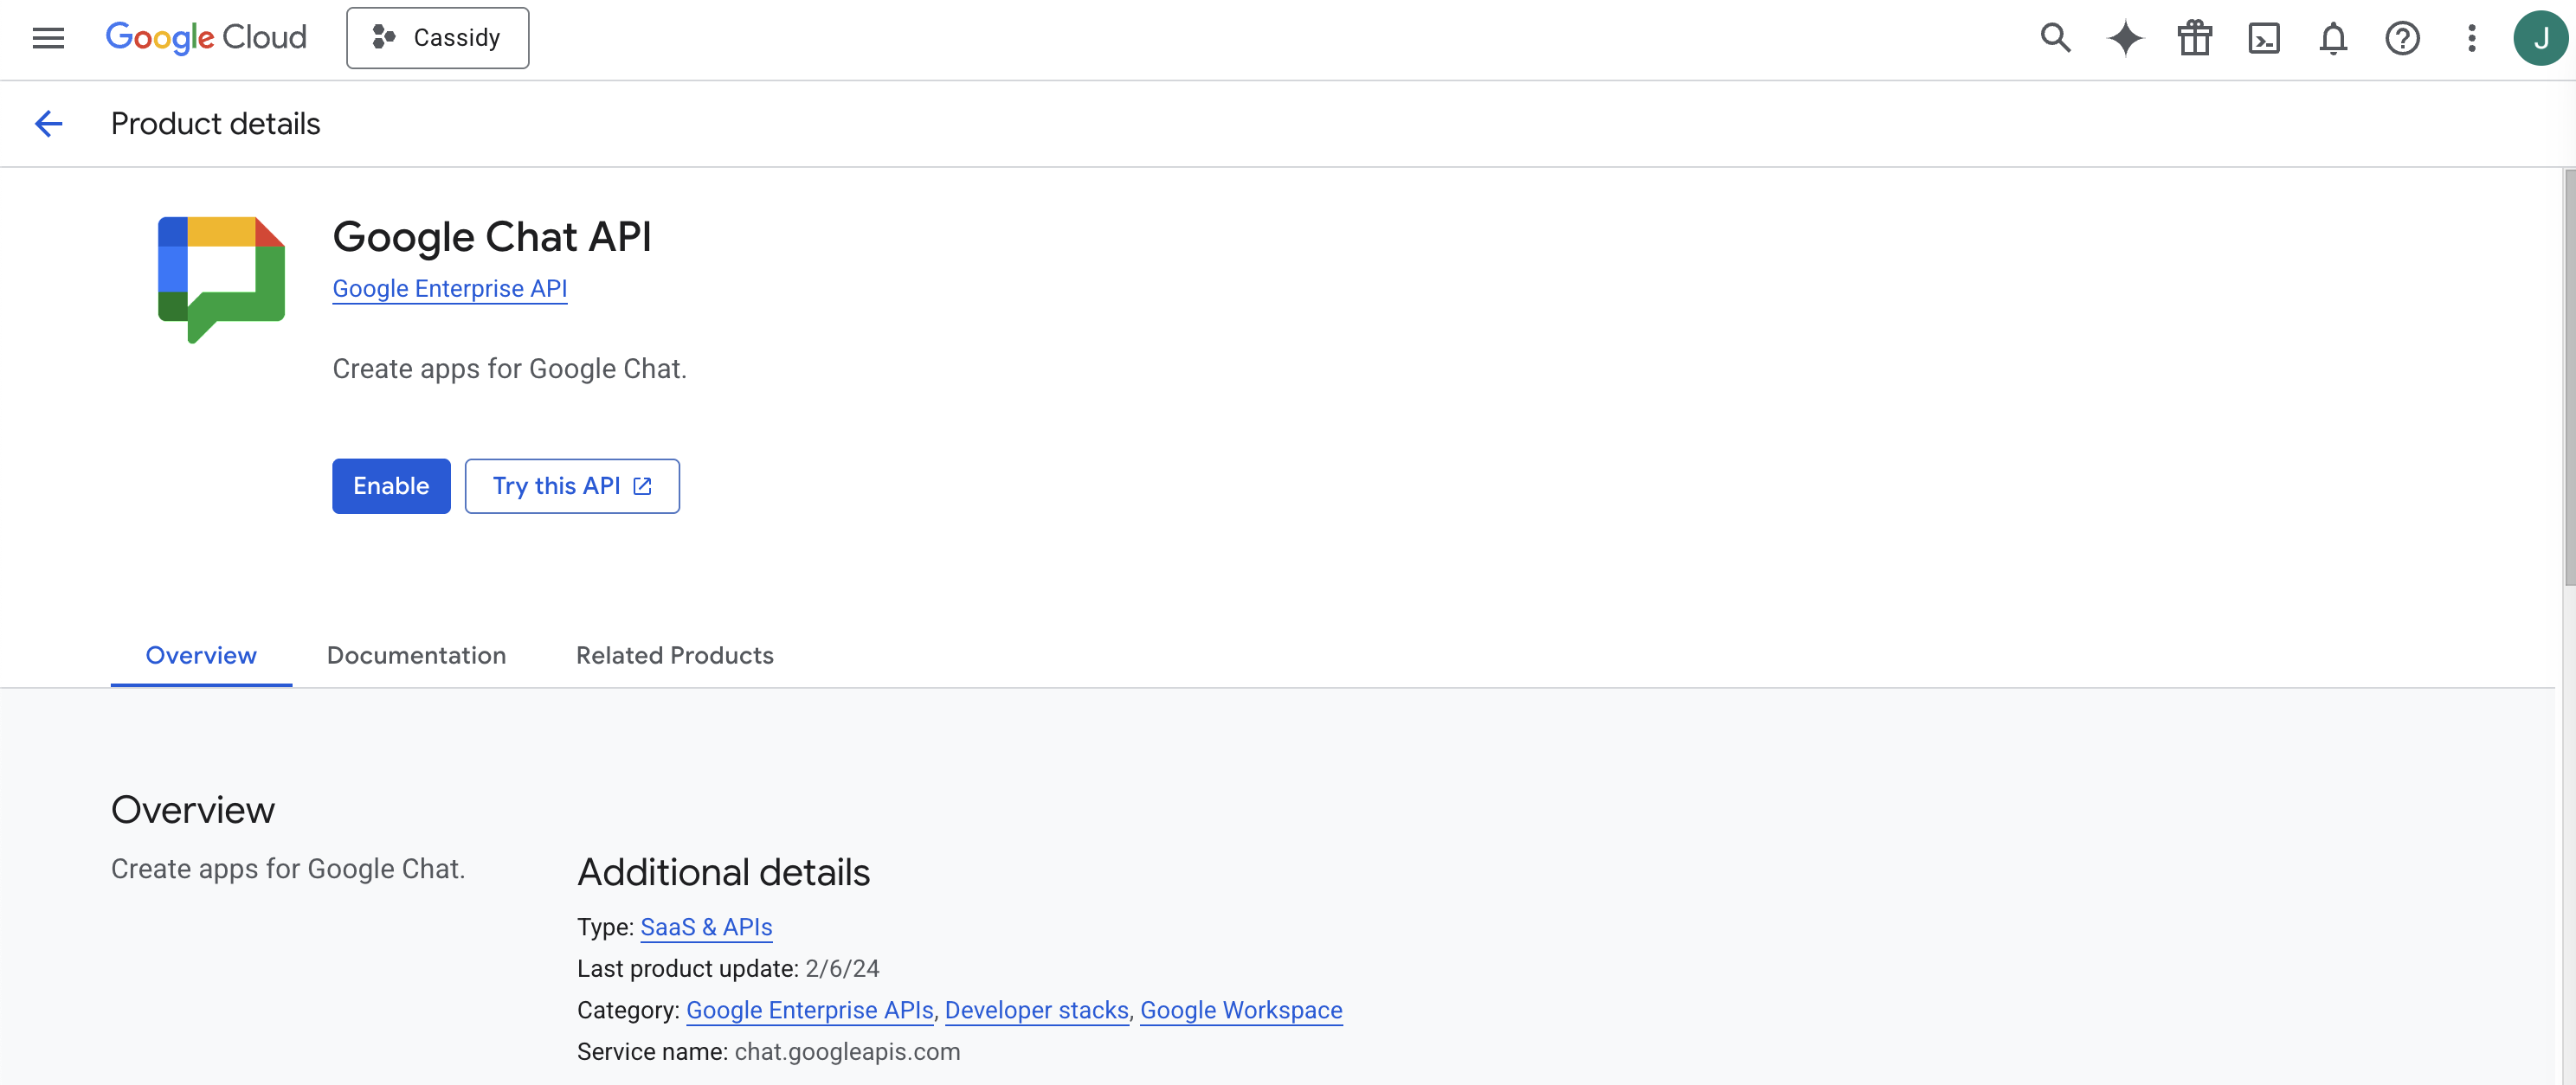
 Navigate to the [Chat API Library](https://console.cloud.google.com/apis/library/chat.googleapis.com). Make sure the correct project is selected and click **Enable**.
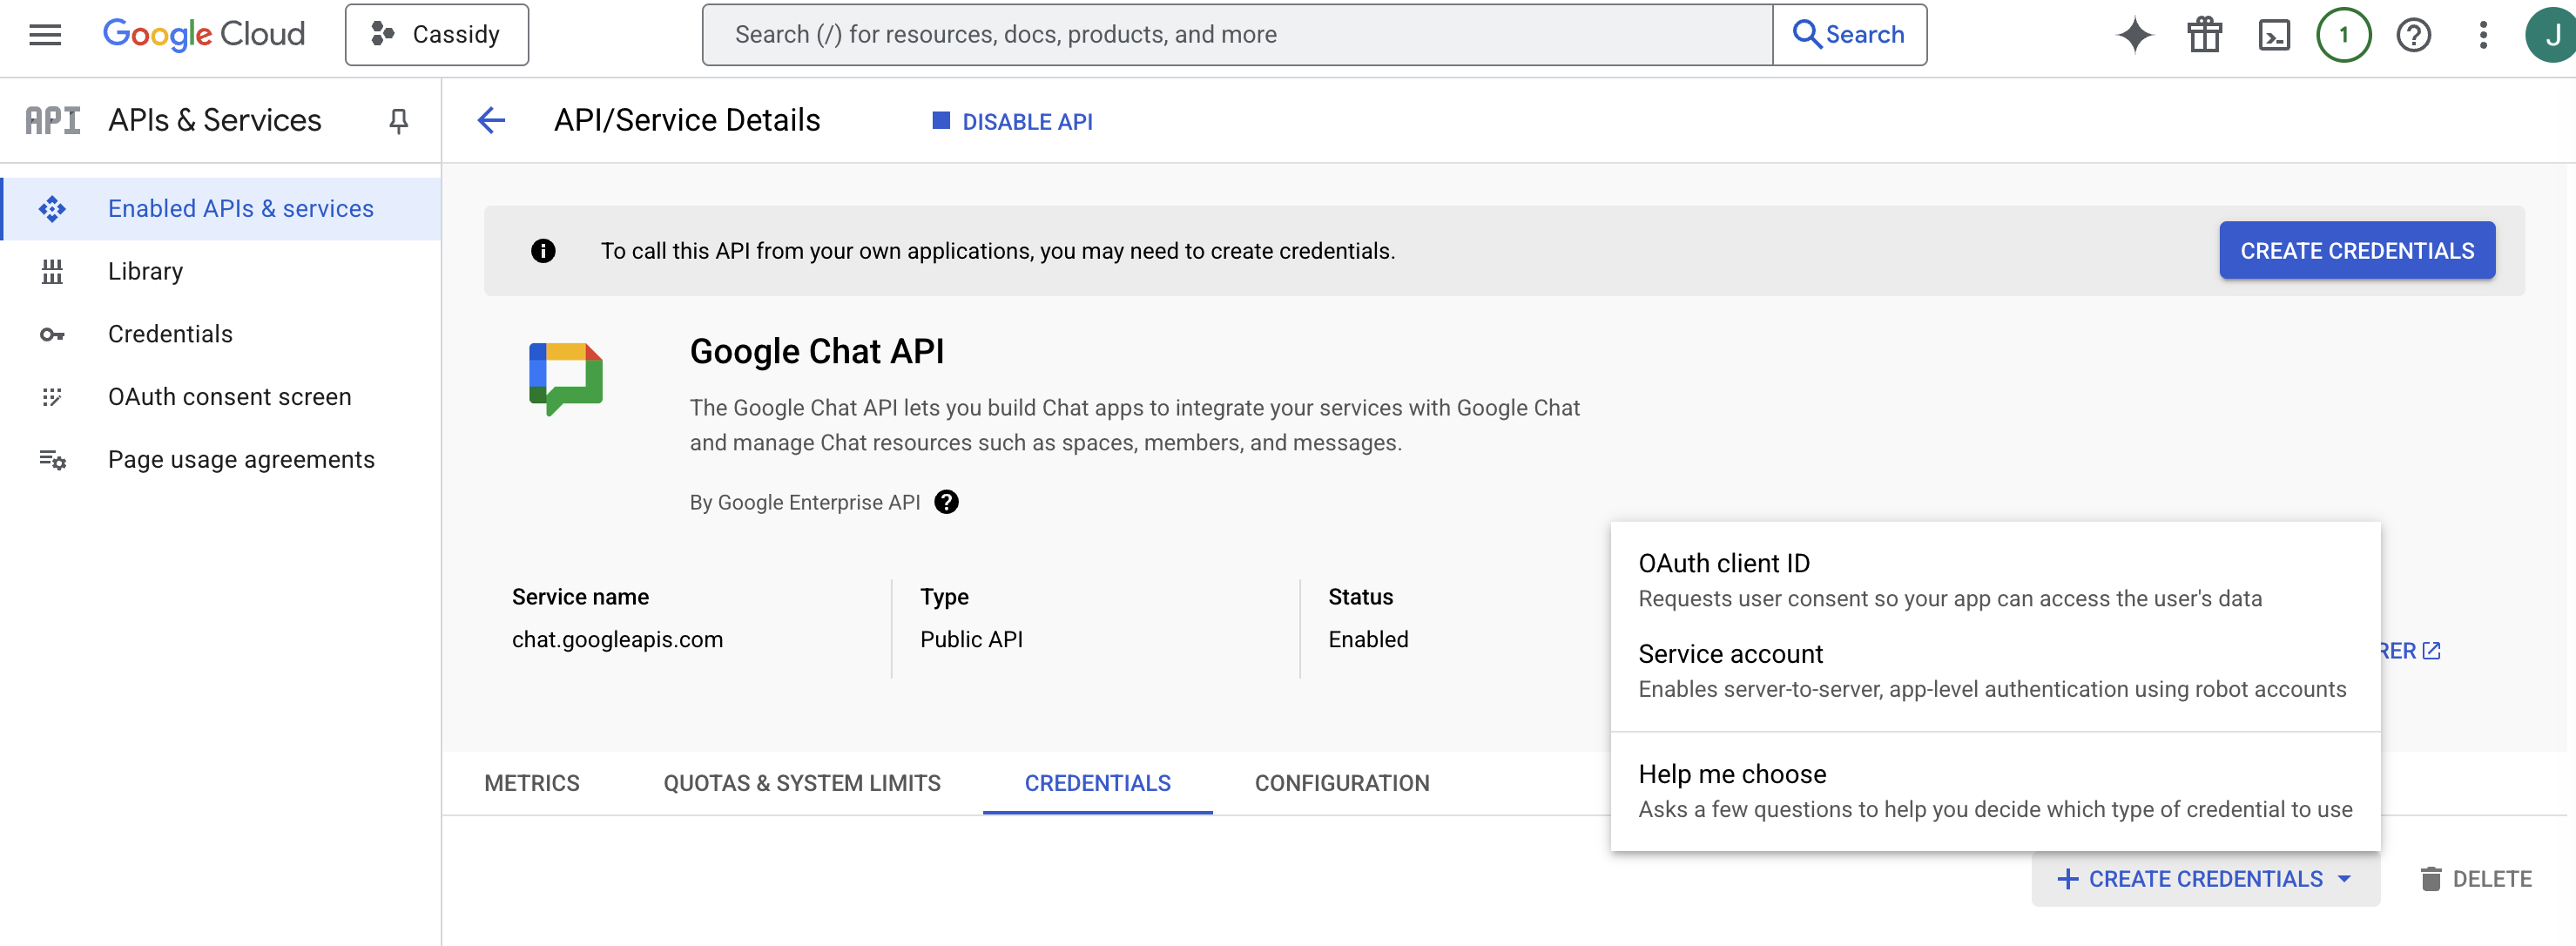
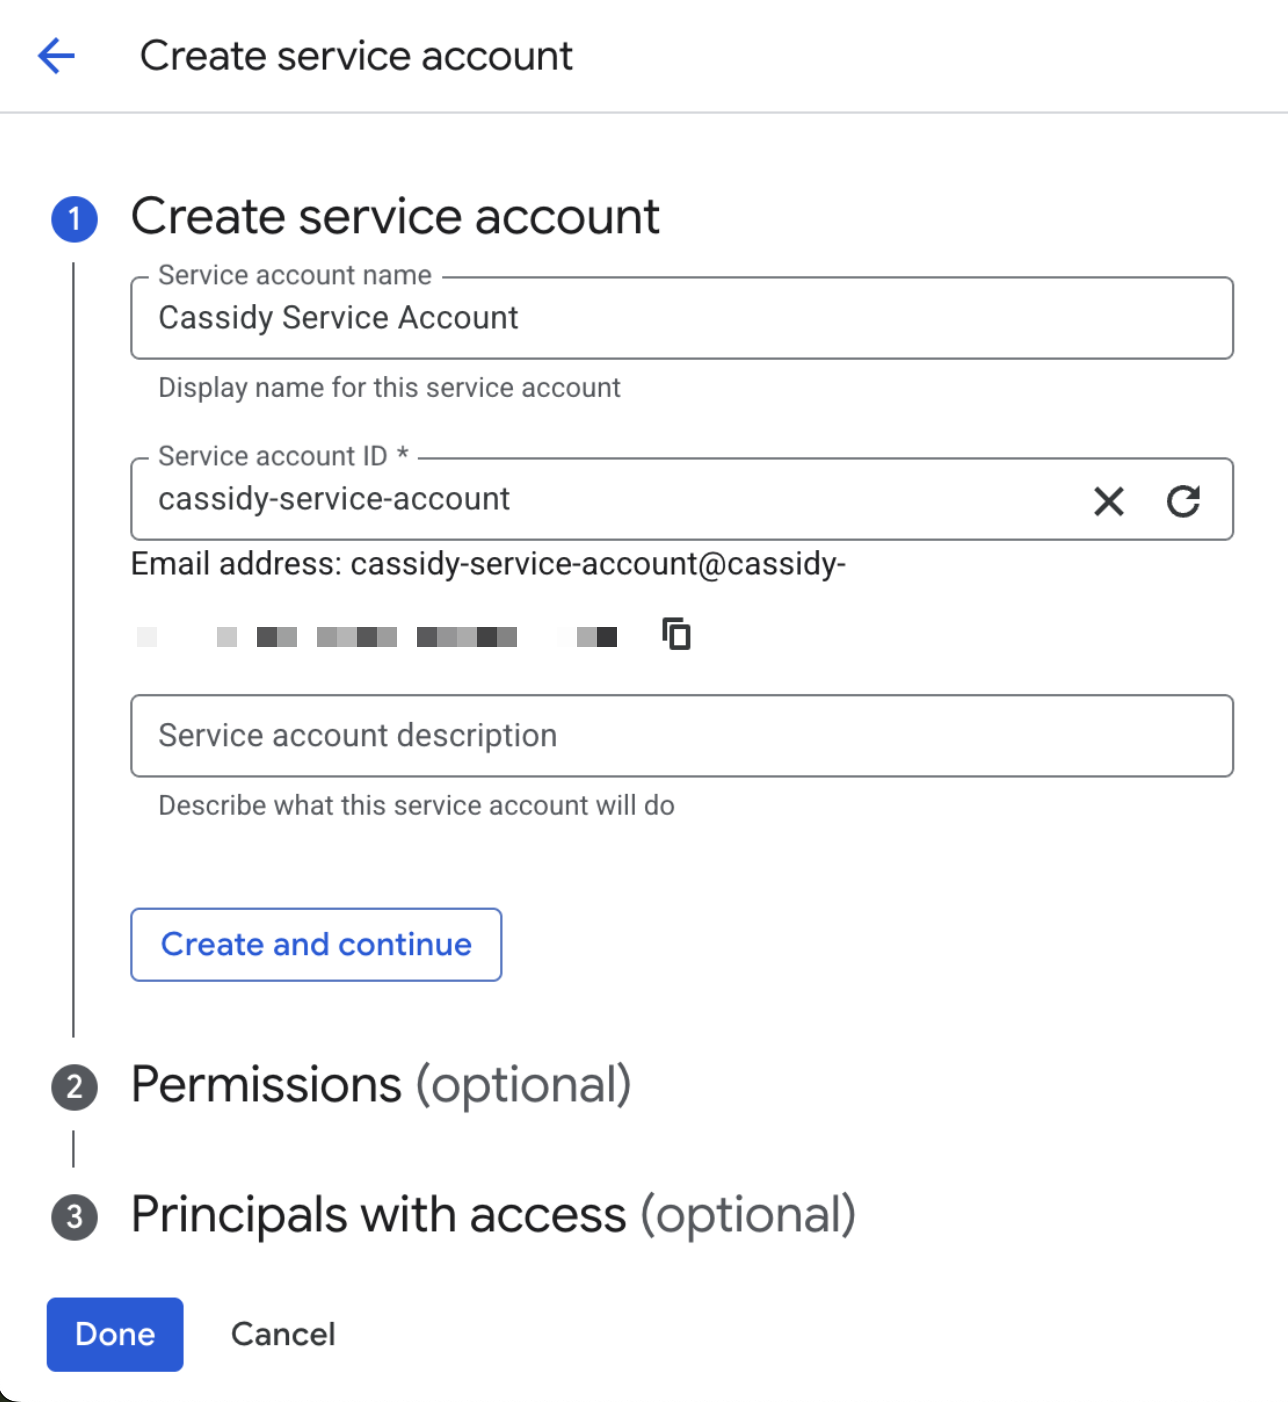
 Go to [Chat API Credentials](https://console.cloud.google.com/apis/api/chat.googleapis.com/credentials). Click the **Create Credentials** dropdown and select **Service Account**. Name it (for example, "Cassidy Service Account") and click **Create and Continue**. Skip optional steps and click **Done**.
 On the **Credentials** tab, click the pencil icon next to the service account you just created.
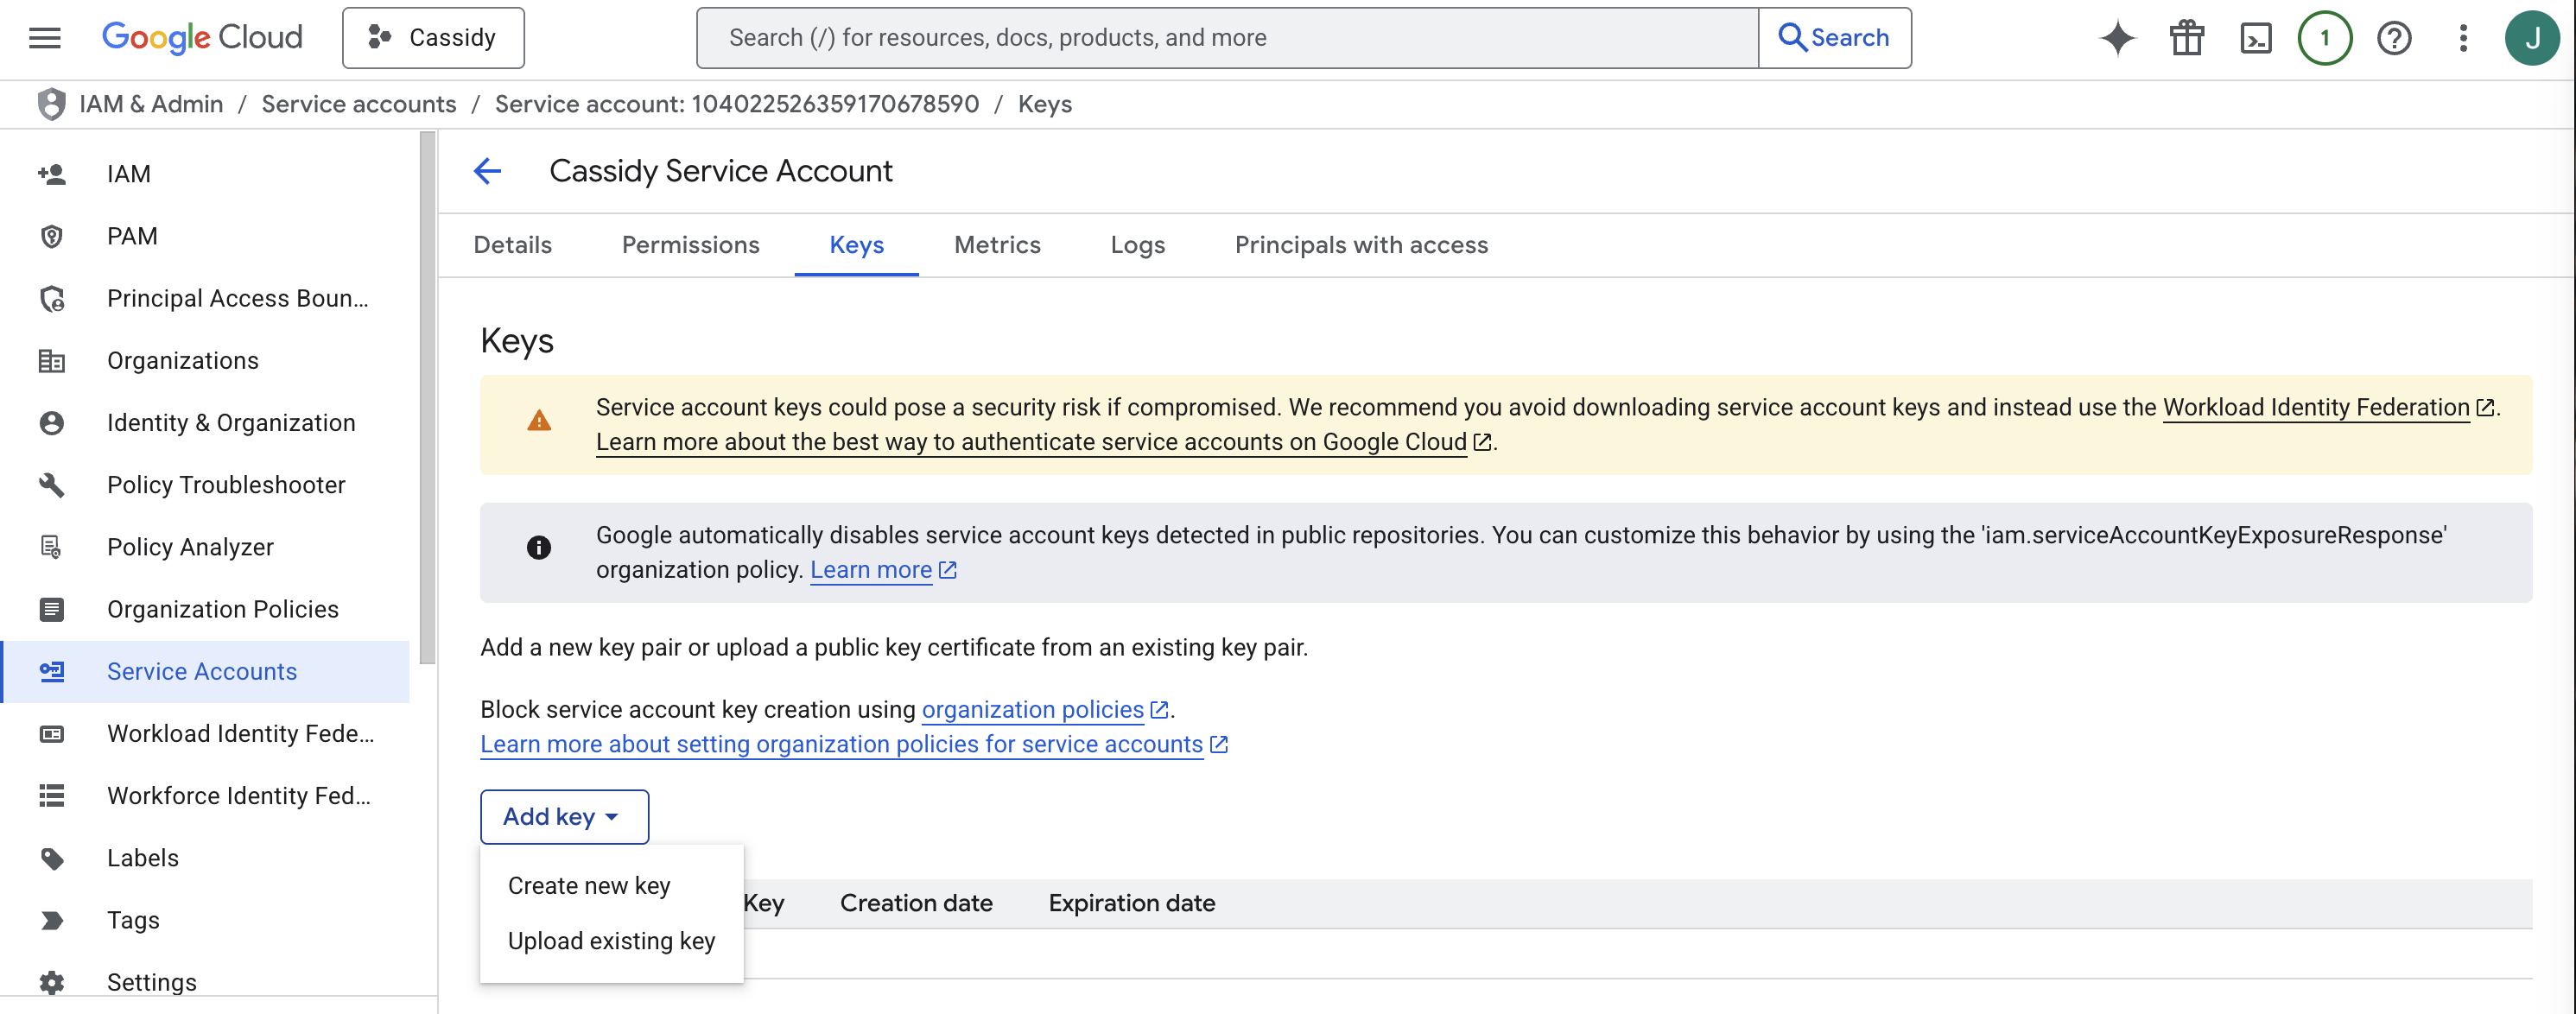
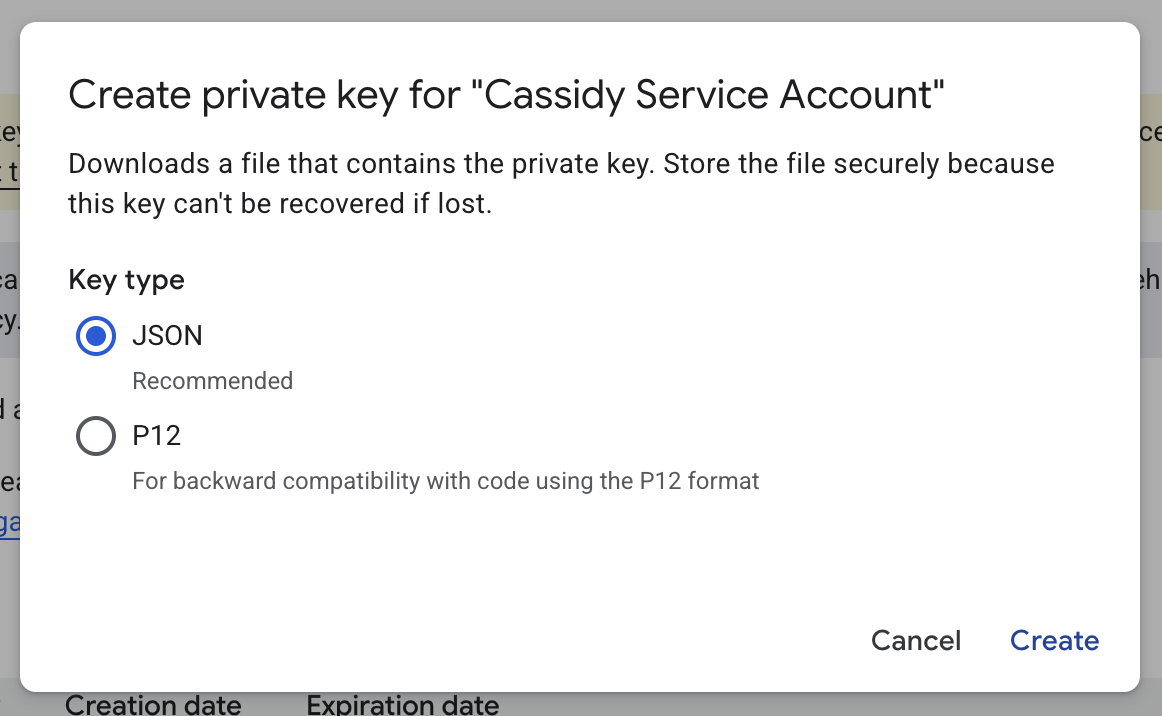
 Go to the **Keys** tab, click **Add Key**, then select **Create New Key**. Choose **JSON** and click **Create** to download the key file.
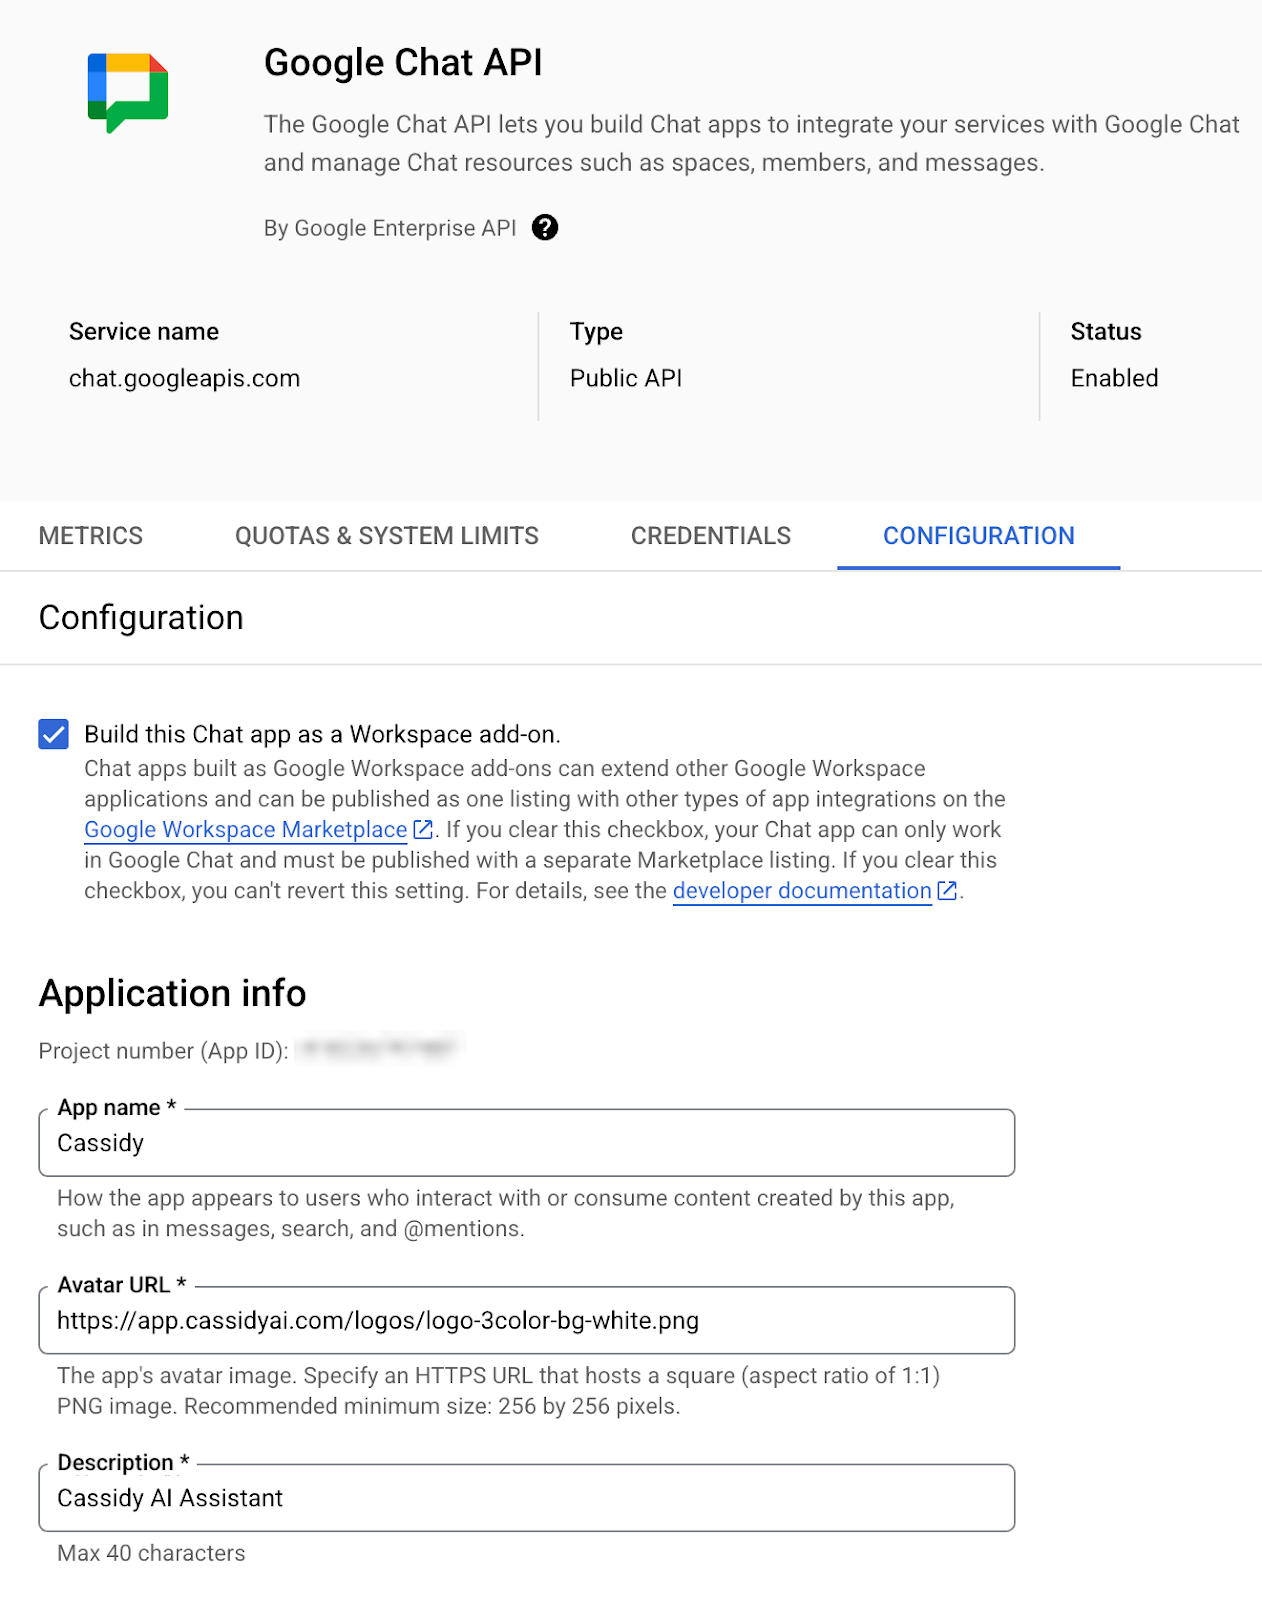
 Go to [Chat API Configuration](https://console.cloud.google.com/apis/api/chat.googleapis.com/hangouts-chat) and set up the following:
* Check **Build this Chat app as a Workspace add-on**
* Fill in the **Application Info** (name, avatar URL, description)
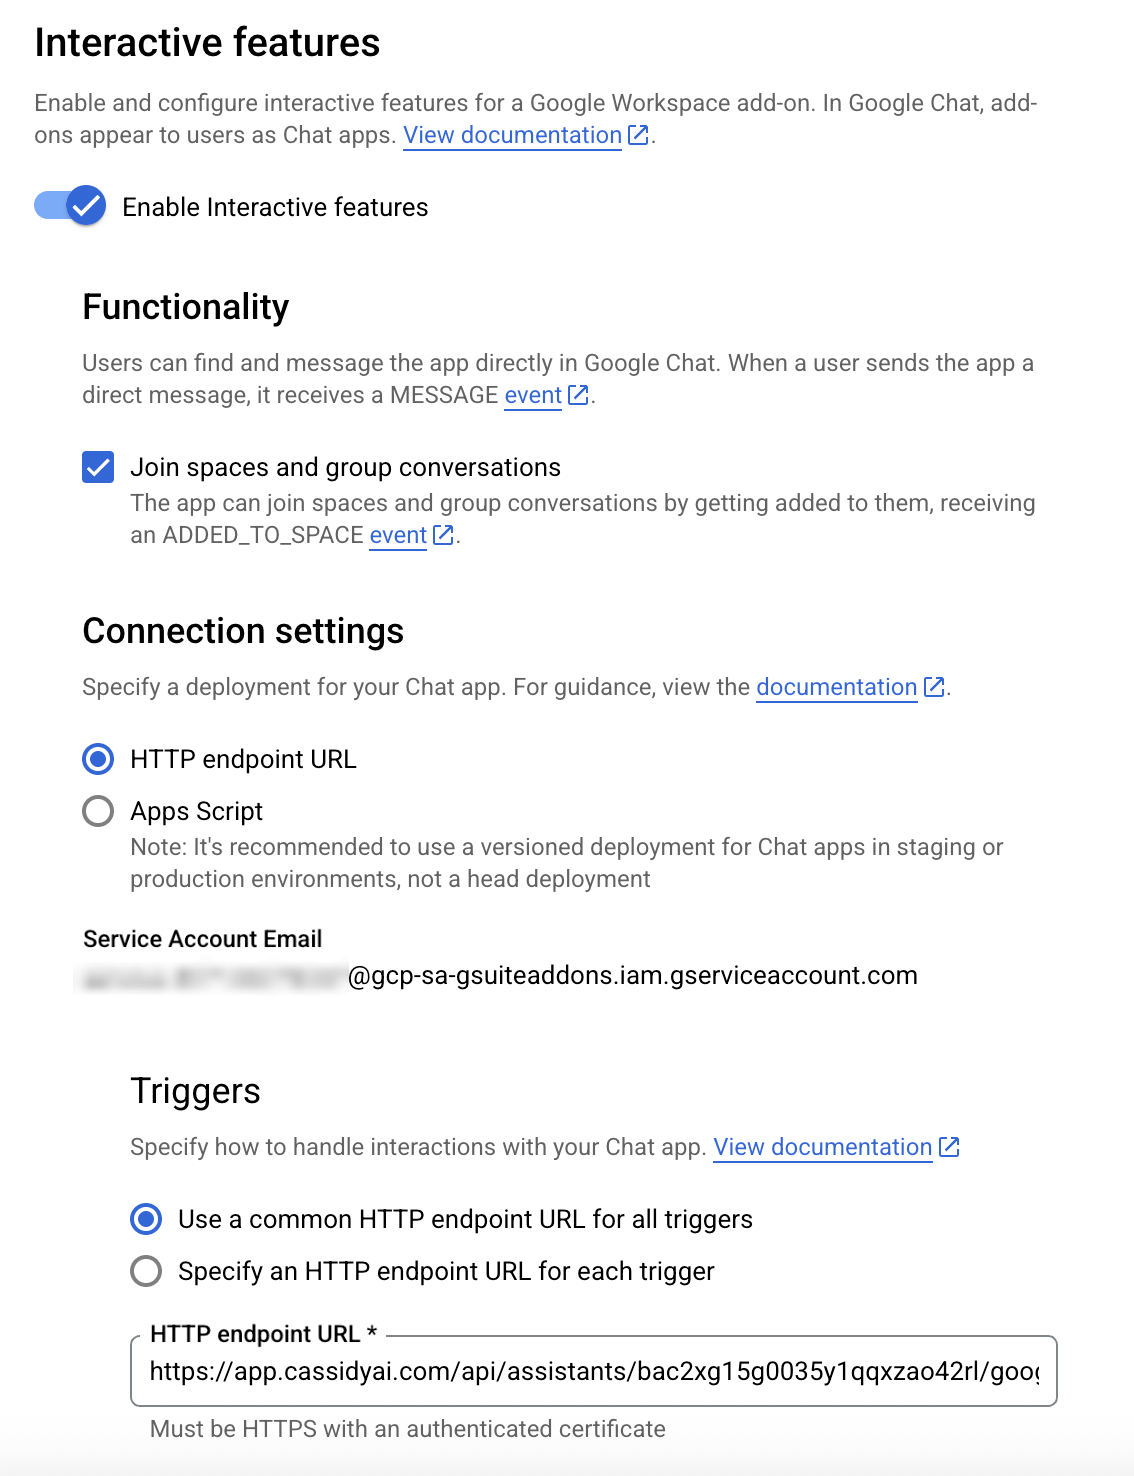
* Ensure **Enable Interactive Features** is enabled
* Under **Connection Settings**, select **HTTP endpoint URL**
* For **Triggers**, choose **Use a common HTTP endpoint URL for all triggers** and paste the **Webhook URL** from Cassidy
* Under **Visibility**, select **Make this Chat app available to specific people and groups** and enter your email for testing
Click **Save**.
Go to [Chat API Configuration](https://console.cloud.google.com/apis/api/chat.googleapis.com/hangouts-chat) and set up the following:
* Check **Build this Chat app as a Workspace add-on**
* Fill in the **Application Info** (name, avatar URL, description)
* Ensure **Enable Interactive Features** is enabled
* Under **Connection Settings**, select **HTTP endpoint URL**
* For **Triggers**, choose **Use a common HTTP endpoint URL for all triggers** and paste the **Webhook URL** from Cassidy
* Under **Visibility**, select **Make this Chat app available to specific people and groups** and enter your email for testing
Click **Save**.
 Return to your Agent's **Deployments** tab in Cassidy. Under **Service Account Key**, click **Upload JSON File** and upload the key file you downloaded.
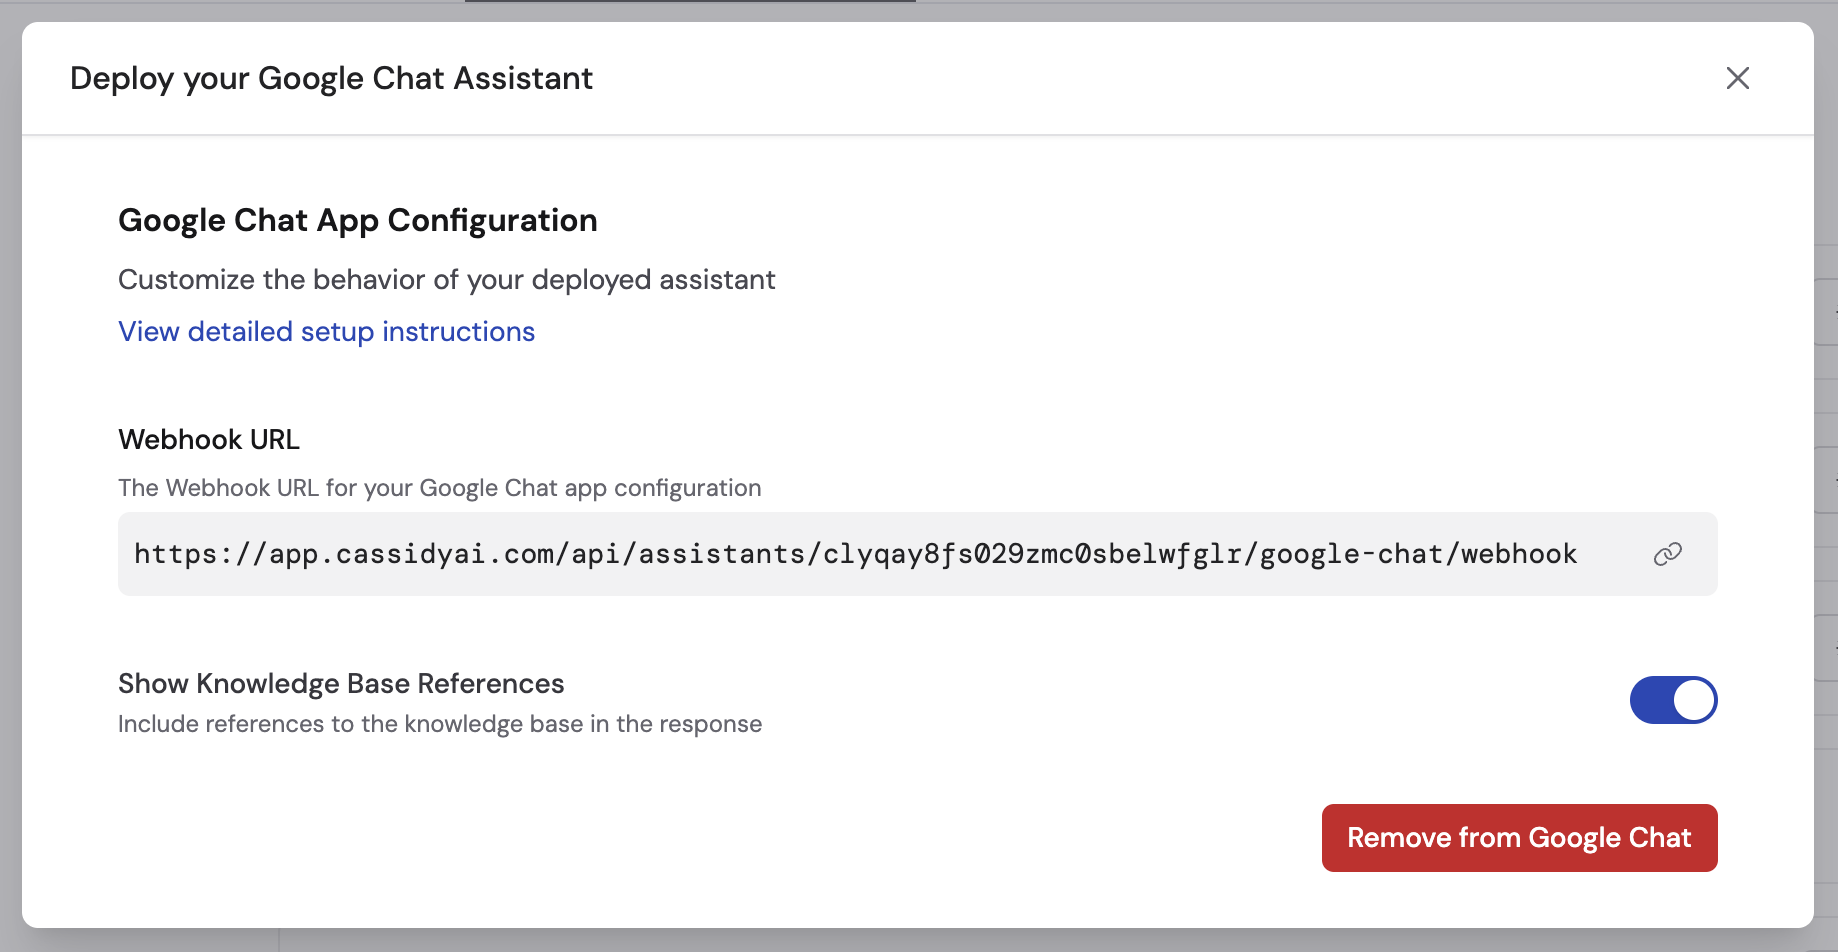
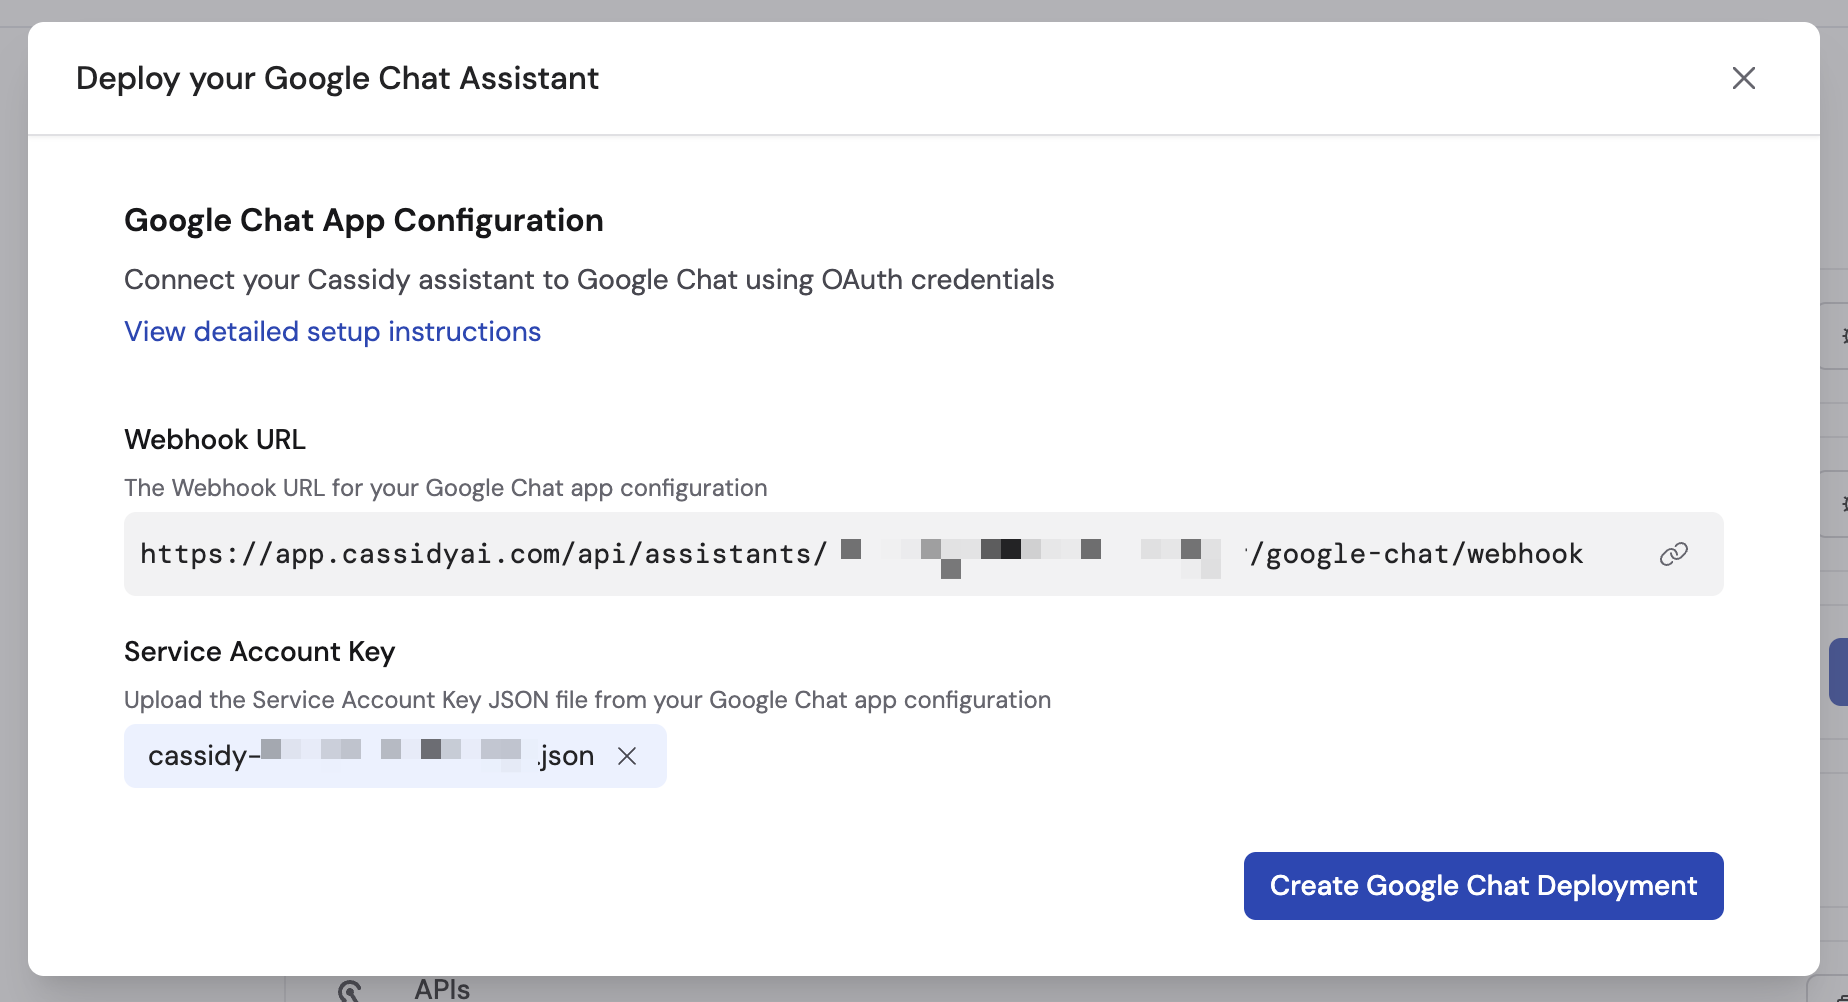 Click **Create Google Chat Deployment**. Optionally toggle on **Show Knowledge Base References** to display source citations in responses.
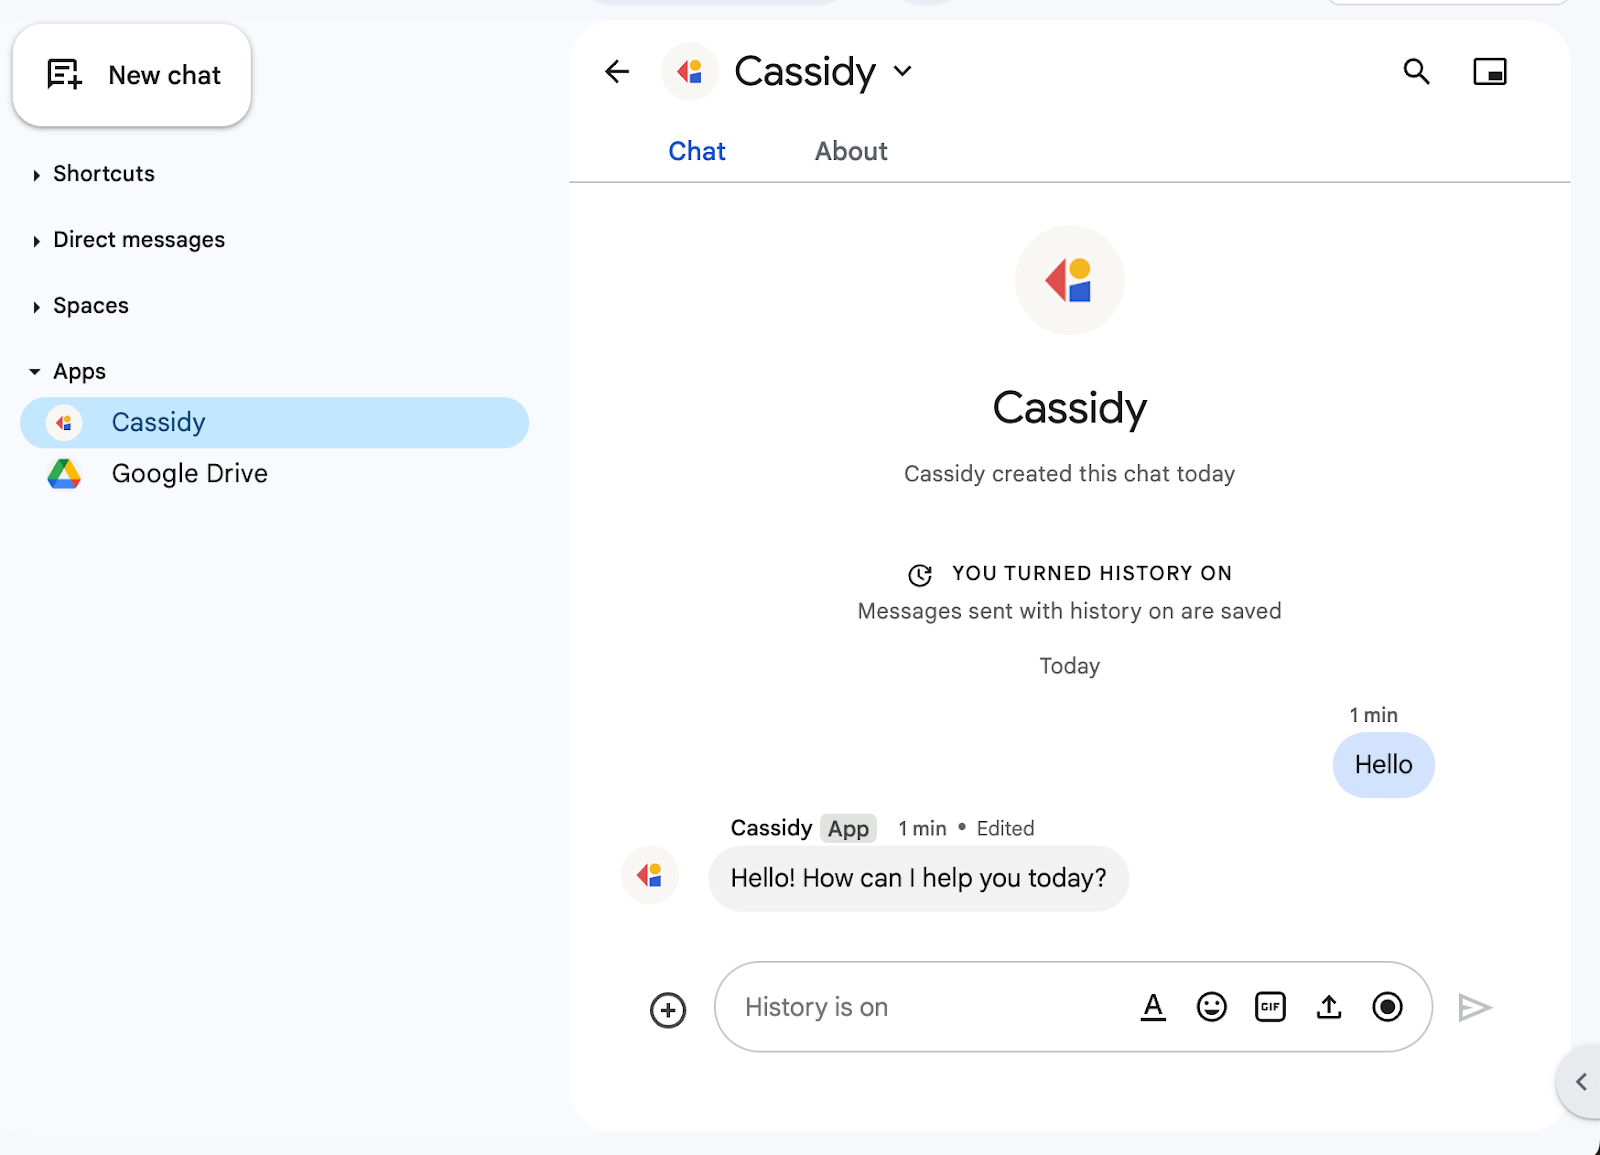
 Open Google Chat, start a new chat, and search for your Agent name. Send a message to confirm it responds.
 If you only need a few people to access the Agent, enter their emails in the **Visibility** setting and skip publishing to the Marketplace.
## Publish to your workspace
To make the Agent available to your entire Google Workspace organization, publish it through the Google Workspace Marketplace.
Go to the [Apps Marketplace API](https://console.cloud.google.com/apis/library/appsmarket-component.googleapis.com) and click **Enable**.
Go to the [OAuth Consent Screen](https://console.cloud.google.com/auth/overview). Click **Get Started**, enter your app name, support email, and set the audience type to **Internal**. Click **Create**.
In the [Google Workspace Marketplace SDK](https://console.cloud.google.com/apis/api/appsmarket-component.googleapis.com/googleapps_sdk), go to **App Configuration**:
* Set app visibility to **Private**
* Set installation settings to **Individual + Admin Install**
* Ensure **Workspace add-on** is selected under App Integrations
* Enter your contact info for developer information
Click **Save Draft**.
If you only need a few people to access the Agent, enter their emails in the **Visibility** setting and skip publishing to the Marketplace.
## Publish to your workspace
To make the Agent available to your entire Google Workspace organization, publish it through the Google Workspace Marketplace.
Go to the [Apps Marketplace API](https://console.cloud.google.com/apis/library/appsmarket-component.googleapis.com) and click **Enable**.
Go to the [OAuth Consent Screen](https://console.cloud.google.com/auth/overview). Click **Get Started**, enter your app name, support email, and set the audience type to **Internal**. Click **Create**.
In the [Google Workspace Marketplace SDK](https://console.cloud.google.com/apis/api/appsmarket-component.googleapis.com/googleapps_sdk), go to **App Configuration**:
* Set app visibility to **Private**
* Set installation settings to **Individual + Admin Install**
* Ensure **Workspace add-on** is selected under App Integrations
* Enter your contact info for developer information
Click **Save Draft**.
 Go to the [Store Listing](https://console.cloud.google.com/apis/api/appsmarket-component.googleapis.com/googleapps_sdk_publish) tab. Fill in the app details (name, description, graphics), save as draft, then click **Publish**.
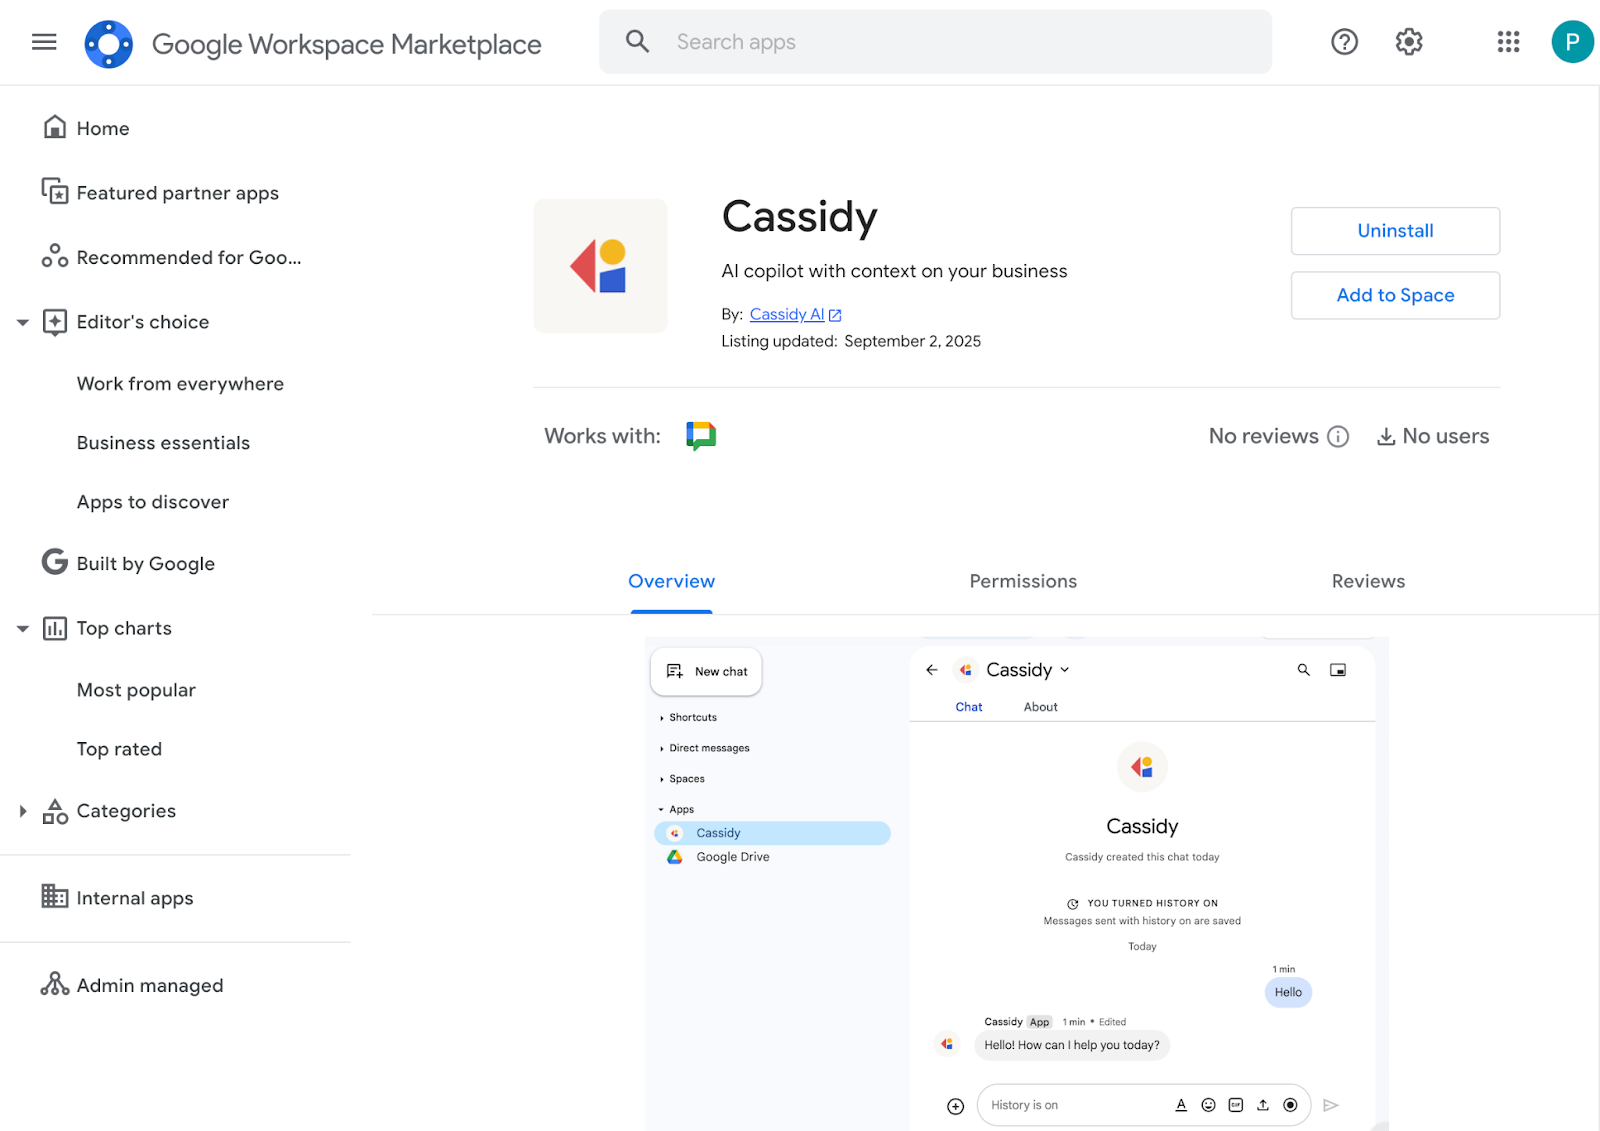
Your Agent should now appear in the Google Workspace Marketplace under [internal apps](https://workspace.google.com/marketplace/mydomainapps).
Go to the [Store Listing](https://console.cloud.google.com/apis/api/appsmarket-component.googleapis.com/googleapps_sdk_publish) tab. Fill in the app details (name, description, graphics), save as draft, then click **Publish**.
Your Agent should now appear in the Google Workspace Marketplace under [internal apps](https://workspace.google.com/marketplace/mydomainapps).
 ## Using your Agent in Google Chat
### Direct messages
Search for the Agent by name and start a direct message conversation. The Agent remembers the full conversation history across the thread.
### Spaces
Add the Agent to a Google Chat Space and @mention it to start a conversation. The Agent replies in-thread and remembers messages where it was mentioned.
## Next steps
Make your Agent available in Slack channels and DMs.
Deploy your Agent to a dedicated email address.
Embed your Agent on your website for external users.
## Using your Agent in Google Chat
### Direct messages
Search for the Agent by name and start a direct message conversation. The Agent remembers the full conversation history across the thread.
### Spaces
Add the Agent to a Google Chat Space and @mention it to start a conversation. The Agent replies in-thread and remembers messages where it was mentioned.
## Next steps
Make your Agent available in Slack channels and DMs.
Deploy your Agent to a dedicated email address.
Embed your Agent on your website for external users.