> ## Documentation Index
> Fetch the complete documentation index at: https://docs.cassidyai.com/llms.txt
> Use this file to discover all available pages before exploring further.
# Share and manage Agents
> Manage Agent permissions, organize with folders, and publish versions.
Control who can access and edit your Agents, organize them into folders, and manage version history.
## Organize Agents with folders
Folders help keep your Agent library organized and let you set permissions at the folder level.
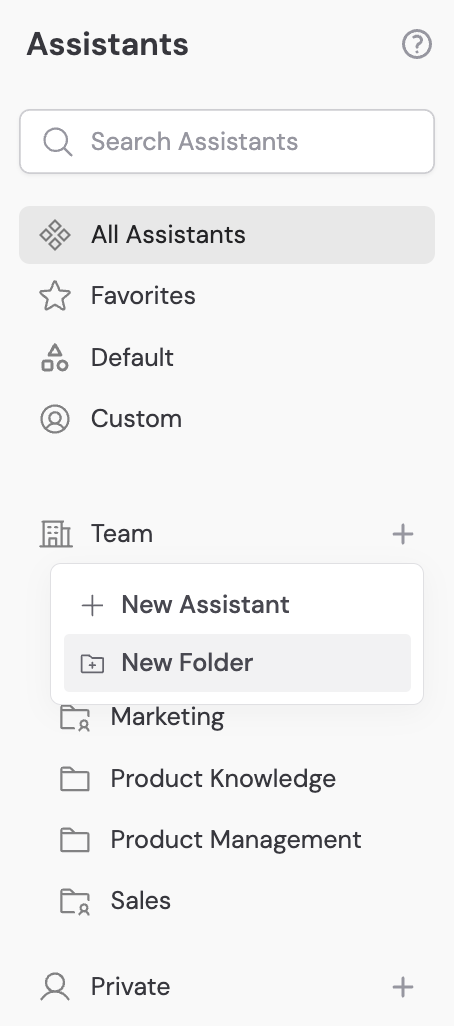
Click **Agents** in the left sidebar.
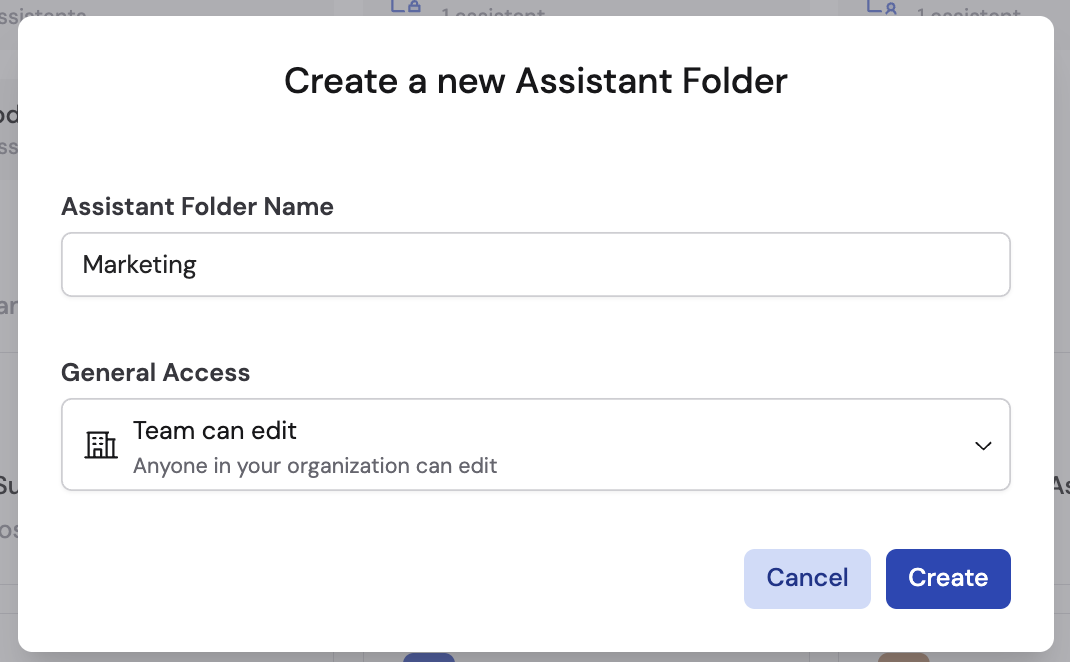
Click **Create a Folder** or the **+** icon next to the **Folders** heading in the sidebar.
 Enter a name and choose an access level:
* **Team can edit** — Anyone in your organization can view and edit Agents in this folder.
* **Team can view** — Anyone can view but not edit.
* **Restricted** — Only specific people and [groups](/settings/roles-and-groups) you add can access the folder.
Enter a name and choose an access level:
* **Team can edit** — Anyone in your organization can view and edit Agents in this folder.
* **Team can view** — Anyone can view but not edit.
* **Restricted** — Only specific people and [groups](/settings/roles-and-groups) you add can access the folder.
 Drag and drop Agents from the main area into the folder. You can move Agents between folders at any time.
## Manage permissions
### From the Agents page
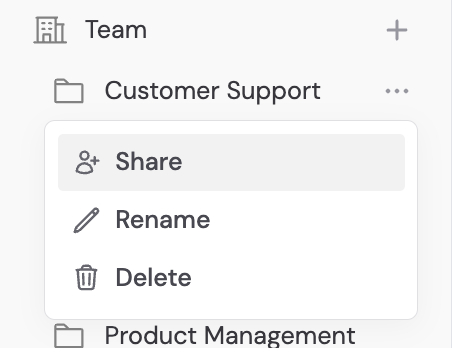
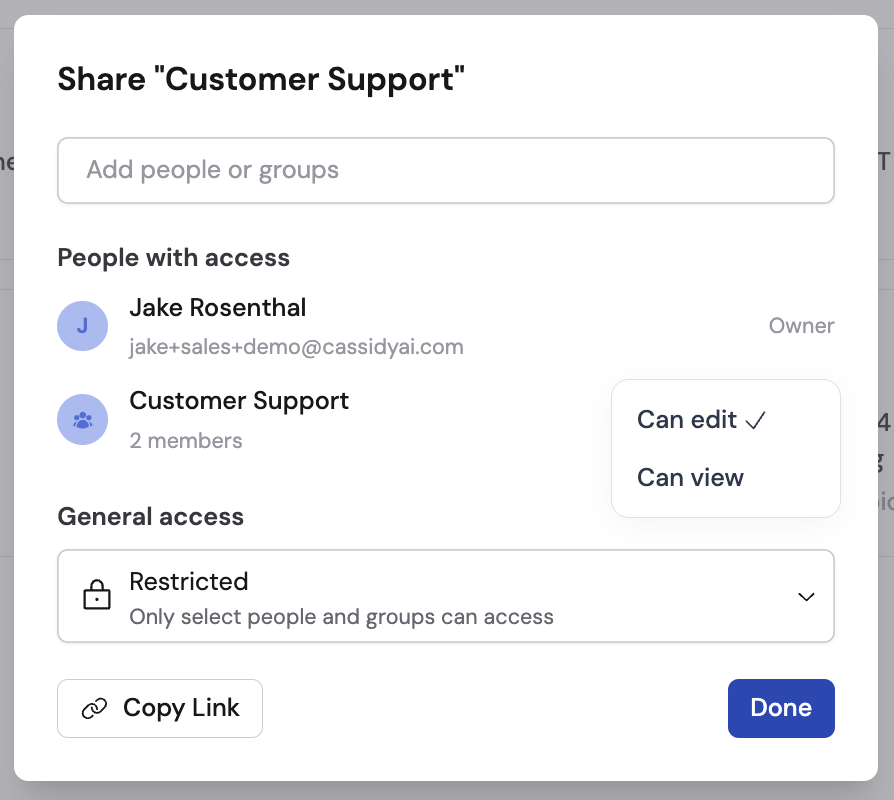
Update folder permissions by clicking **...** on a folder and selecting **Share**. From there you can:
* Change the access type between **Team can edit**, **Team can view**, and **Restricted**.
* When using **Restricted** access, add specific people or [groups](/settings/roles-and-groups) who should have access. Start typing a name or email address and select from the list. For each person or group, set either **Can edit** or **Can view** permissions.
* Remove access by clicking the **x** next to a person or group.
Drag and drop Agents from the main area into the folder. You can move Agents between folders at any time.
## Manage permissions
### From the Agents page
Update folder permissions by clicking **...** on a folder and selecting **Share**. From there you can:
* Change the access type between **Team can edit**, **Team can view**, and **Restricted**.
* When using **Restricted** access, add specific people or [groups](/settings/roles-and-groups) who should have access. Start typing a name or email address and select from the list. For each person or group, set either **Can edit** or **Can view** permissions.
* Remove access by clicking the **x** next to a person or group.
 Set up [roles and groups](/settings/roles-and-groups) to simplify permission management. Instead of adding individuals one by one, create groups like "Sales Team" or "Support Leads" and grant access to the entire group at once.
### From the Agent editor
You can also manage permissions while editing an Agent:
In the Agent editor, click **...** and select **Organize & Share Agent** under **Sharing**.
Set up [roles and groups](/settings/roles-and-groups) to simplify permission management. Instead of adding individuals one by one, create groups like "Sales Team" or "Support Leads" and grant access to the entire group at once.
### From the Agent editor
You can also manage permissions while editing an Agent:
In the Agent editor, click **...** and select **Organize & Share Agent** under **Sharing**.
 Select where to save the Agent — **Team**, **Private**, or a specific folder. You can create new folders directly from this dialog.
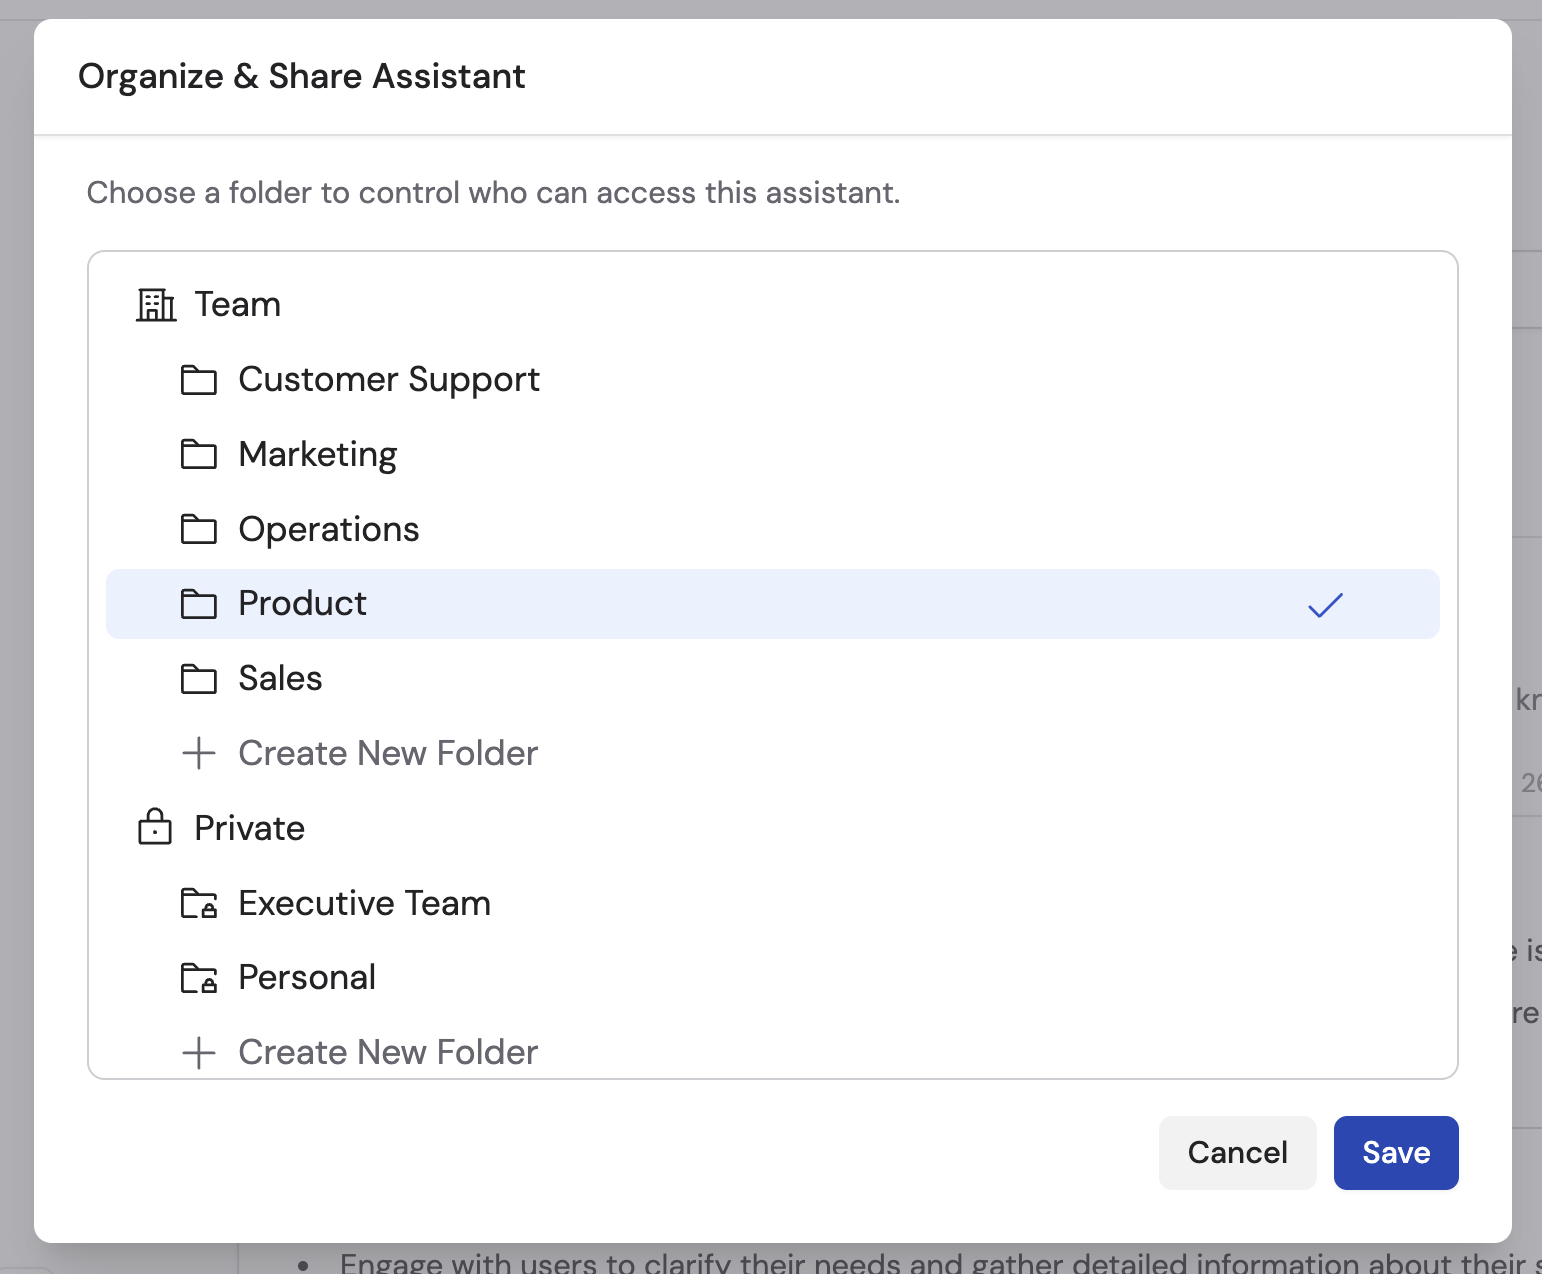 Click **Save** to apply the new permissions.
To make an Agent private, drag it into the **Private** section or a private folder on the Agents page.
## Publish versions and review history
Agents use a versioning system so you can test changes before making them live.
### Save drafts
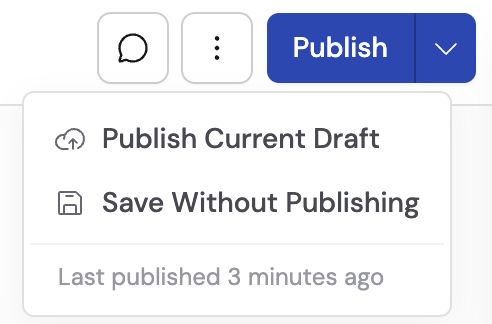
While editing, click **Draft** then **Save Without Publishing** to save your changes without making them available to end users. This lets you iterate on changes over time.
### Publish a version
Click **Publish** or go to **Draft** and select **Publish Current Draft**.
Click **Save** to apply the new permissions.
To make an Agent private, drag it into the **Private** section or a private folder on the Agents page.
## Publish versions and review history
Agents use a versioning system so you can test changes before making them live.
### Save drafts
While editing, click **Draft** then **Save Without Publishing** to save your changes without making them available to end users. This lets you iterate on changes over time.
### Publish a version
Click **Publish** or go to **Draft** and select **Publish Current Draft**.
 Enter a **Version Name** and optional description to document what changed. This helps you track changes over time.
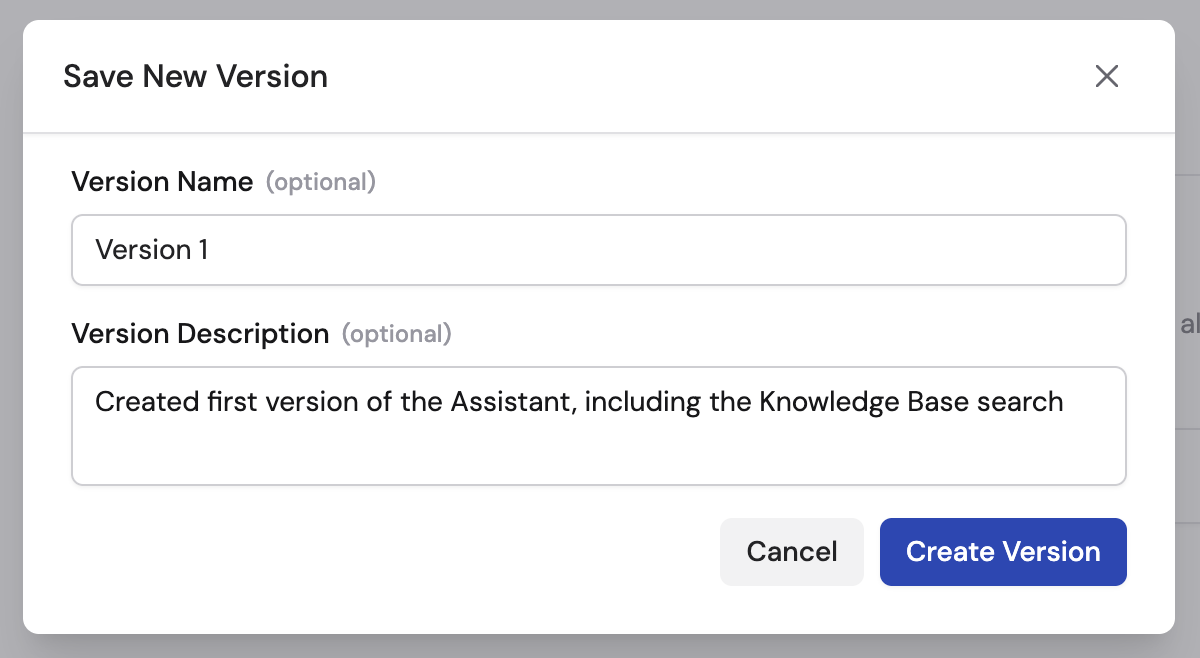 Click **Create Version** to save the version, or **Publish** to save and immediately make it live.
### Review version history
Open the **Draft** dropdown at the top of the Agent editor to see all published versions and what changed since each one.
Click **Create Version** to save the version, or **Publish** to save and immediately make it live.
### Review version history
Open the **Draft** dropdown at the top of the Agent editor to see all published versions and what changed since each one.
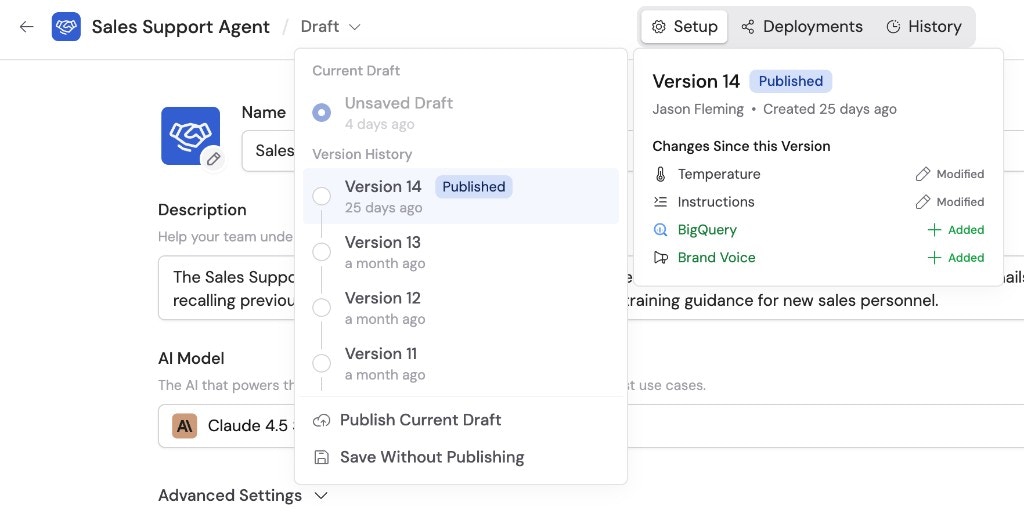 To revert to a previous version, click on the desired version. A modal shows the version details and changes being restored. Click **Restore Version** to confirm.
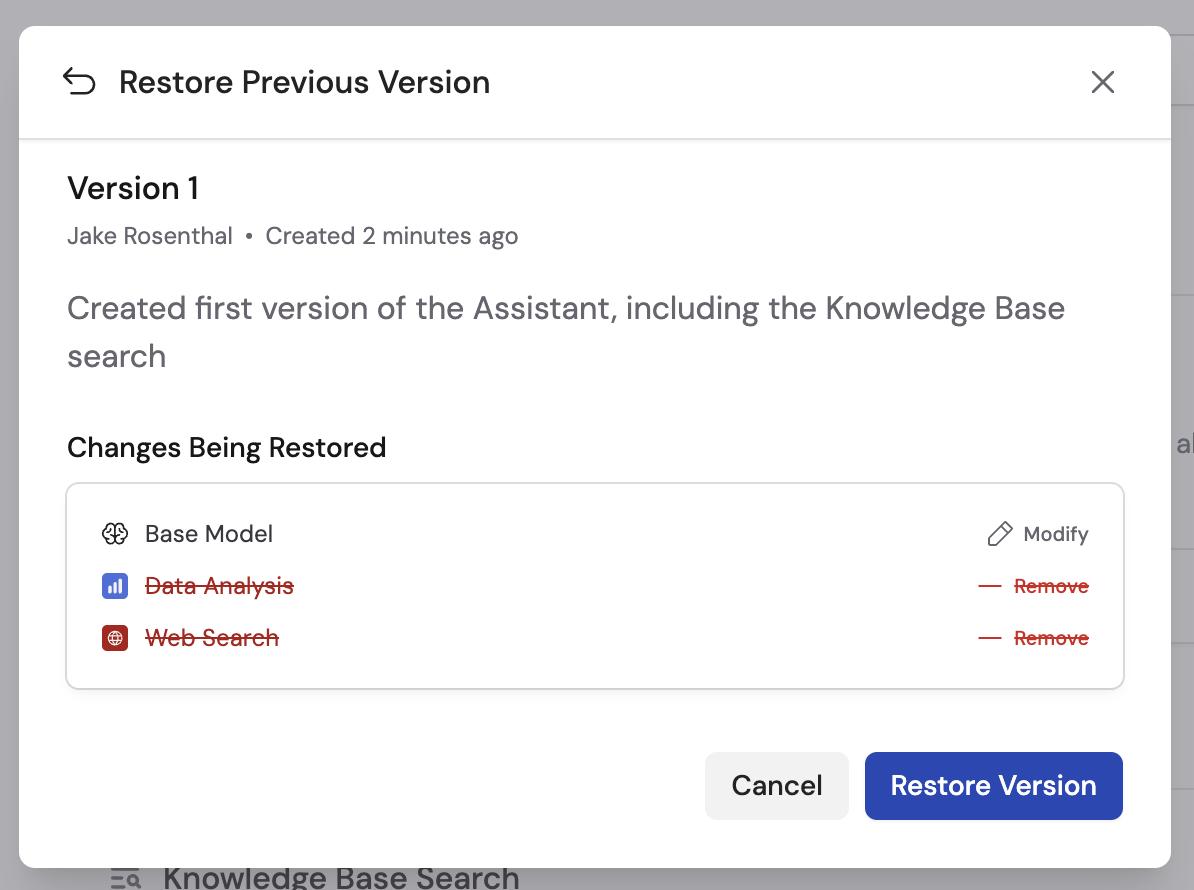 Reverting does not delete newer versions — you can go back to any saved version at any time.
## Next steps
Create a new Agent or edit an existing one.
Set up user groups to simplify permission management.
Reverting does not delete newer versions — you can go back to any saved version at any time.
## Next steps
Create a new Agent or edit an existing one.
Set up user groups to simplify permission management.