> ## Documentation Index
> Fetch the complete documentation index at: https://docs.cassidyai.com/llms.txt
> Use this file to discover all available pages before exploring further.
# Outlook Email Agent Connector
> Connect your Agent to Outlook Email so it can read, draft, categorize, and send emails during conversations.
The Outlook Email [Connector](/agents/connectors/overview) gives your [Agents](/agents/overview) real-time access to Outlook. Agents can read messages, retrieve attachments, create drafts, update message properties, apply categories, and, if you allow it, send or reply to emails directly from a conversation.
For best results with complex Connector queries, use a powerful,
reasoning-capable model. Cassidy supports models from OpenAI, Anthropic, and
Google. See [Choose the right AI model](/guides/choose-ai-model) for
recommendations.
## Set up the Outlook Email Connector
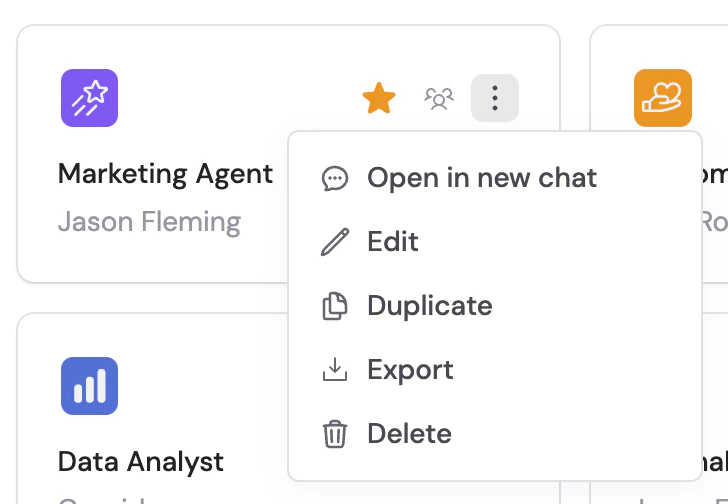
Go to **Agents** and select the Agent you want to configure.
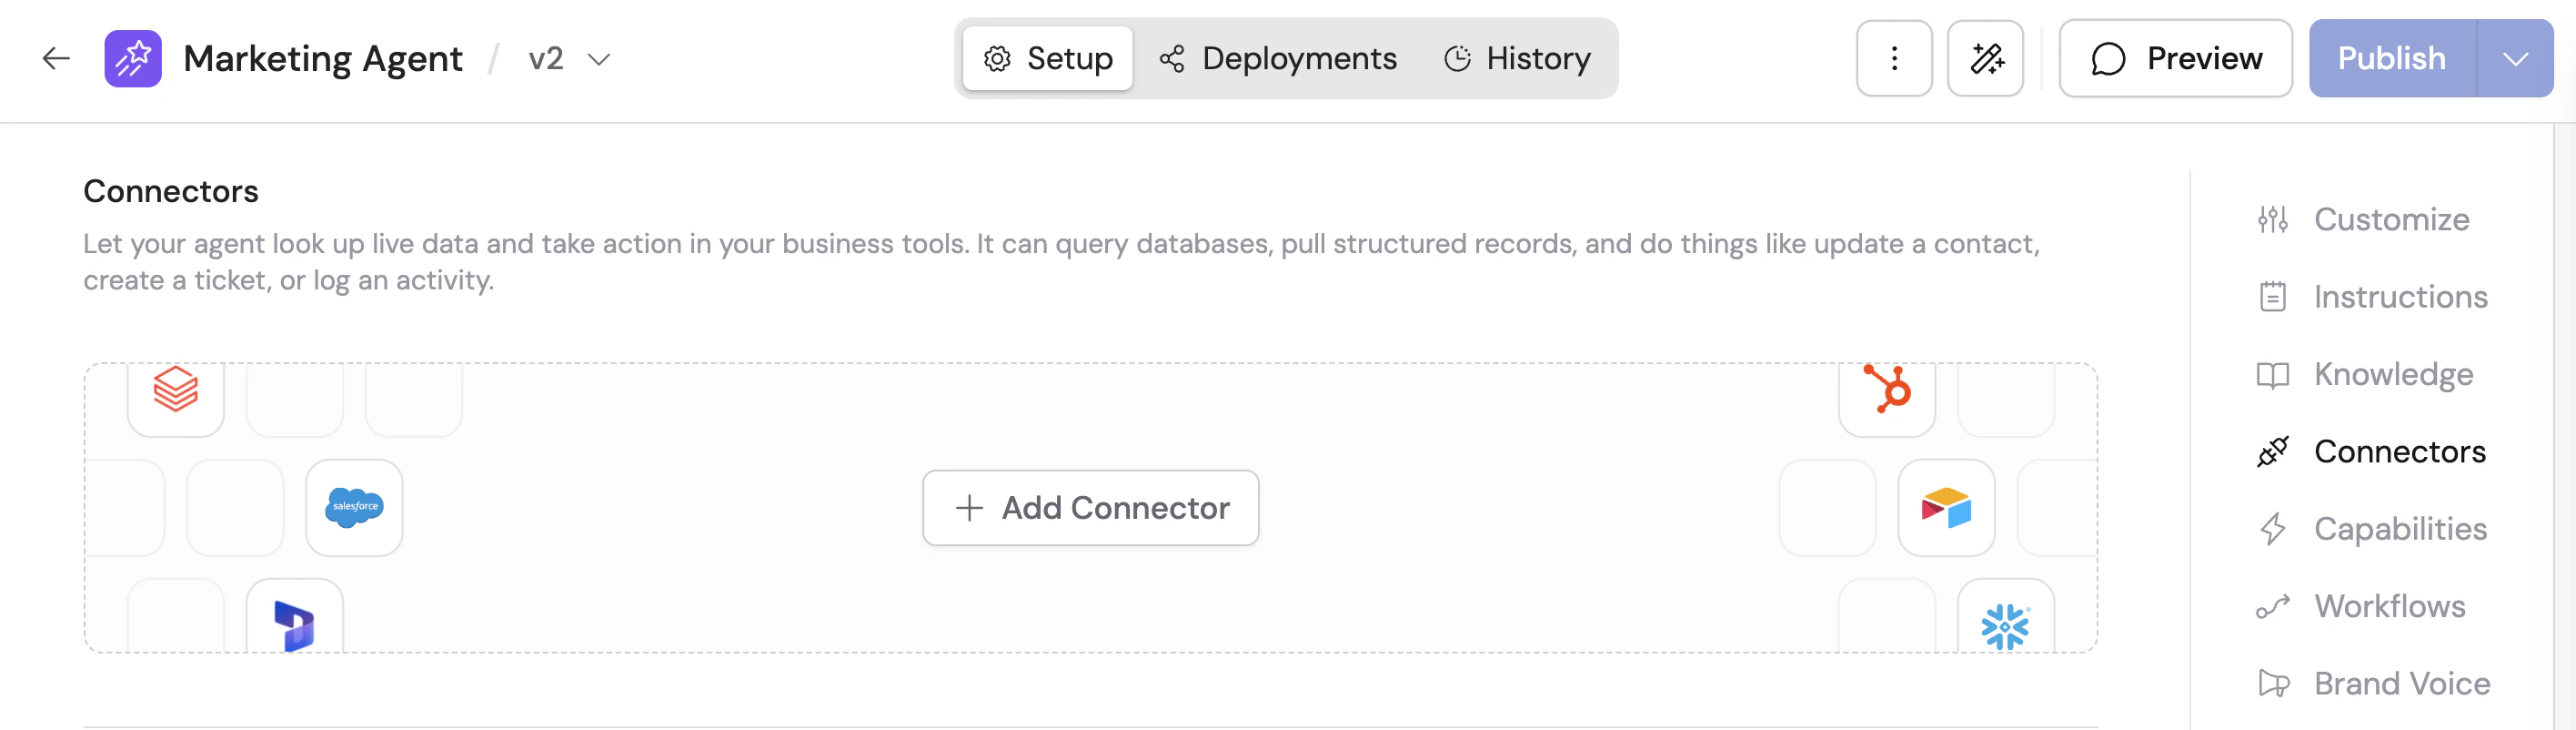
 Click the **Setup** tab and scroll to the **Connectors** section.
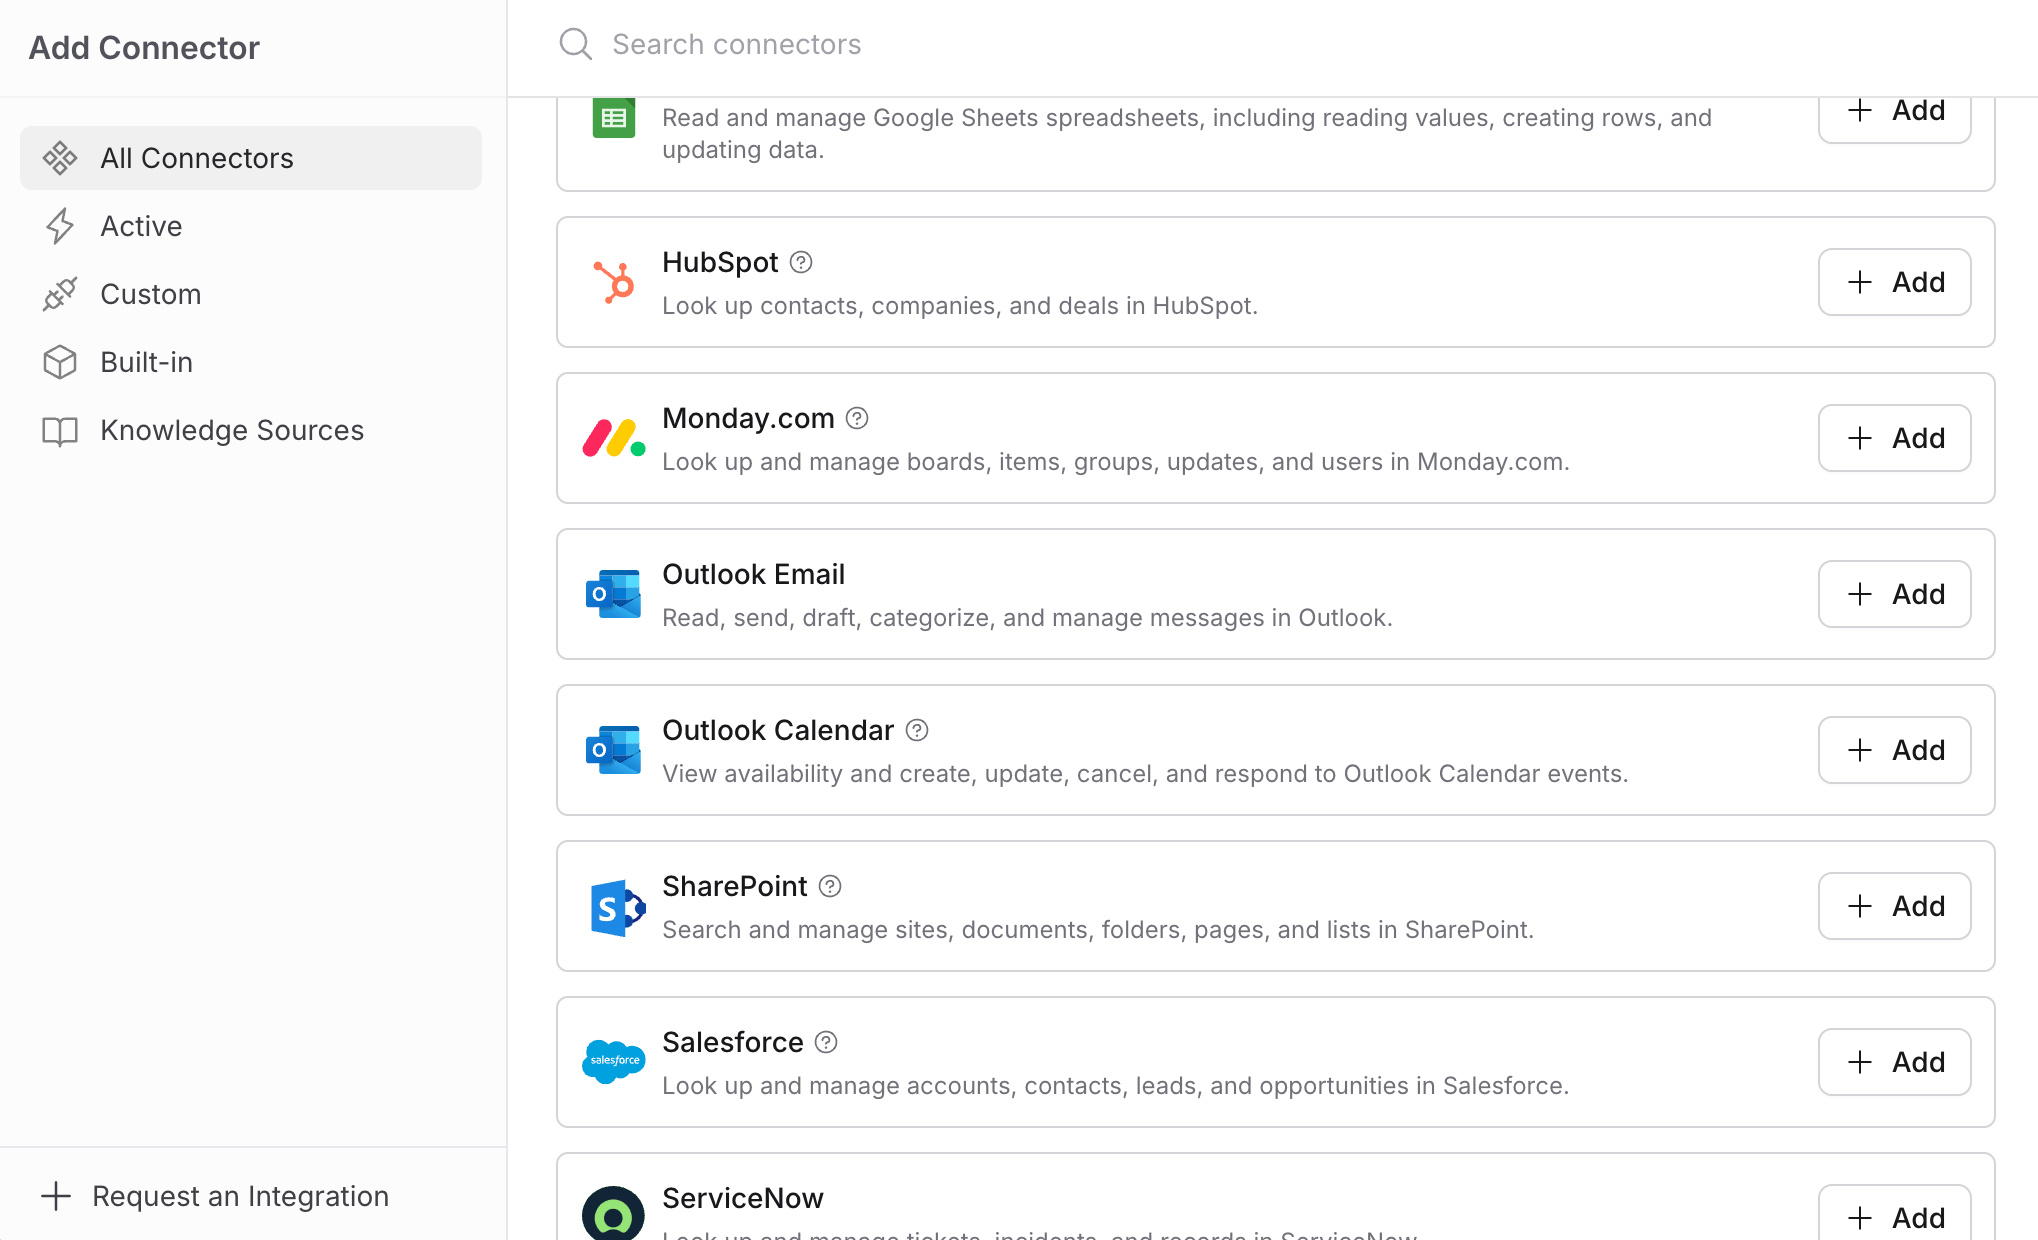
 Click **+ Add Connector**, then select **Outlook Email**.
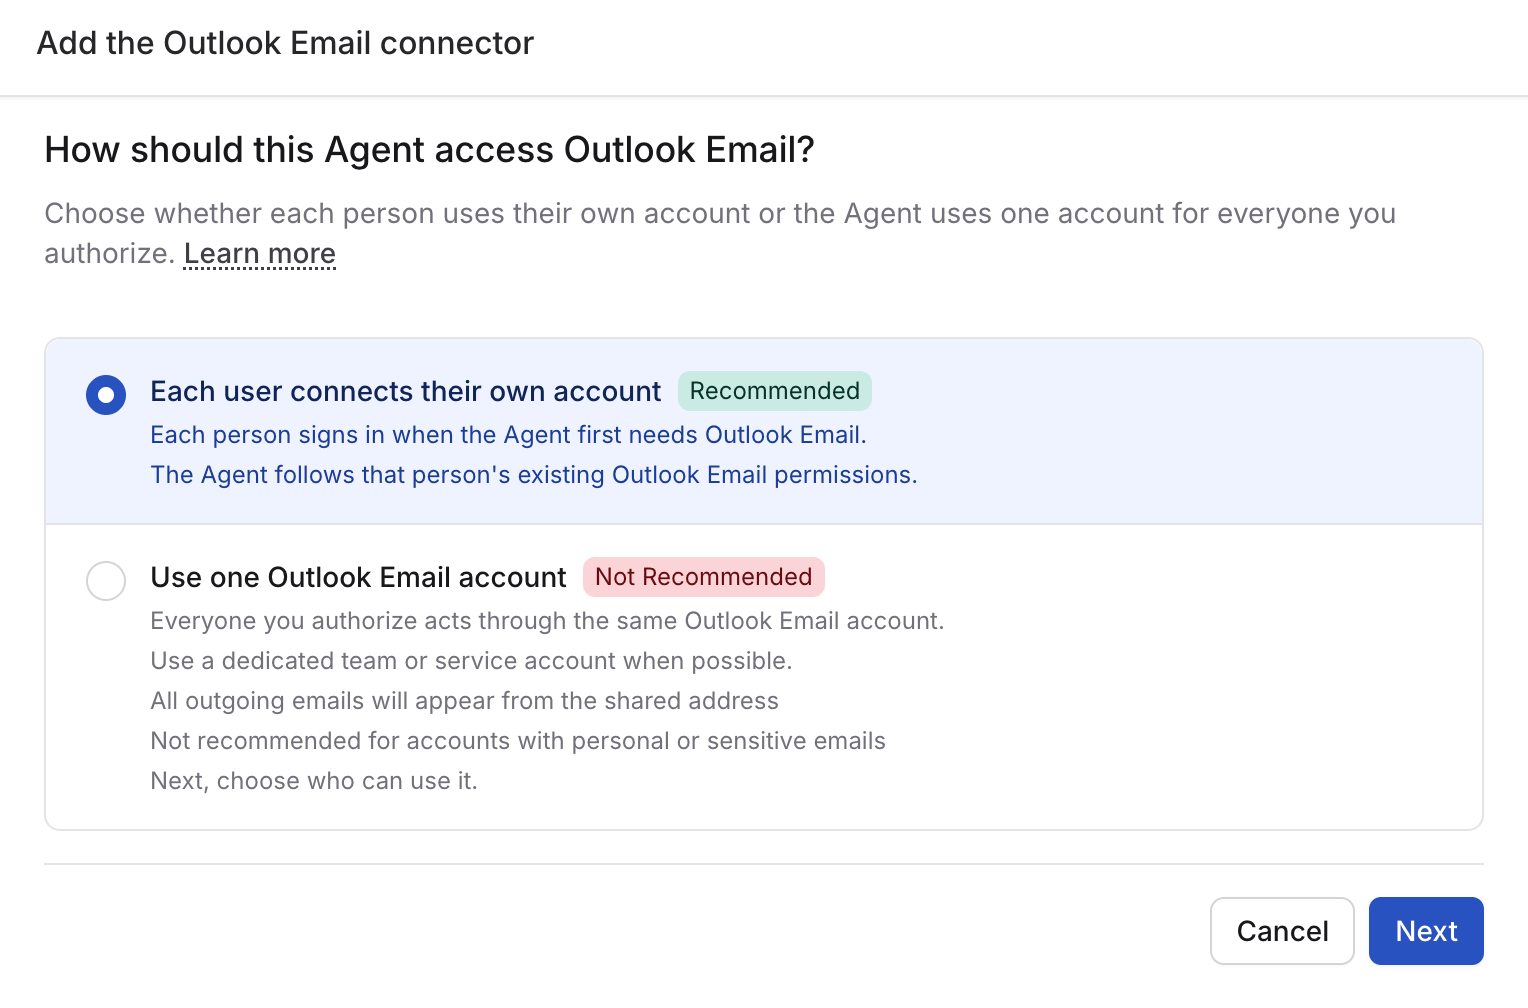
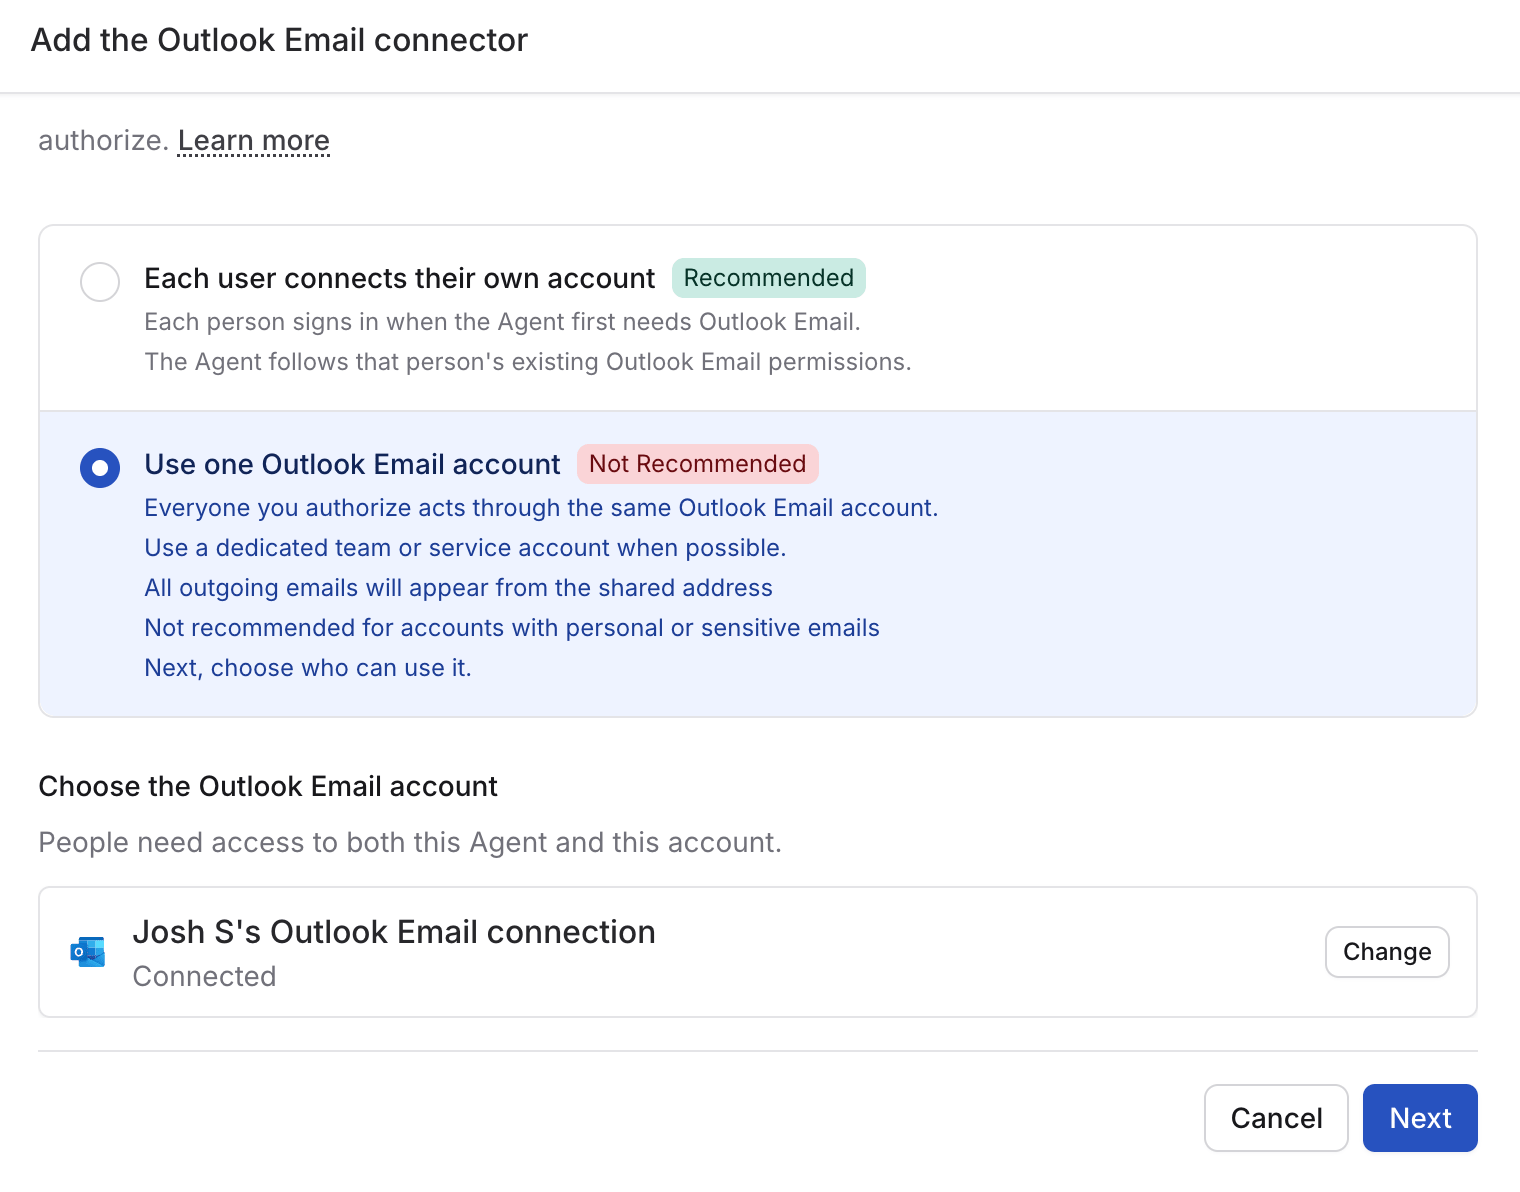
 Select how users will authenticate:
* **Each user connects their own account** (recommended) — each person signs in with their own Outlook account the first time they use the Connector. This respects each user's Microsoft permissions and provides the clearest audit trail.
* **Use one Outlook Email account** (privacy risk) — all users access Outlook through one shared account.
Per-user connections are the recommended default for nearly every team. They reduce security risk, preserve accountability, and prevent users from acting through a mailbox they do not personally control.
A shared Outlook Email connection is a privacy risk because it allows people to act through the same mailbox. In practice, that means a user may be able to draft, send, reply to, archive, or label emails in a way that appears to come from someone else or from a shared team account. Use a shared connection only when that behavior is intentional and tightly controlled.
Per-user Outlook Email connections are not currently supported in external deployments.
Select how users will authenticate:
* **Each user connects their own account** (recommended) — each person signs in with their own Outlook account the first time they use the Connector. This respects each user's Microsoft permissions and provides the clearest audit trail.
* **Use one Outlook Email account** (privacy risk) — all users access Outlook through one shared account.
Per-user connections are the recommended default for nearly every team. They reduce security risk, preserve accountability, and prevent users from acting through a mailbox they do not personally control.
A shared Outlook Email connection is a privacy risk because it allows people to act through the same mailbox. In practice, that means a user may be able to draft, send, reply to, archive, or label emails in a way that appears to come from someone else or from a shared team account. Use a shared connection only when that behavior is intentional and tightly controlled.
Per-user Outlook Email connections are not currently supported in external deployments.
 If you choose **Use one Outlook Email account**, select an existing
connection or click **Create shared connection**. After signing in, give
the connection a recognizable name and choose who can use it.
Use a dedicated shared mailbox or service account if your team needs centralized sending. Avoid connecting a personal inbox as a shared connection unless there is a clear governance reason to do so.
If you choose **Use one Outlook Email account**, select an existing
connection or click **Create shared connection**. After signing in, give
the connection a recognizable name and choose who can use it.
Use a dedicated shared mailbox or service account if your team needs centralized sending. Avoid connecting a personal inbox as a shared connection unless there is a clear governance reason to do so.
 Review Outlook Email's action permissions before adding the Connector:
* **Read Emails** — read-only actions such as listing messages, retrieving attachments, viewing messages, accessing the drafts folder, and viewing Outlook categories. Default: **Always allow**.
* **Draft Emails** — actions such as creating drafts, creating draft replies, and updating email properties. Default: **Disabled**.
* **Categorize Emails** — actions such as moving messages and creating or updating Outlook categories. Default: **Disabled**.
* **Send Emails** — actions such as forwarding, sending, sending drafts, and replying to emails. Default: **Disabled**.
* **Delete / Archive** — destructive actions such as deleting messages or deleting Outlook categories. Default: **Disabled**.
You can set each category to:
* **Always allow** — the Agent can perform the action automatically
* **Ask every time** — the Agent asks before taking the action
* **Disabled** — the Agent cannot use the action
Review **Send Emails**, **Draft Emails**, **Categorize Emails**, and **Delete / Archive** especially carefully. Setting these categories to **Always allow** lets the Agent send, reply, forward, move, update, or delete Outlook messages without asking.
Click **Add connector**.
Open **Chat** and select the Agent with the Outlook Email Connector enabled.
If you chose **Each user connects their own account**, each user is prompted to sign in to Outlook on first use. After the connection is complete, the Agent can help read messages, prepare drafts, organize inboxes, and, if enabled, send email.
## Connect Outlook Email for yourself
To use Outlook Email in any chat, not just with this Agent, open **Customize** →
**Connectors**, find **Outlook Email**, and click **Connect**. See [Add a Connector for
yourself](/agents/connectors/overview#add-a-connector-for-yourself).
## What the Agent can do
Depending on the permissions you enable, your Agent can:
* Read email content and attachments
* Find messages by message ID or conversation
* View drafts and Outlook categories
* Create drafts and draft replies
* Update existing message properties
* Apply, create, update, or delete Outlook categories
* Reply to emails, forward messages, and send new emails
* Send existing drafts
* Move or delete messages
## Data security
* **Real-time access** — Outlook data is accessed only when the Agent needs it during a conversation.
* **Permission controls** — You decide which categories are always allowed, require approval, or are disabled.
* **Per-user accountability** — Individual connections preserve each user's own Microsoft access and make actions easier to attribute.
* **Shared mailbox risk** — Shared connections centralize access, but they also make it easier for users to act through the same mailbox identity.
## Next steps
Trigger Workflows from incoming Outlook messages and automate replies,
drafts, and categorization.
Learn how Agent Connectors work across Cassidy.
This documentation is built and hosted on [Mintlify](https://mintlify.com), a developer documentation platform.
Review Outlook Email's action permissions before adding the Connector:
* **Read Emails** — read-only actions such as listing messages, retrieving attachments, viewing messages, accessing the drafts folder, and viewing Outlook categories. Default: **Always allow**.
* **Draft Emails** — actions such as creating drafts, creating draft replies, and updating email properties. Default: **Disabled**.
* **Categorize Emails** — actions such as moving messages and creating or updating Outlook categories. Default: **Disabled**.
* **Send Emails** — actions such as forwarding, sending, sending drafts, and replying to emails. Default: **Disabled**.
* **Delete / Archive** — destructive actions such as deleting messages or deleting Outlook categories. Default: **Disabled**.
You can set each category to:
* **Always allow** — the Agent can perform the action automatically
* **Ask every time** — the Agent asks before taking the action
* **Disabled** — the Agent cannot use the action
Review **Send Emails**, **Draft Emails**, **Categorize Emails**, and **Delete / Archive** especially carefully. Setting these categories to **Always allow** lets the Agent send, reply, forward, move, update, or delete Outlook messages without asking.
Click **Add connector**.
Open **Chat** and select the Agent with the Outlook Email Connector enabled.
If you chose **Each user connects their own account**, each user is prompted to sign in to Outlook on first use. After the connection is complete, the Agent can help read messages, prepare drafts, organize inboxes, and, if enabled, send email.
## Connect Outlook Email for yourself
To use Outlook Email in any chat, not just with this Agent, open **Customize** →
**Connectors**, find **Outlook Email**, and click **Connect**. See [Add a Connector for
yourself](/agents/connectors/overview#add-a-connector-for-yourself).
## What the Agent can do
Depending on the permissions you enable, your Agent can:
* Read email content and attachments
* Find messages by message ID or conversation
* View drafts and Outlook categories
* Create drafts and draft replies
* Update existing message properties
* Apply, create, update, or delete Outlook categories
* Reply to emails, forward messages, and send new emails
* Send existing drafts
* Move or delete messages
## Data security
* **Real-time access** — Outlook data is accessed only when the Agent needs it during a conversation.
* **Permission controls** — You decide which categories are always allowed, require approval, or are disabled.
* **Per-user accountability** — Individual connections preserve each user's own Microsoft access and make actions easier to attribute.
* **Shared mailbox risk** — Shared connections centralize access, but they also make it easier for users to act through the same mailbox identity.
## Next steps
Trigger Workflows from incoming Outlook messages and automate replies,
drafts, and categorization.
Learn how Agent Connectors work across Cassidy.
This documentation is built and hosted on [Mintlify](https://mintlify.com), a developer documentation platform.