> ## Documentation Index
> Fetch the complete documentation index at: https://docs.cassidyai.com/llms.txt
> Use this file to discover all available pages before exploring further.
# Use webhooks
> Set up webhooks to trigger Cassidy Workflows from any external system that can send HTTP requests.
Webhooks let any external system trigger a Cassidy [Workflow](/workflows/overview) by sending an HTTP POST request to a unique URL. This is ideal for connecting Cassidy to apps that don't have a native integration but support outbound webhooks.
## Set up a webhook trigger
Go to the [Workflows](/workflows/overview) page and create a new Workflow, or open an existing one you want to trigger via webhook.
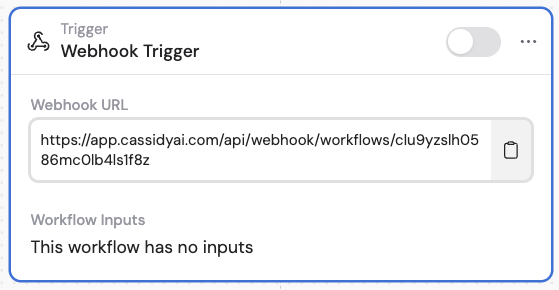 In the trigger configuration panel, select **Webhook** as the trigger type.
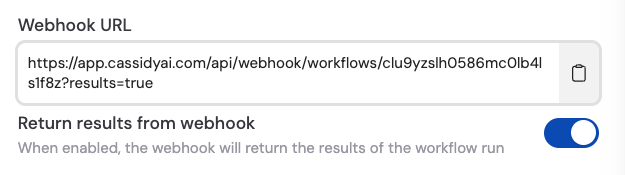
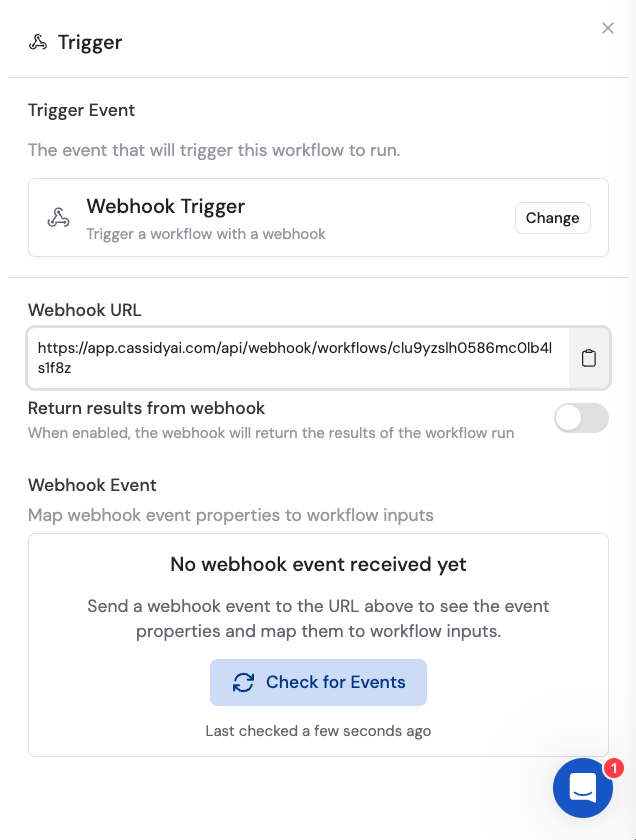 Optionally enable **Return results from webhook** if you need to send data back to the calling system. This is useful when the external app expects a response — for example, a chatbot waiting for an AI-generated reply.
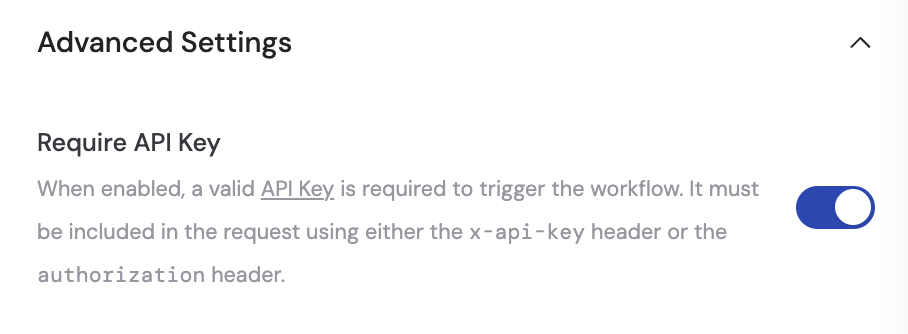
 In **Advanced settings**, optionally enable **Require API Key** to secure your webhook. When enabled, the calling system must include your API key in the request headers.
 Copy the unique **Webhook URL** provided by Cassidy. You'll paste this into your external system's webhook configuration.
Configure the external system to send a POST request with a JSON body to your webhook URL. Once Cassidy receives the first event, the incoming data fields appear in the trigger settings.
Map the incoming event properties to Workflow variables so you can use the data in subsequent actions.
Copy the unique **Webhook URL** provided by Cassidy. You'll paste this into your external system's webhook configuration.
Configure the external system to send a POST request with a JSON body to your webhook URL. Once Cassidy receives the first event, the incoming data fields appear in the trigger settings.
Map the incoming event properties to Workflow variables so you can use the data in subsequent actions.
 Toggle the trigger to active and continue building the rest of your Workflow. The Workflow now runs automatically whenever the external system sends a request to your webhook URL.
 Test your webhook by sending a sample POST request (using a tool like Postman or cURL) before activating in production. This lets you verify the data mapping without waiting for a real event.
## Next steps
Learn how to add actions and logic after your webhook trigger.
Explore other methods for connecting apps without native integrations.
Test your webhook by sending a sample POST request (using a tool like Postman or cURL) before activating in production. This lets you verify the data mapping without waiting for a real event.
## Next steps
Learn how to add actions and logic after your webhook trigger.
Explore other methods for connecting apps without native integrations.