> ## Documentation Index
> Fetch the complete documentation index at: https://docs.cassidyai.com/llms.txt
> Use this file to discover all available pages before exploring further.
# Email trigger
> Run a Workflow automatically when an email is sent to the Workflow's dedicated email address.
Run a [Workflow](/workflows/overview) whenever someone sends an email to its dedicated email address. Use this trigger for automations like processing inbound support requests, routing customer inquiries, extracting data from forwarded emails, or kicking off a review process when a specific message arrives.
Each Workflow with an Email trigger gets a dedicated email address at `@workflows.cassidyai.com`. Any email sent to that address triggers the Workflow and makes the sender, subject, body, attachments, and other fields available as variables.
Looking to deploy an [Agent](/agents/overview) via email instead? See [Deploy
via email](/agents/deploy/email).
## Set up an Email trigger
Create a new Workflow with an Email trigger, or change an existing Workflow's trigger type to Email.
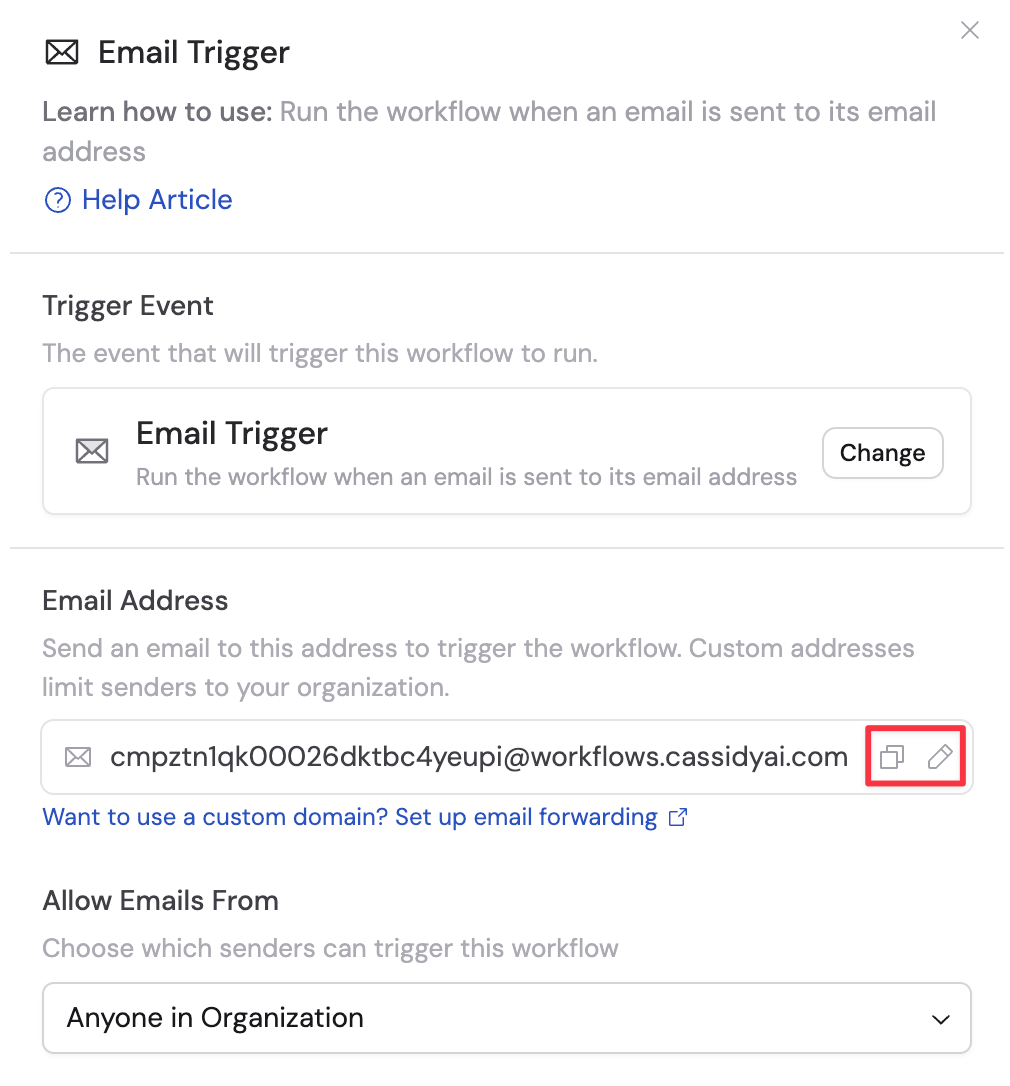
 Your Workflow gets a dedicated email address like `abc123@workflows.cassidyai.com`. The part before the `@` defaults to the Workflow's ID but can be customized (e.g. `support-tickets@workflows.cassidyai.com`).
Using a custom email address (any value other than the Workflow's ID) restricts senders to members of your organization. The **Anyone** sender filter is not available when using a custom address, and with **Specific Senders**, only senders who are also members of your organization will be accepted. See [Custom address and organization restrictions](#custom-address-and-organization-restrictions) for details.
Your Workflow gets a dedicated email address like `abc123@workflows.cassidyai.com`. The part before the `@` defaults to the Workflow's ID but can be customized (e.g. `support-tickets@workflows.cassidyai.com`).
Using a custom email address (any value other than the Workflow's ID) restricts senders to members of your organization. The **Anyone** sender filter is not available when using a custom address, and with **Specific Senders**, only senders who are also members of your organization will be accepted. See [Custom address and organization restrictions](#custom-address-and-organization-restrictions) for details.
 Under **Allow Emails From**, select a sender filter to control which emails are accepted:
| Filter | Description |
| -------------------------- | ------------------------------------------------------------------------------------------------- |
| **Anyone** | Accept emails from any sender. Only available when using the Workflow's default ID-based address. |
| **Anyone in Organization** | Only accept emails from users who are members of your Cassidy organization |
| **Users with Access** | Only accept emails from Cassidy users who have access to this specific Workflow |
| **Specific Senders** | Only accept emails from addresses or domains you specify |
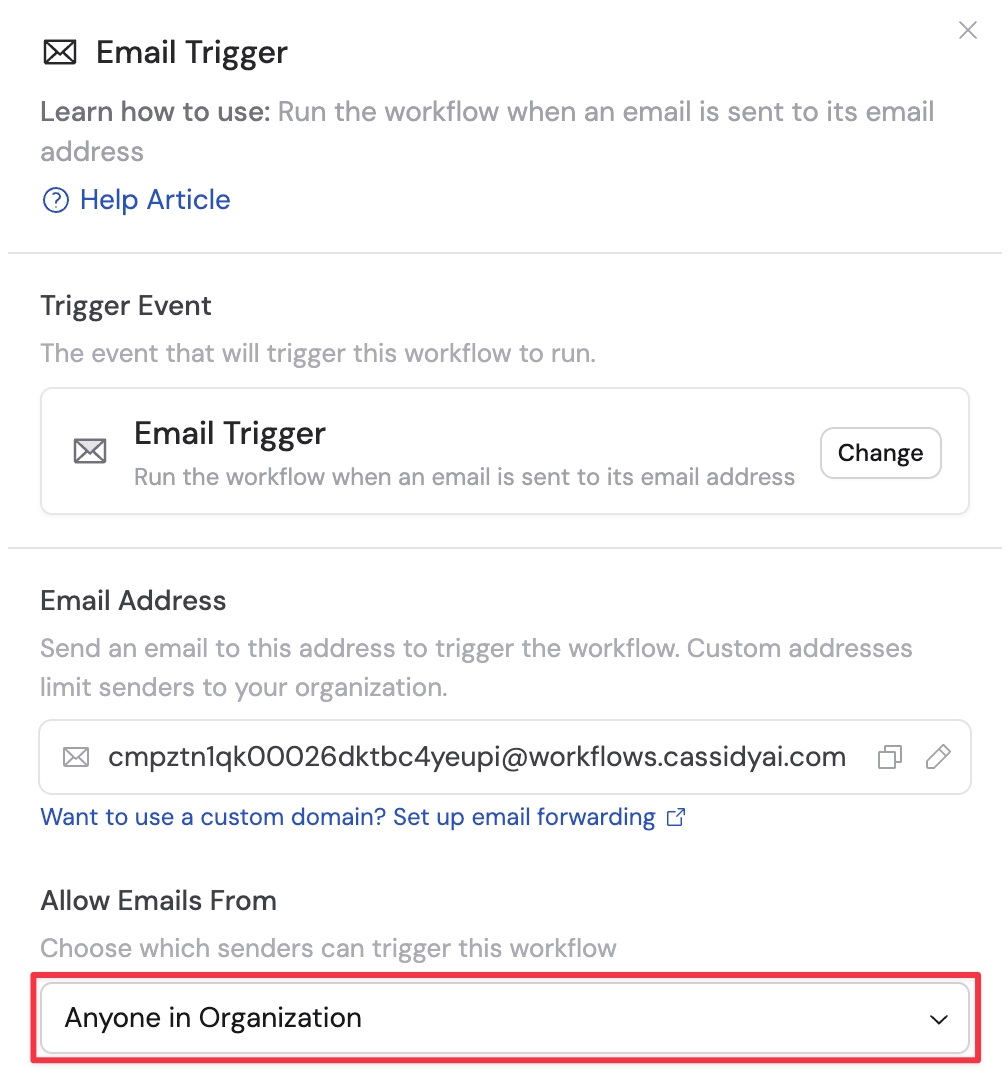
Under **Allow Emails From**, select a sender filter to control which emails are accepted:
| Filter | Description |
| -------------------------- | ------------------------------------------------------------------------------------------------- |
| **Anyone** | Accept emails from any sender. Only available when using the Workflow's default ID-based address. |
| **Anyone in Organization** | Only accept emails from users who are members of your Cassidy organization |
| **Users with Access** | Only accept emails from Cassidy users who have access to this specific Workflow |
| **Specific Senders** | Only accept emails from addresses or domains you specify |
 If you selected **Specific Senders**, add the email addresses or domains that should be allowed to trigger this Workflow. You can mix individual addresses (e.g. `user@example.com`) and entire domains (e.g. `example.com`).
 Use a domain filter like `example.com` to accept emails from any address at that domain — no need to list every individual sender.
[Publish](/workflows/building#publish-your-workflow) the Workflow and toggle the trigger on. The Workflow now runs automatically whenever an accepted email arrives at its dedicated address.
## Custom address and organization restrictions
When you set a custom email address (any name other than the Workflow's ID), Cassidy automatically restricts senders to members of your organization. This means:
* The **Anyone** sender filter is disabled — you must use **Anyone in Organization**, **Users with Access**, or **Specific Senders**
* With **Specific Senders**, only senders who are also members of your organization can trigger the Workflow
If you need to accept emails from anyone (including people outside your organization), use the Workflow's default ID-based address.
## Use a custom domain with email forwarding
By default, every Email trigger uses an `@workflows.cassidyai.com` address. If you want emails sent to your own domain (e.g. `support@yourcompany.com`) to trigger a Workflow, set up email forwarding from your mail provider.
This is useful when you want:
* A branded, professional email address customers already recognize
* To route existing email aliases or distribution lists into a Workflow
* To keep your internal email addresses visible to senders instead of a Cassidy address
### How it works
Your mail provider receives the email at your custom domain address, then automatically forwards it to the Workflow's `@workflows.cassidyai.com` address. Cassidy processes the forwarded email the same way as a direct one — the original sender, subject, body, and attachments are all available as variables in your Workflow.
### Set up forwarding
In the Email trigger configuration, copy the Workflow's `@workflows.cassidyai.com` address.
Set up a forwarding rule that sends incoming messages to the Cassidy address you copied. The exact steps depend on your provider:
* **Google Workspace** — Use [routing rules](https://support.google.com/a/answer/4524505) in the Admin Console under **Apps > Google Workspace > Gmail > Routing**
* **Microsoft 365 / Exchange** — Use [mail flow rules (transport rules)](https://learn.microsoft.com/en-us/exchange/security-and-compliance/mail-flow-rules/mail-flow-rules) in the Exchange Admin Center
* **Other providers** — Look for "email forwarding", "mail routing", or "alias" settings in your provider's admin panel
Send a test email to your custom domain address and verify the Workflow runs by checking **View Previous Runs** on the Workflow detail page.
## Related
* [Build and configure Workflows](/workflows/building)
* [Run and test Workflows](/workflows/running-and-testing)
* [Use webhooks](/integrations/webhooks)
* [Deploy an Agent via email](/agents/deploy/email)
Use a domain filter like `example.com` to accept emails from any address at that domain — no need to list every individual sender.
[Publish](/workflows/building#publish-your-workflow) the Workflow and toggle the trigger on. The Workflow now runs automatically whenever an accepted email arrives at its dedicated address.
## Custom address and organization restrictions
When you set a custom email address (any name other than the Workflow's ID), Cassidy automatically restricts senders to members of your organization. This means:
* The **Anyone** sender filter is disabled — you must use **Anyone in Organization**, **Users with Access**, or **Specific Senders**
* With **Specific Senders**, only senders who are also members of your organization can trigger the Workflow
If you need to accept emails from anyone (including people outside your organization), use the Workflow's default ID-based address.
## Use a custom domain with email forwarding
By default, every Email trigger uses an `@workflows.cassidyai.com` address. If you want emails sent to your own domain (e.g. `support@yourcompany.com`) to trigger a Workflow, set up email forwarding from your mail provider.
This is useful when you want:
* A branded, professional email address customers already recognize
* To route existing email aliases or distribution lists into a Workflow
* To keep your internal email addresses visible to senders instead of a Cassidy address
### How it works
Your mail provider receives the email at your custom domain address, then automatically forwards it to the Workflow's `@workflows.cassidyai.com` address. Cassidy processes the forwarded email the same way as a direct one — the original sender, subject, body, and attachments are all available as variables in your Workflow.
### Set up forwarding
In the Email trigger configuration, copy the Workflow's `@workflows.cassidyai.com` address.
Set up a forwarding rule that sends incoming messages to the Cassidy address you copied. The exact steps depend on your provider:
* **Google Workspace** — Use [routing rules](https://support.google.com/a/answer/4524505) in the Admin Console under **Apps > Google Workspace > Gmail > Routing**
* **Microsoft 365 / Exchange** — Use [mail flow rules (transport rules)](https://learn.microsoft.com/en-us/exchange/security-and-compliance/mail-flow-rules/mail-flow-rules) in the Exchange Admin Center
* **Other providers** — Look for "email forwarding", "mail routing", or "alias" settings in your provider's admin panel
Send a test email to your custom domain address and verify the Workflow runs by checking **View Previous Runs** on the Workflow detail page.
## Related
* [Build and configure Workflows](/workflows/building)
* [Run and test Workflows](/workflows/running-and-testing)
* [Use webhooks](/integrations/webhooks)
* [Deploy an Agent via email](/agents/deploy/email)