> ## Documentation Index
> Fetch the complete documentation index at: https://docs.cassidyai.com/llms.txt
> Use this file to discover all available pages before exploring further.
# Invite team members
> Invite colleagues to your Cassidy workspace and manage pending invitations.
Add your team to Cassidy so they can collaborate on [Agents](/agents/overview), [Workflows](/workflows/overview), and your [Knowledge Base](/knowledge-base/overview). You can invite new members from anywhere in the app or from Organization Settings.
## Send invitations
You can invite team members from two places:
* **Quick invite** — Click **Invite Members** in the sidebar.
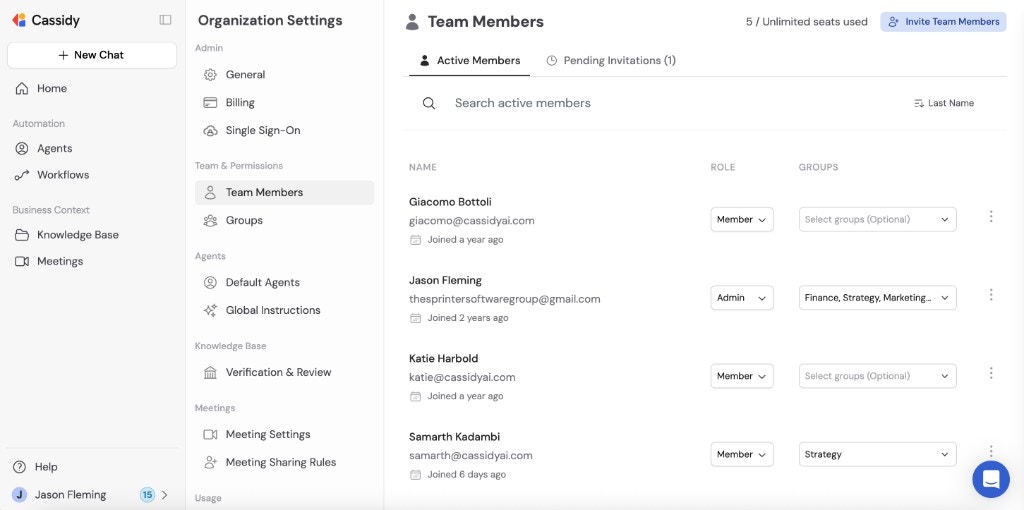
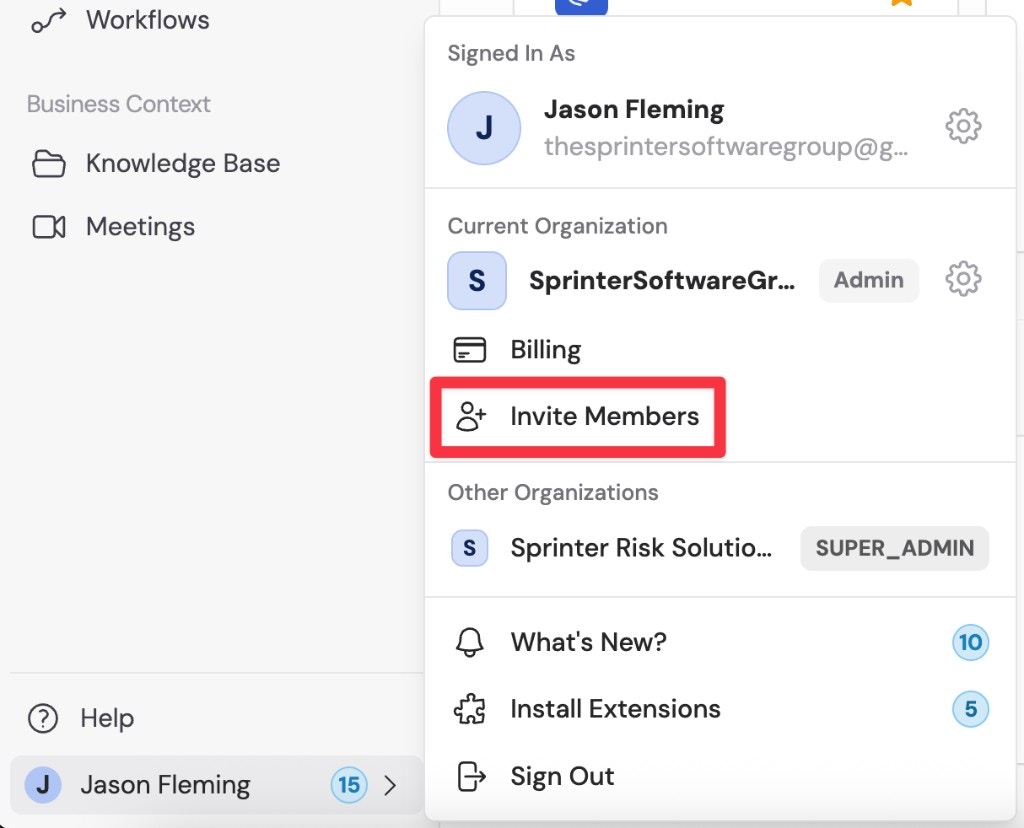 * **Organization Settings** — Click your account name at the bottom of the sidebar, click the **gear icon**, go to **Team Members**, and click **Invite Team Members**.
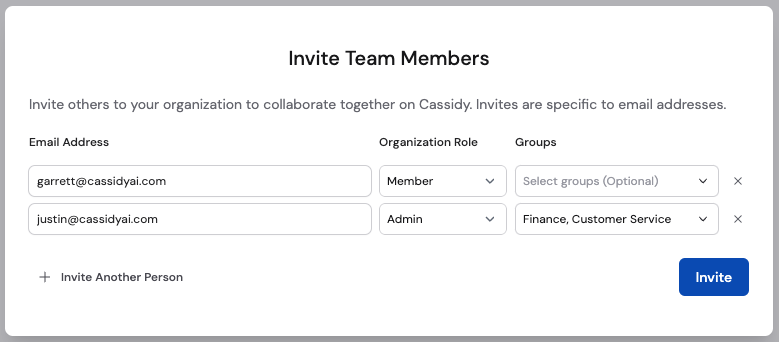
 Type one or more email addresses into the invite field. You can invite multiple people at once by separating emails with commas or pressing Enter after each one.
Choose one or more roles for each invitee. Roles control what the person can do in Cassidy.
* **Viewer**: Basic access to shared resources.
* **Member**: Standard access for regular team members.
* **Admin**: Administrative access for managing team settings, integrations, users, and workspace configuration.
* **Custom roles**: Workspace-specific privilege sets created by your team.
You can always change a user's roles later from Organization Settings. Start with the narrowest role that lets someone do their job.
Select one or more [groups](/settings/roles-and-groups) to add the invitee to. Groups control which shared Agents, Workflows, Knowledge Base collections, chats, and meetings the user can access.
Click **Send Invites**. Each invitee receives an email with a link to join your Cassidy workspace.
Type one or more email addresses into the invite field. You can invite multiple people at once by separating emails with commas or pressing Enter after each one.
Choose one or more roles for each invitee. Roles control what the person can do in Cassidy.
* **Viewer**: Basic access to shared resources.
* **Member**: Standard access for regular team members.
* **Admin**: Administrative access for managing team settings, integrations, users, and workspace configuration.
* **Custom roles**: Workspace-specific privilege sets created by your team.
You can always change a user's roles later from Organization Settings. Start with the narrowest role that lets someone do their job.
Select one or more [groups](/settings/roles-and-groups) to add the invitee to. Groups control which shared Agents, Workflows, Knowledge Base collections, chats, and meetings the user can access.
Click **Send Invites**. Each invitee receives an email with a link to join your Cassidy workspace.
 Invitations sent. You can track their status in Organization Settings under **Team Members**.
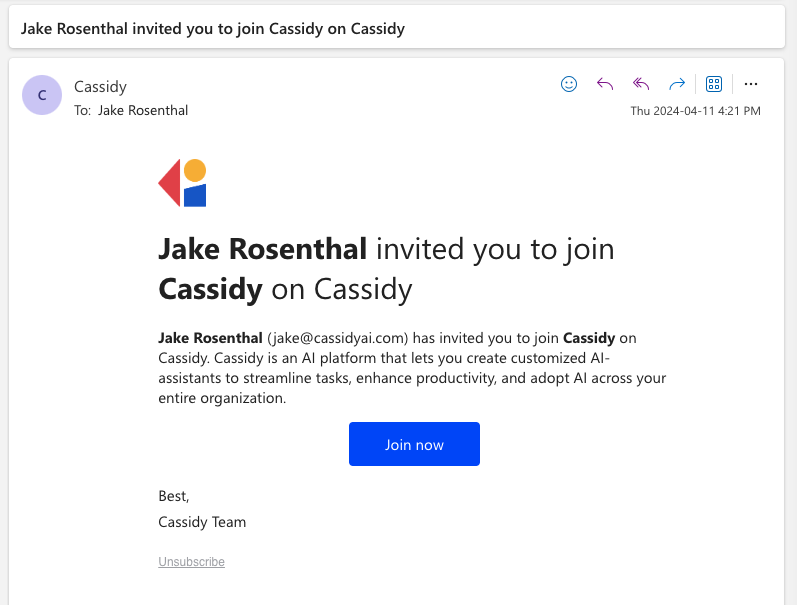
## Accept an invitation
When someone invites you to a Cassidy workspace:
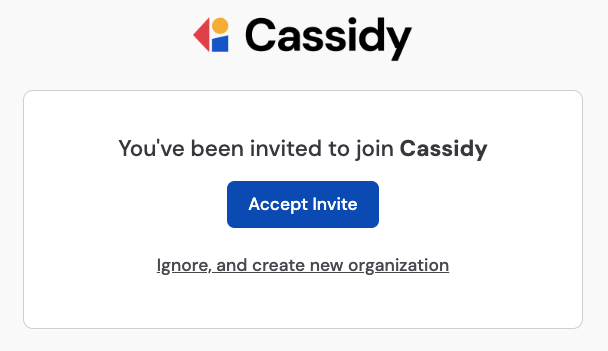
Look for an invitation email from Cassidy. Click the **Join** button in the email.
Invitations sent. You can track their status in Organization Settings under **Team Members**.
## Accept an invitation
When someone invites you to a Cassidy workspace:
Look for an invitation email from Cassidy. Click the **Join** button in the email.
 If you don't see the email, check your spam or junk folder. The sender can resend the invitation from Organization Settings if needed.
If you're new to Cassidy, create an account with the invited email address. When prompted during account creation, click the option to join the organization.
If you don't see the email, check your spam or junk folder. The sender can resend the invitation from Organization Settings if needed.
If you're new to Cassidy, create an account with the invited email address. When prompted during account creation, click the option to join the organization.
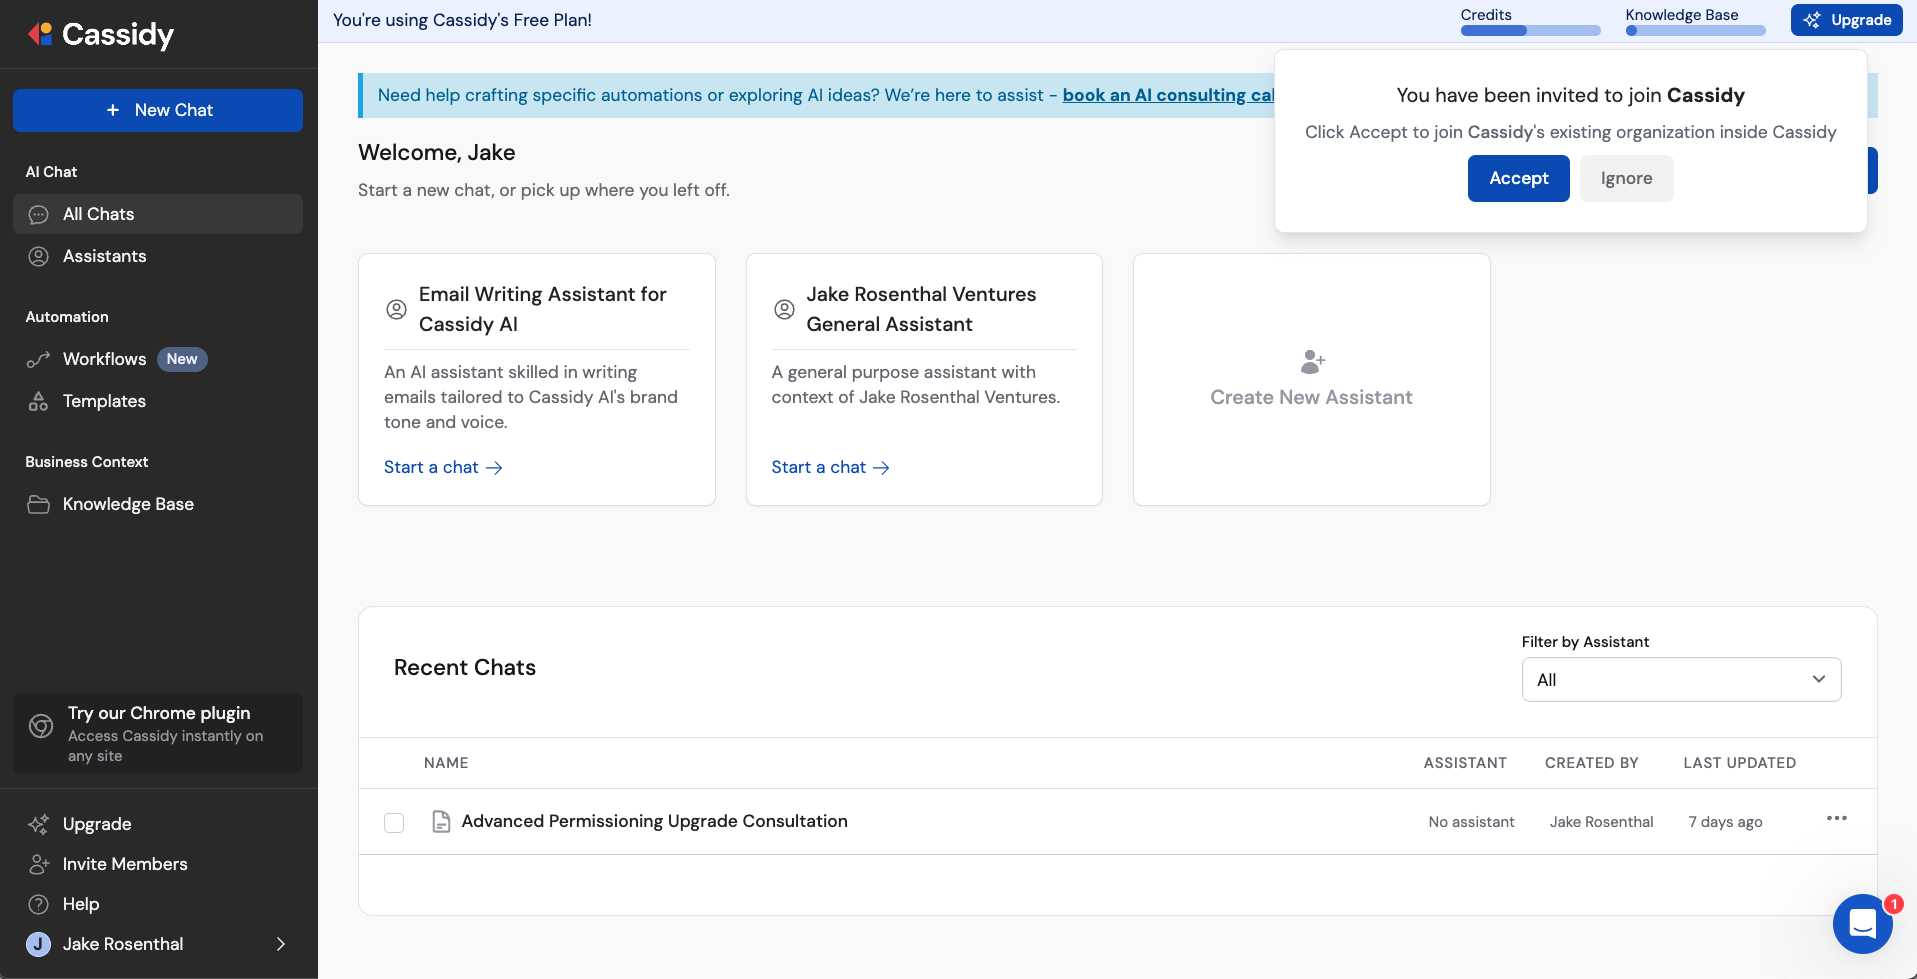
 If you already have a Cassidy account and are logged in, a pop-up appears in the app asking you to accept the invite.
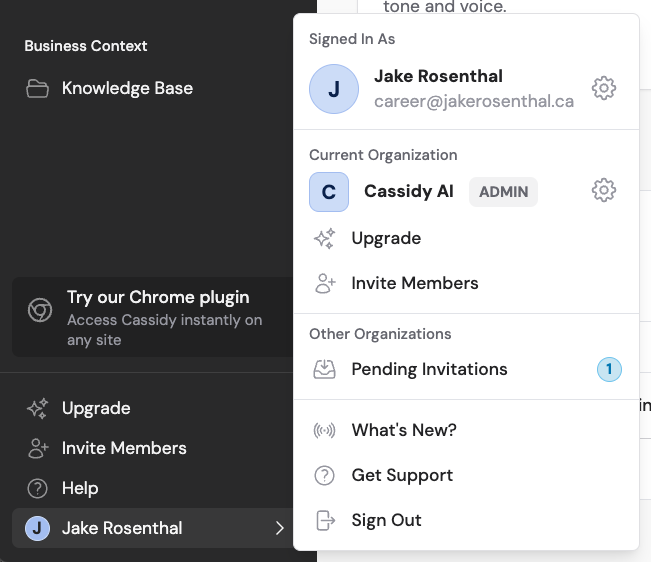
 You can access your pending invitations by clicking your name in the sidebar and selecting **Pending Invitations**.
 In the Pending Invitations screen, click **Accept Invitation** to join the organization or **Reject Invitation** to decline.
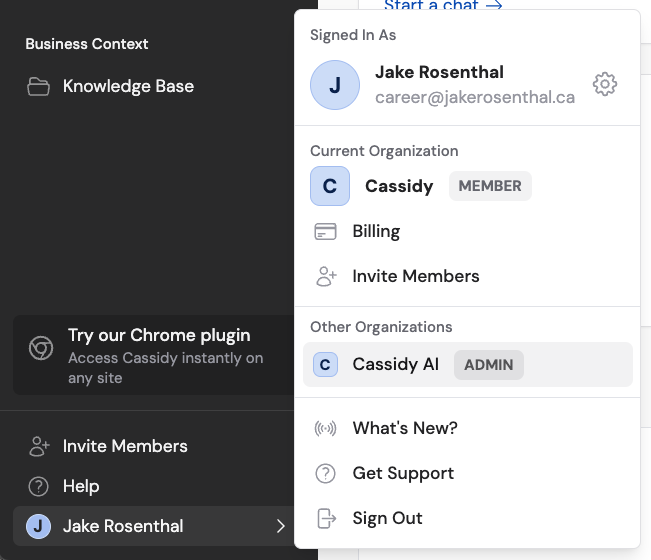
 Once you've accepted, you can switch between organizations by clicking your account name at the bottom of the sidebar.
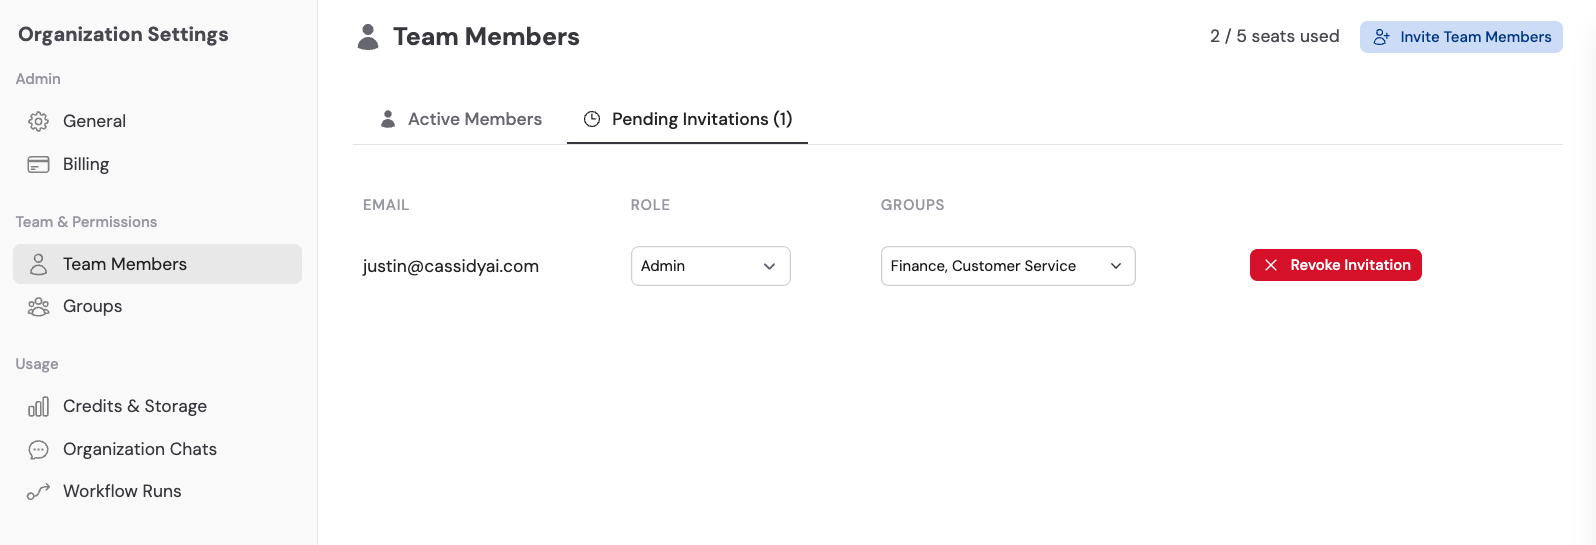
 ## Manage invitations and members
From **Organization Settings** → **Team Members**, you can manage both pending invitations and existing members.
### Revoke a pending invitation
If you made a mistake or no longer want someone to join, click **Revoke Invitation** next to the pending invite.
## Manage invitations and members
From **Organization Settings** → **Team Members**, you can manage both pending invitations and existing members.
### Revoke a pending invitation
If you made a mistake or no longer want someone to join, click **Revoke Invitation** next to the pending invite.
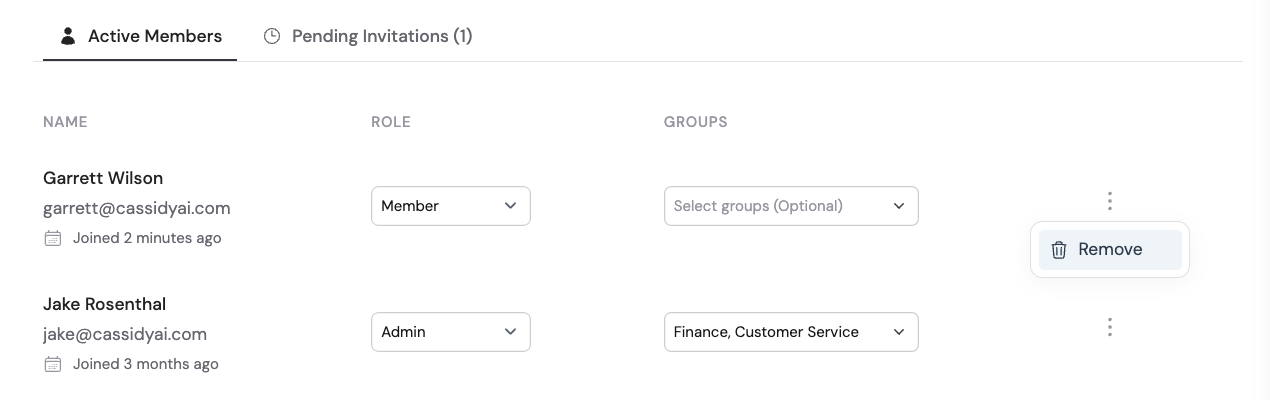
 ### Remove an existing member
For members who have already joined, click the **...** menu next to their name and select **Remove**, then confirm the action.
### Remove an existing member
For members who have already joined, click the **...** menu next to their name and select **Remove**, then confirm the action.
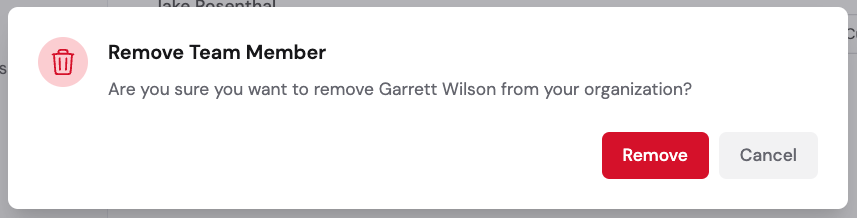 Removing a member is immediate. They will lose access to all shared resources in your organization. Any Agents or Workflows they own will remain but may need to be reassigned.
## Next steps
Control what team members can do and which resources they can access.
Let your team sign in with your identity provider.
Removing a member is immediate. They will lose access to all shared resources in your organization. Any Agents or Workflows they own will remain but may need to be reassigned.
## Next steps
Control what team members can do and which resources they can access.
Let your team sign in with your identity provider.