> ## Documentation Index
> Fetch the complete documentation index at: https://docs.cassidyai.com/llms.txt
> Use this file to discover all available pages before exploring further.
# Use Skills
> Install Skills for your Cassidy chats, let Agents choose them automatically, select one yourself, or add one to an Agent or Workflow.
Use a published Skill across your Cassidy chats or make it available through a specific [Agent](/agents/overview) or [Workflow](/workflows/overview) AI action.
**Skills require Code Execution & File Creation.** Newer Agents include this
setting by default. An older custom Agent may need an editor to enable it
under **Advanced Settings** and publish the Agent again.
## Understand where a Skill is available
* **Installed for you:** The Skill follows you across chats you start directly in Cassidy with compatible default and custom Agents.
* **Attached to an Agent:** The Skill is available while someone uses that Agent.
* **Added to a Workflow AI action:** The Skill is available to that specific **Generate Text** action.
A compatible Agent has **Code Execution & File Creation** enabled.
Personal installations apply to chats you start directly in Cassidy. They do not automatically carry into external Agent deployments or unrelated Workflow runs.
## Install a Skill for yourself
Install a Skill when you want it available regardless of which compatible Agent you choose.
Open **Skills** and browse **All Skills**, **Team**, or a shared folder.
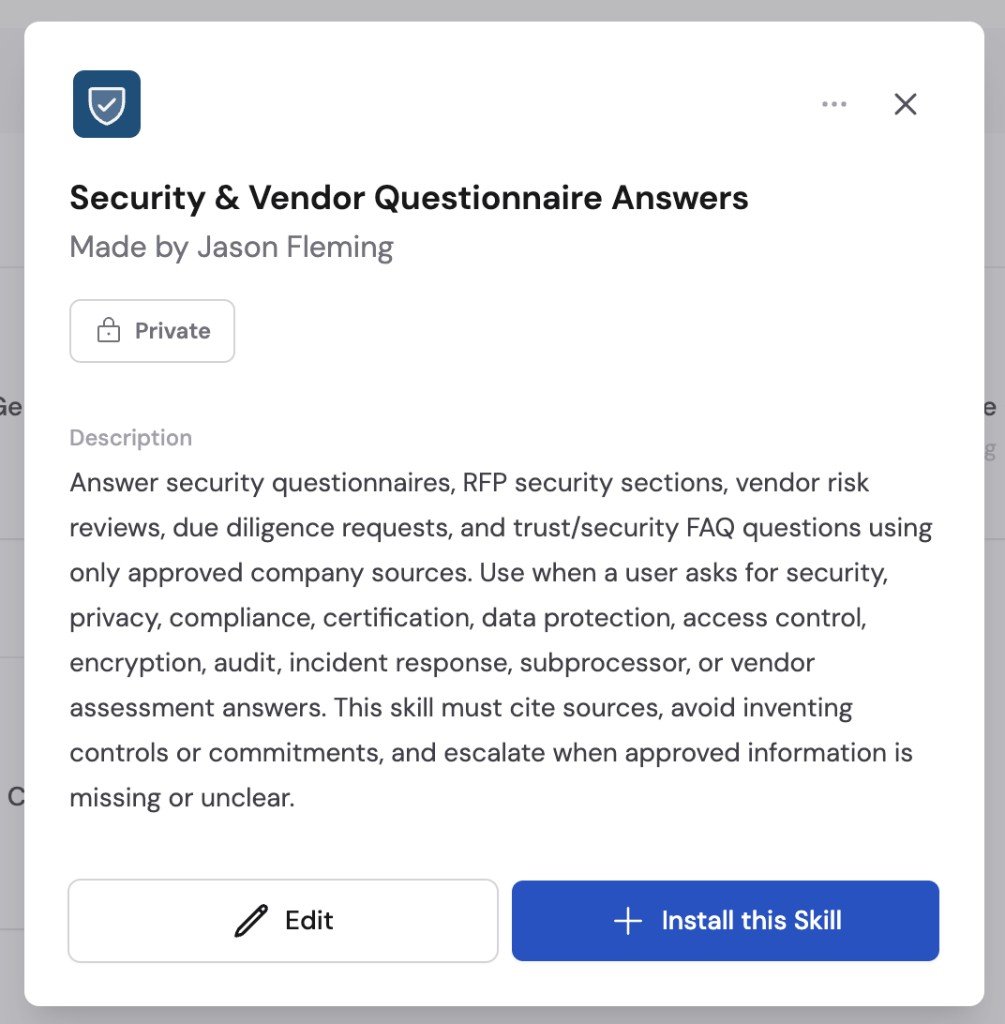
Open the Skill and review its description, resources, and tools.
Cassidy warns you when the Skill references Knowledge Base sources or Workflows you cannot access.
Click **Install this Skill**.
The Skill appears under **Installed** in the Skills directory and **My Skills** in the chat slash menu.
 You can uninstall a Skill you installed personally. A Skill installed by an administrator remains installed while that distribution rule applies.
## Let Cassidy choose a Skill
Once a Skill is available, Cassidy can select it when its description matches your request.
For example:
1. You install a **Customer Follow-up Email** Skill.
2. You open your regular sales Agent.
3. You ask for a follow-up email using customer call notes.
4. Cassidy loads the Skill's playbook and applies it to the draft.
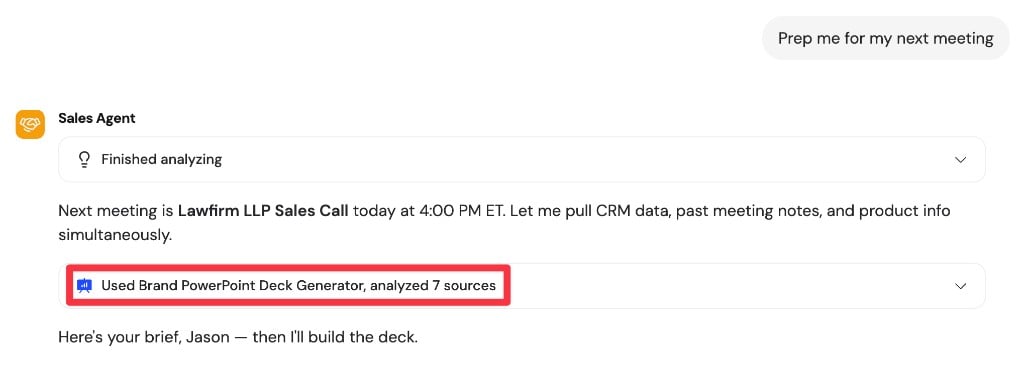
The response progress shows **Used \[Skill name]** when Cassidy uses a Skill.
You can uninstall a Skill you installed personally. A Skill installed by an administrator remains installed while that distribution rule applies.
## Let Cassidy choose a Skill
Once a Skill is available, Cassidy can select it when its description matches your request.
For example:
1. You install a **Customer Follow-up Email** Skill.
2. You open your regular sales Agent.
3. You ask for a follow-up email using customer call notes.
4. Cassidy loads the Skill's playbook and applies it to the draft.
The response progress shows **Used \[Skill name]** when Cassidy uses a Skill.
 A specific name and description help Cassidy choose appropriately. If a Skill
is used too often or not often enough, improve its description and test again.
## Choose a Skill yourself
Use the slash menu when you already know which Skill you want.
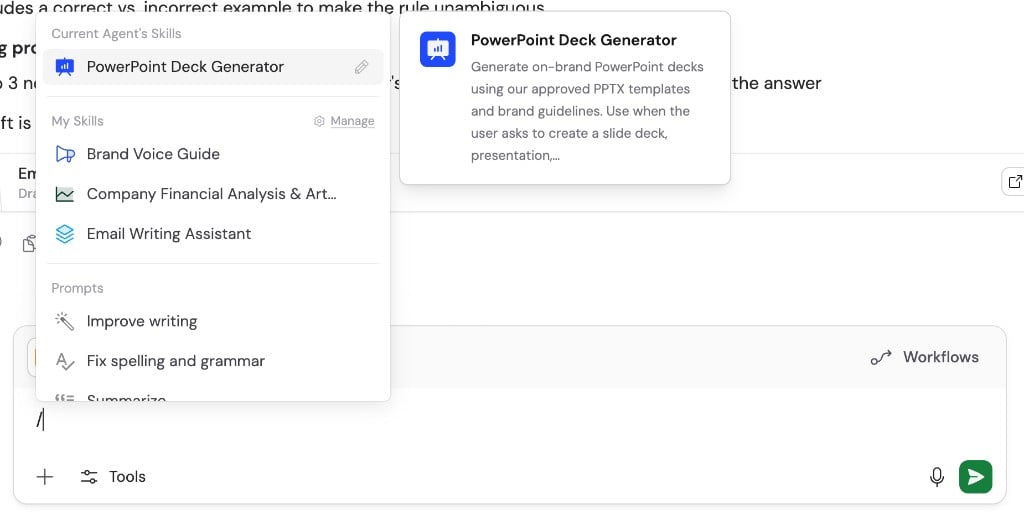
Type **/** in the chat box.
Select a Skill under:
* **Current Agent's Skills:** Skills attached to the Agent you are using
* **My Skills:** Skills installed personally or by an administrator
A specific name and description help Cassidy choose appropriately. If a Skill
is used too often or not often enough, improve its description and test again.
## Choose a Skill yourself
Use the slash menu when you already know which Skill you want.
Type **/** in the chat box.
Select a Skill under:
* **Current Agent's Skills:** Skills attached to the Agent you are using
* **My Skills:** Skills installed personally or by an administrator
 Continue writing your request after the Skill reference, then send the message.
Selecting a Skill makes your intention explicit, but you should still include the information needed to complete the task.
## Attach a Skill to an Agent
Attach a Skill when it should be available whenever someone uses a particular Agent.
Go to **Agents**, open the Agent, and click **Edit**.
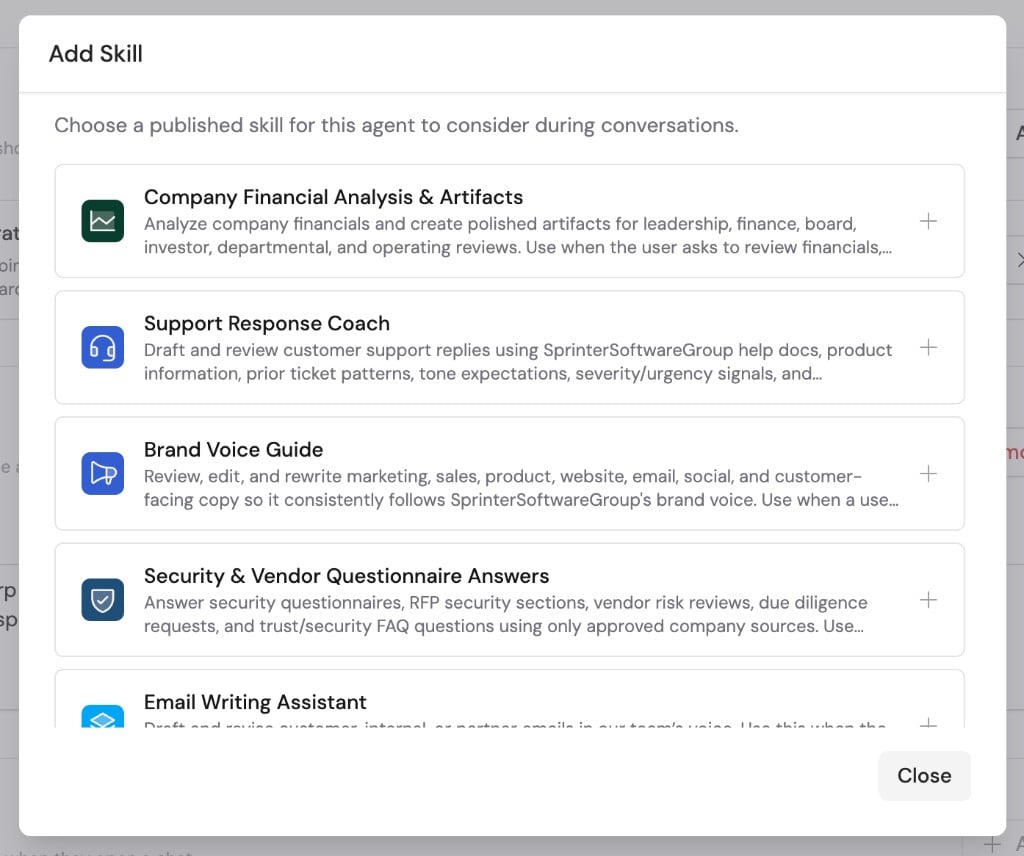
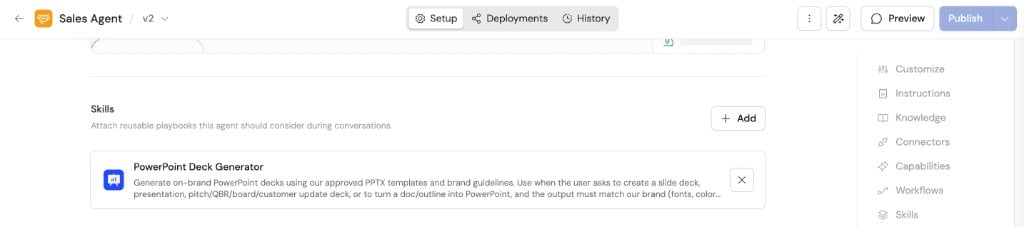
Find **Skills**, click **Add**, and choose a published Skill.
Continue writing your request after the Skill reference, then send the message.
Selecting a Skill makes your intention explicit, but you should still include the information needed to complete the task.
## Attach a Skill to an Agent
Attach a Skill when it should be available whenever someone uses a particular Agent.
Go to **Agents**, open the Agent, and click **Edit**.
Find **Skills**, click **Add**, and choose a published Skill.
 Confirm **Code Execution & File Creation** is enabled under **Advanced
Settings**.
Publish the Agent so the change becomes available to users.
People must still be able to view the Skill and access its referenced Knowledge Base sources, Workflows, and external applications. Attaching a Skill does not grant those permissions.
## Add a Skill to a Workflow AI action
Skills can provide instructions and resources to **Generate Text** and **Generate Text with Agent** actions.
For **Generate Text with Agent**, action-level Skills are added to any Skills already attached to the selected Agent.
In the Workflow builder, select a **Generate Text** or **Generate Text with Agent** action.
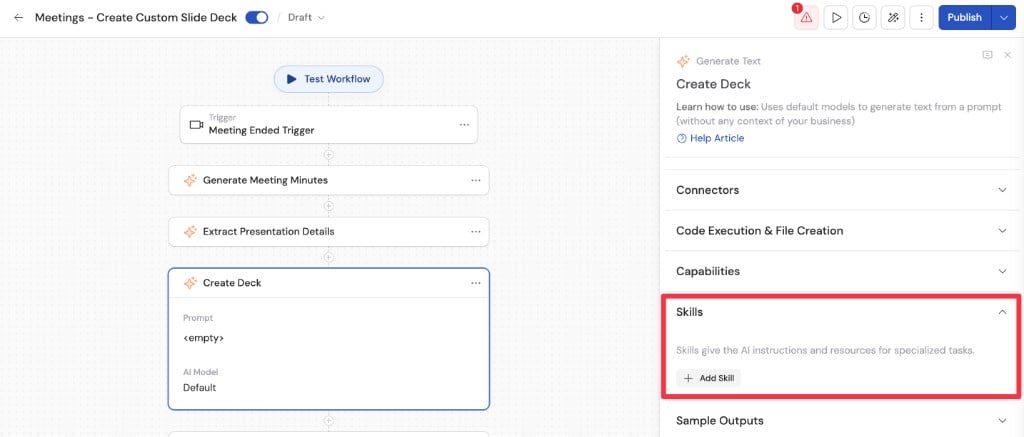
Expand **Skills**, click **Add Skill**, and choose a published Skill.
Adding the first Skill automatically enables **Code Execution & File Creation** for that action.
Confirm **Code Execution & File Creation** is enabled under **Advanced
Settings**.
Publish the Agent so the change becomes available to users.
People must still be able to view the Skill and access its referenced Knowledge Base sources, Workflows, and external applications. Attaching a Skill does not grant those permissions.
## Add a Skill to a Workflow AI action
Skills can provide instructions and resources to **Generate Text** and **Generate Text with Agent** actions.
For **Generate Text with Agent**, action-level Skills are added to any Skills already attached to the selected Agent.
In the Workflow builder, select a **Generate Text** or **Generate Text with Agent** action.
Expand **Skills**, click **Add Skill**, and choose a published Skill.
Adding the first Skill automatically enables **Code Execution & File Creation** for that action.
 Run the Workflow with realistic inputs, check the result, and publish the Workflow.
Only add Skills relevant to that AI step. Too many unrelated Skills make selection less predictable.
## If a Skill is unavailable
Check:
* The Skill has a published version.
* You can view the Skill.
* The Agent has **Code Execution & File Creation** enabled.
* You can access the Skill's referenced resources.
* You are using a chat started directly in Cassidy, or the Skill is explicitly attached to the Agent or Workflow action.
## Next steps
Improve selection, instructions, resources, and testing.
Control who can discover and install a Skill.
Run the Workflow with realistic inputs, check the result, and publish the Workflow.
Only add Skills relevant to that AI step. Too many unrelated Skills make selection less predictable.
## If a Skill is unavailable
Check:
* The Skill has a published version.
* You can view the Skill.
* The Agent has **Code Execution & File Creation** enabled.
* You can access the Skill's referenced resources.
* You are using a chat started directly in Cassidy, or the Skill is explicitly attached to the Agent or Workflow action.
## Next steps
Improve selection, instructions, resources, and testing.
Control who can discover and install a Skill.