You need admin access to manage roles and run the migration.
What changes
Before migration, groups controlled both visibility and permissions. If someone belonged to multiple groups, their permissions were additive. For example, if one group allowed editing Workflows and another group allowed inviting members, the person could do both. After migration, roles control privileges and groups control visibility. A person can still have multiple roles, and their effective privileges are the union of those roles. Group membership stays focused on which Agents, Workflows, Knowledge Base collections, chats, and meetings the person can access.What Cassidy creates
Migration is designed to preserve existing access. Cassidy generates a migration plan before changing your workspace.Managed role assignments
Legacy admins keep the managed admin role they need to manage the workspace.
Generated custom roles
Groups that previously granted feature permissions become custom roles, such as Migrated: Sales Team.
Existing groups remain
Existing group memberships stay in place for visibility, so shared resources stay visible to the same teams.
Existing SAML group mappings are backfilled into role mappings where needed, so automatic role assignment keeps working after migration.
Migrate your workspace
1
Open Roles
Go to Organization Settings and click Roles.
2
Start migration
If your workspace still uses legacy group permissions, click the migration prompt.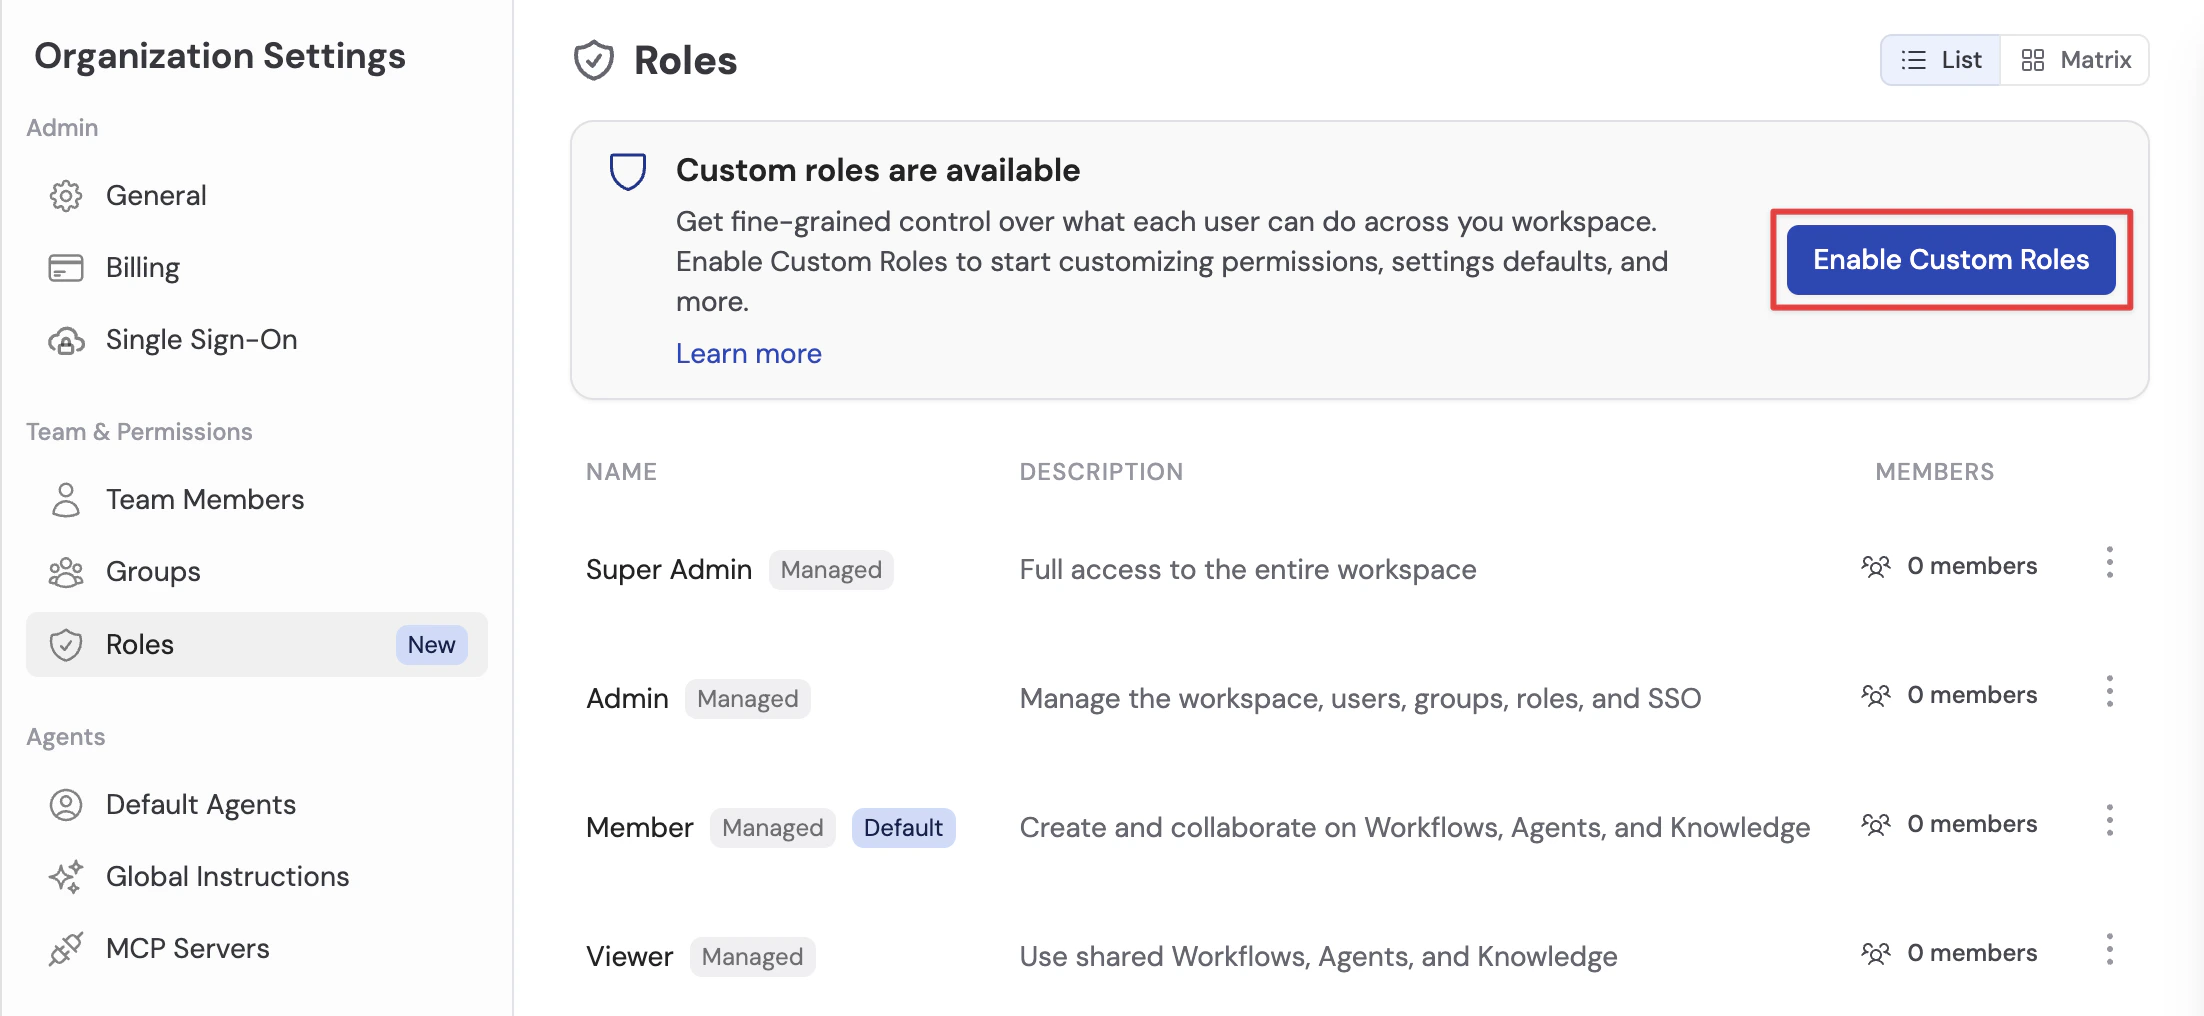
3
Review the migration plan
Review the managed role assignments and custom roles Cassidy will create. The plan explains which groups map to each generated custom role.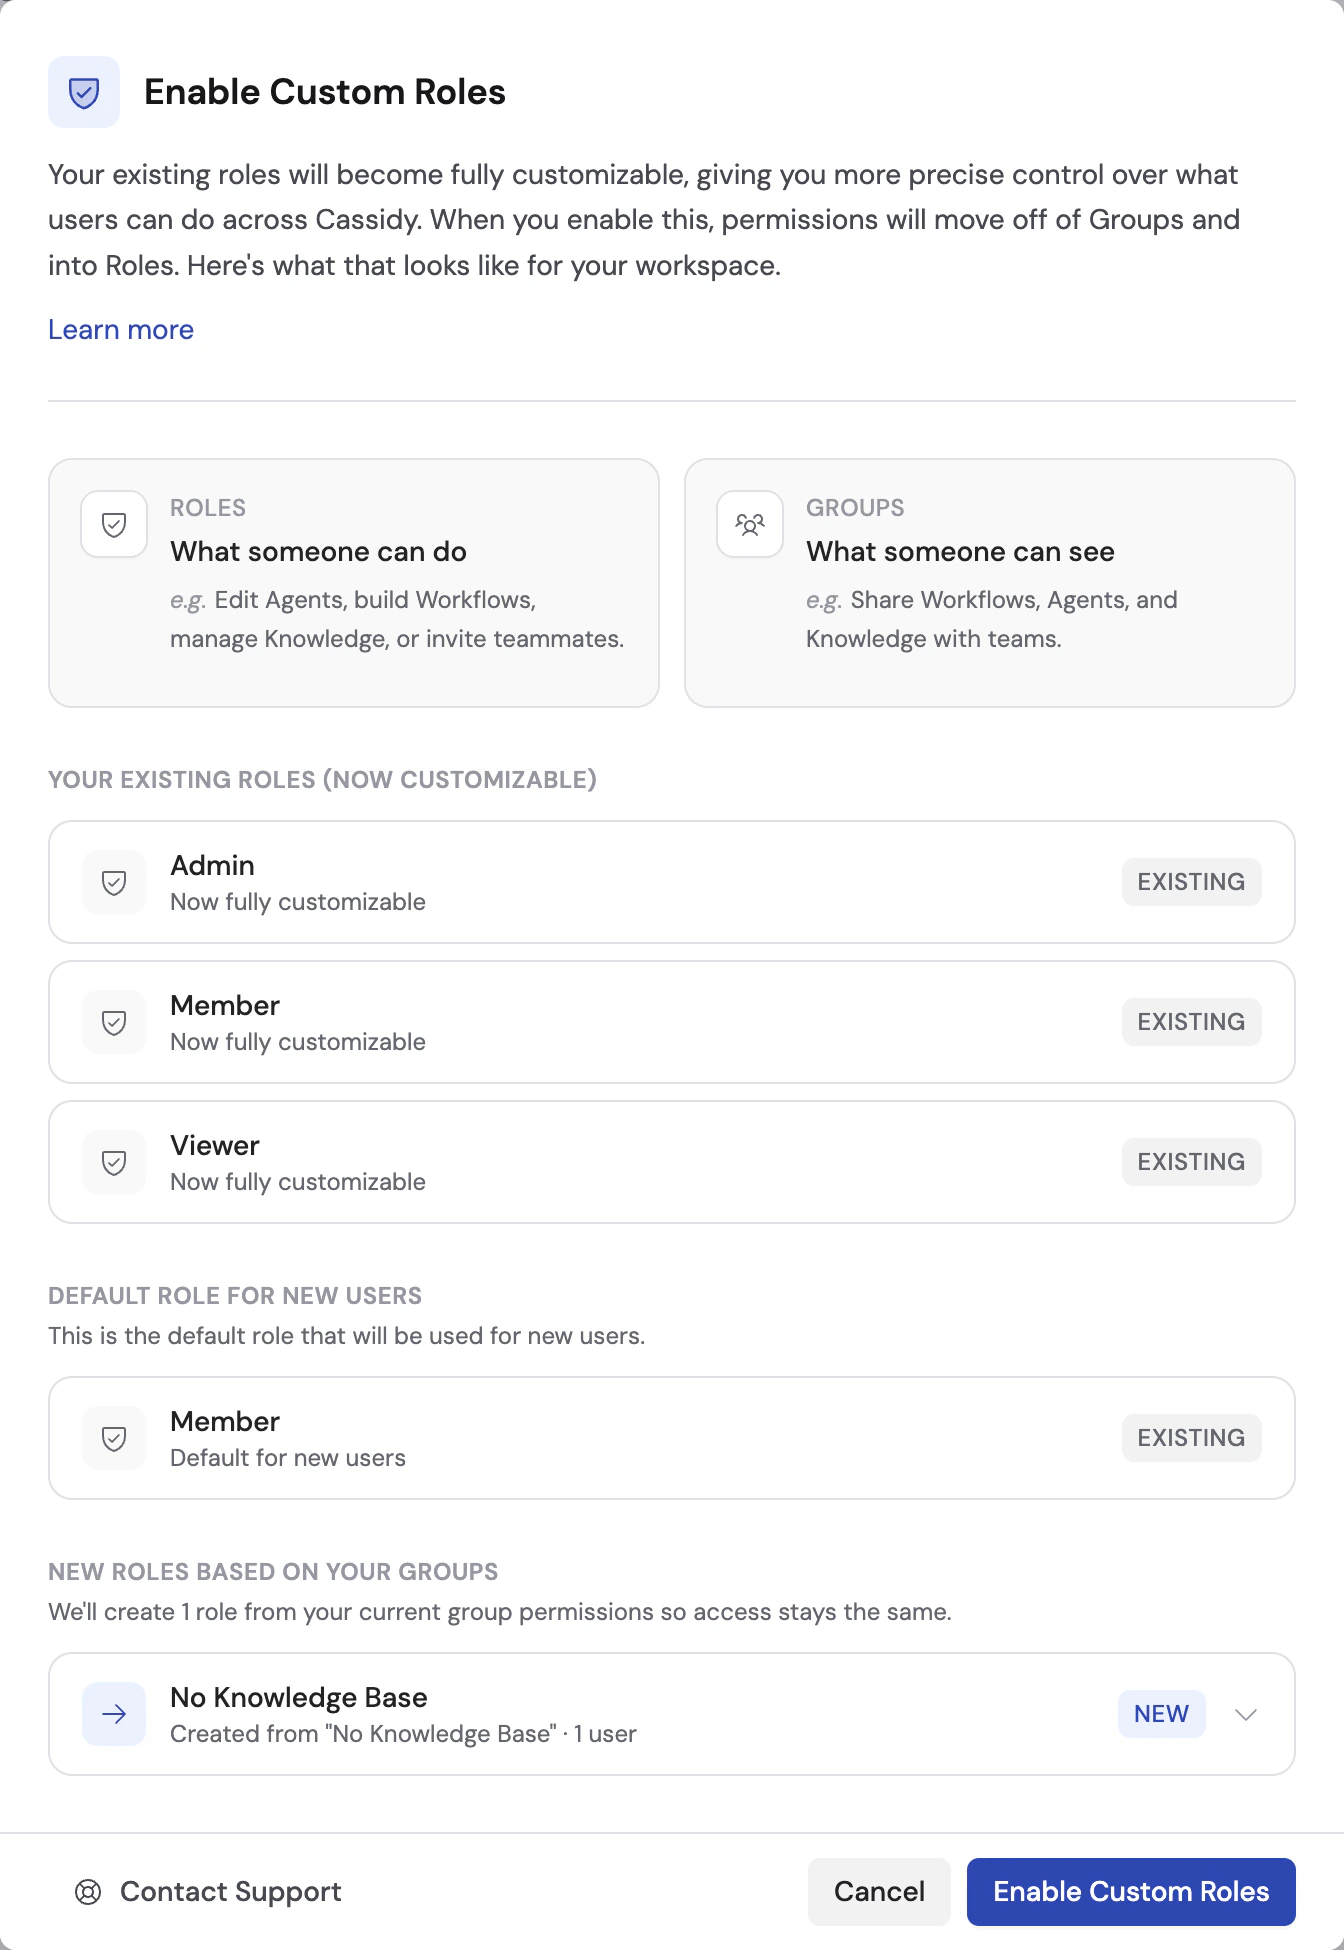
4
Enable custom roles
Click Enable Custom Roles. Cassidy updates your workspace to the custom roles system.
5
Review generated roles
Open each generated custom role. Rename roles to match how your team talks about access, such as Workflow Editors or Knowledge Base Managers.
6
Update privileges if needed
Adjust generated role privileges if the migrated role is broader than you want going forward. Keep the generated role in place until everyone who needs those privileges has another role that grants them.
Your workspace now uses roles for privileges and groups for visibility.
Next steps
Assign roles and groups
Learn the current roles and groups model.
Set up SSO
Map your identity provider attributes to Cassidy roles and groups.