SSO is available on Enterprise plans only. Contact us to learn more or upgrade.
Verify your domain
Before you can enable SSO, you need to verify that you own the email domain your team uses to sign in.1
Open organization settings
Click your account name at the bottom of the sidebar, then click the gear icon next to your organization name.
2
Go to Single Sign-On
In the left sidebar, click Single Sign-On. You’ll see the SSO configuration panel.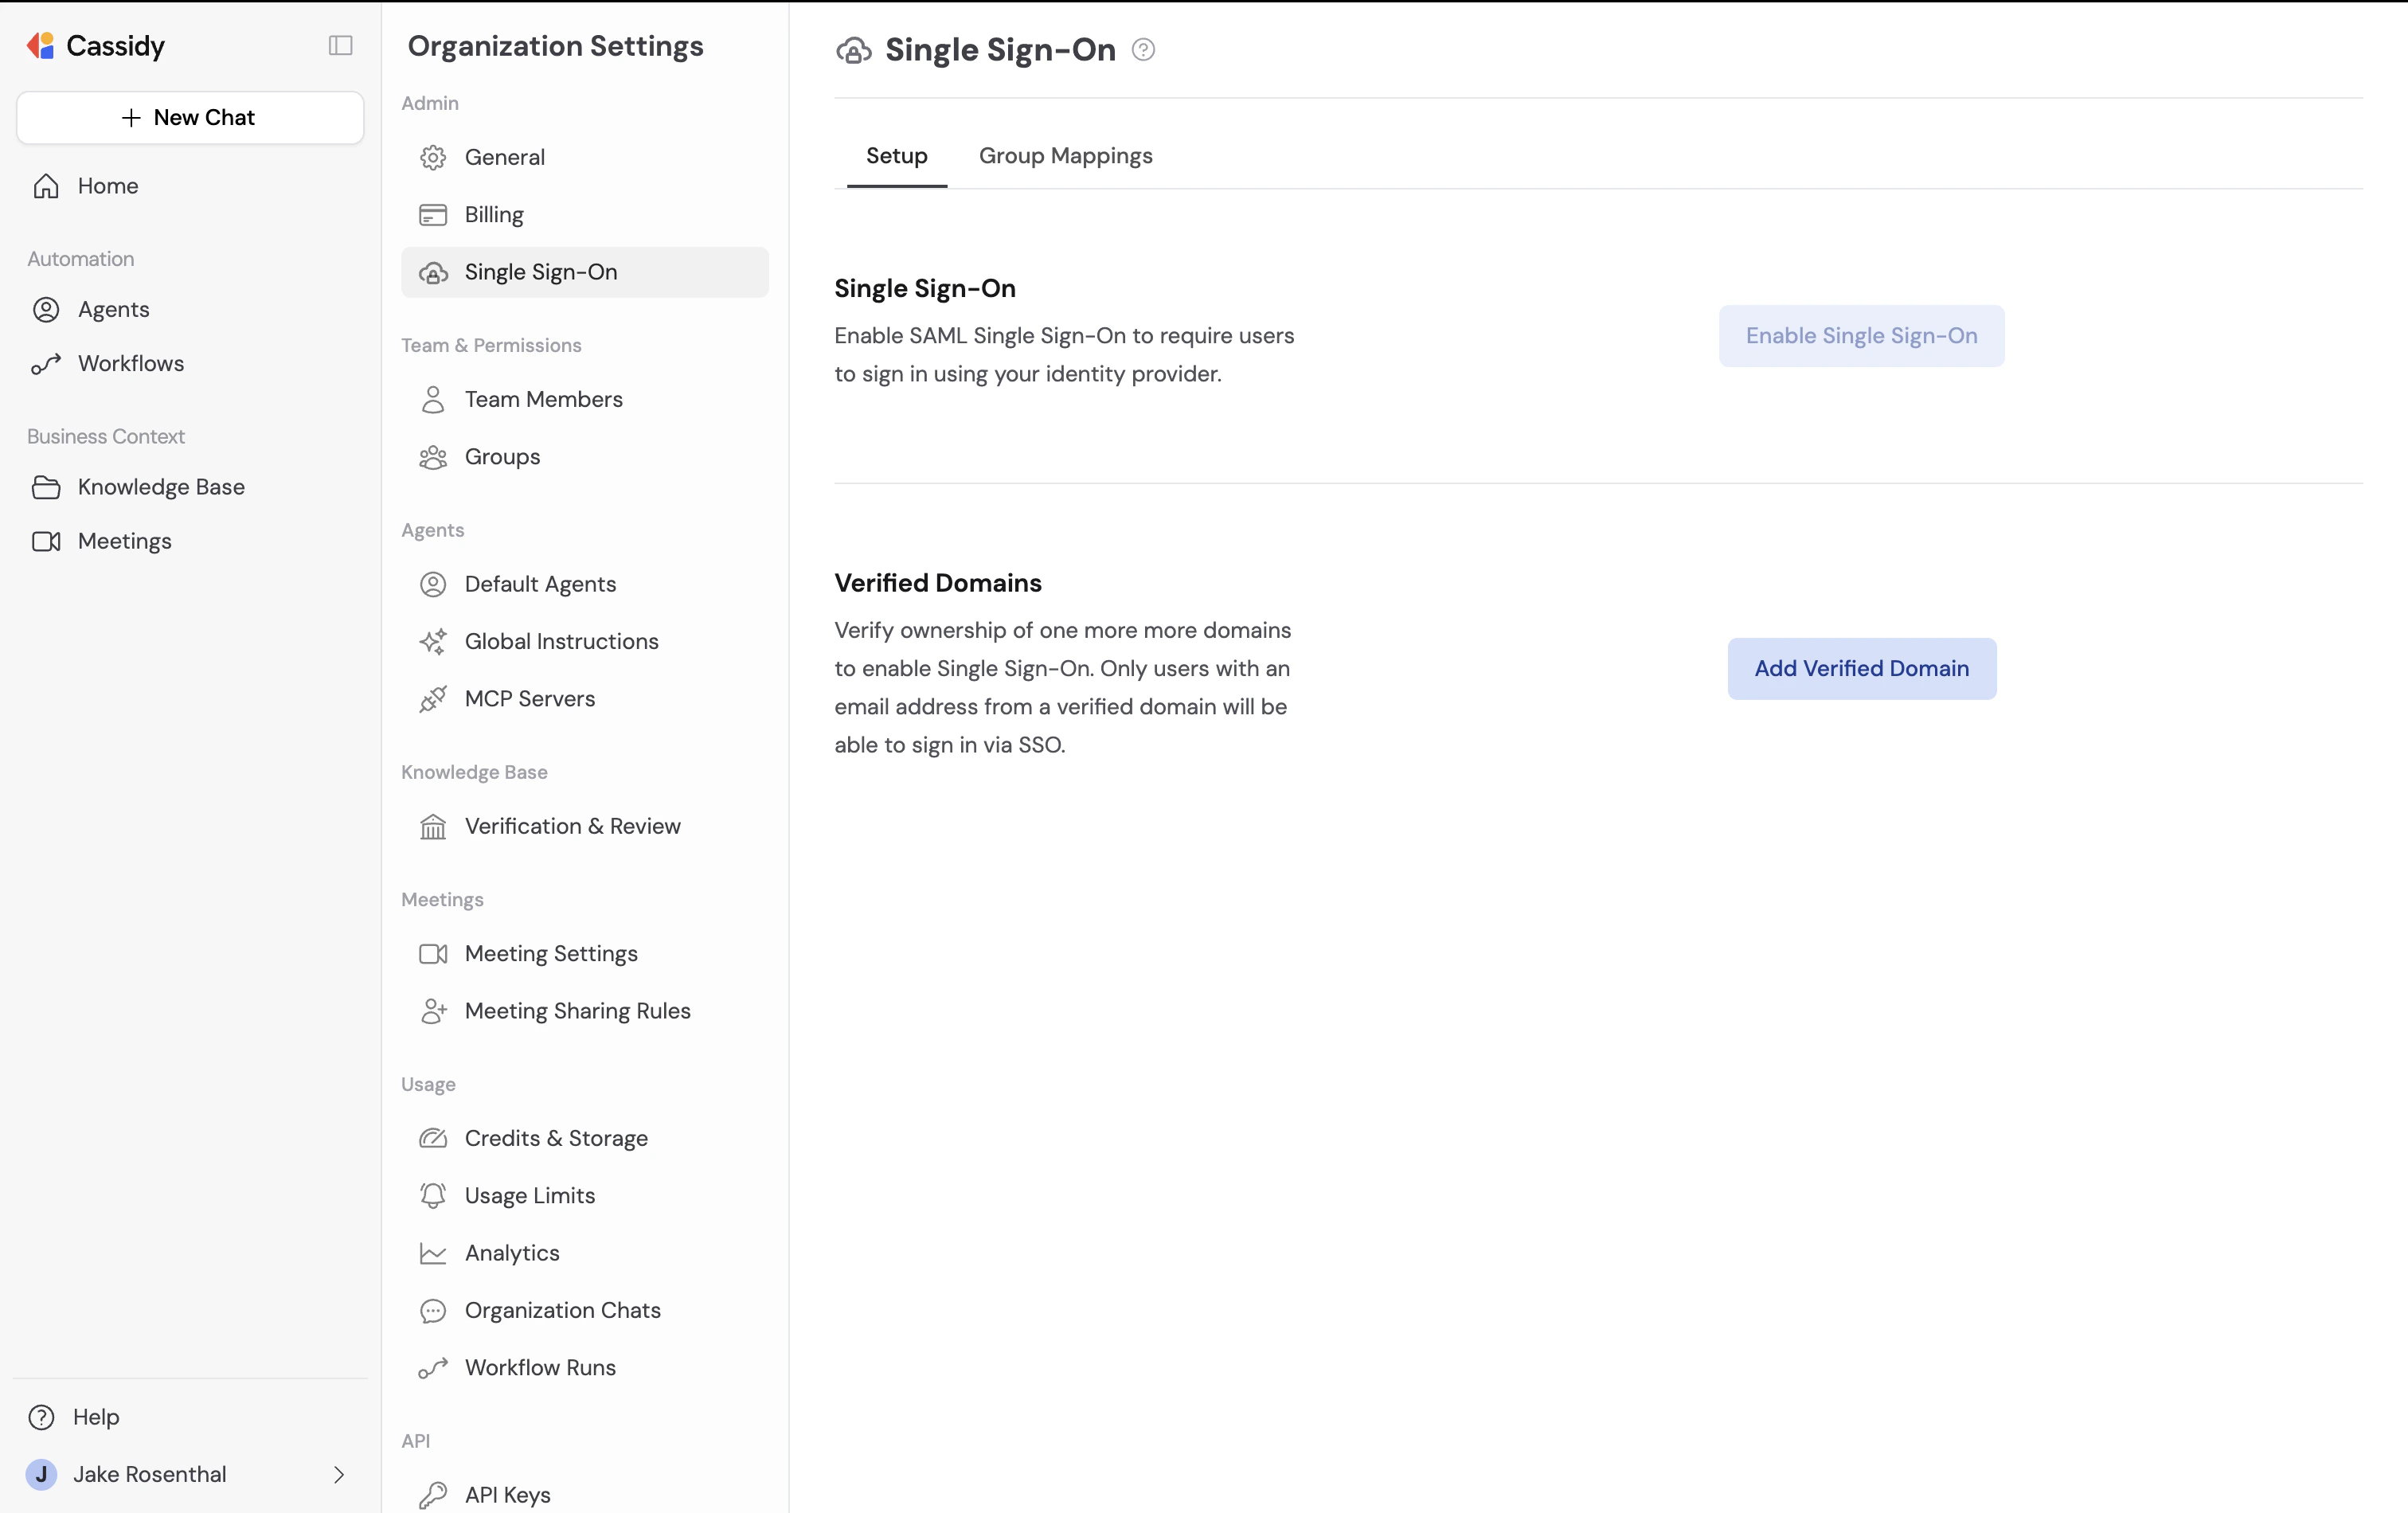
3
Add your domain
Click Add Verified Domain and enter the email domain you want to enable for SSO (e.g., 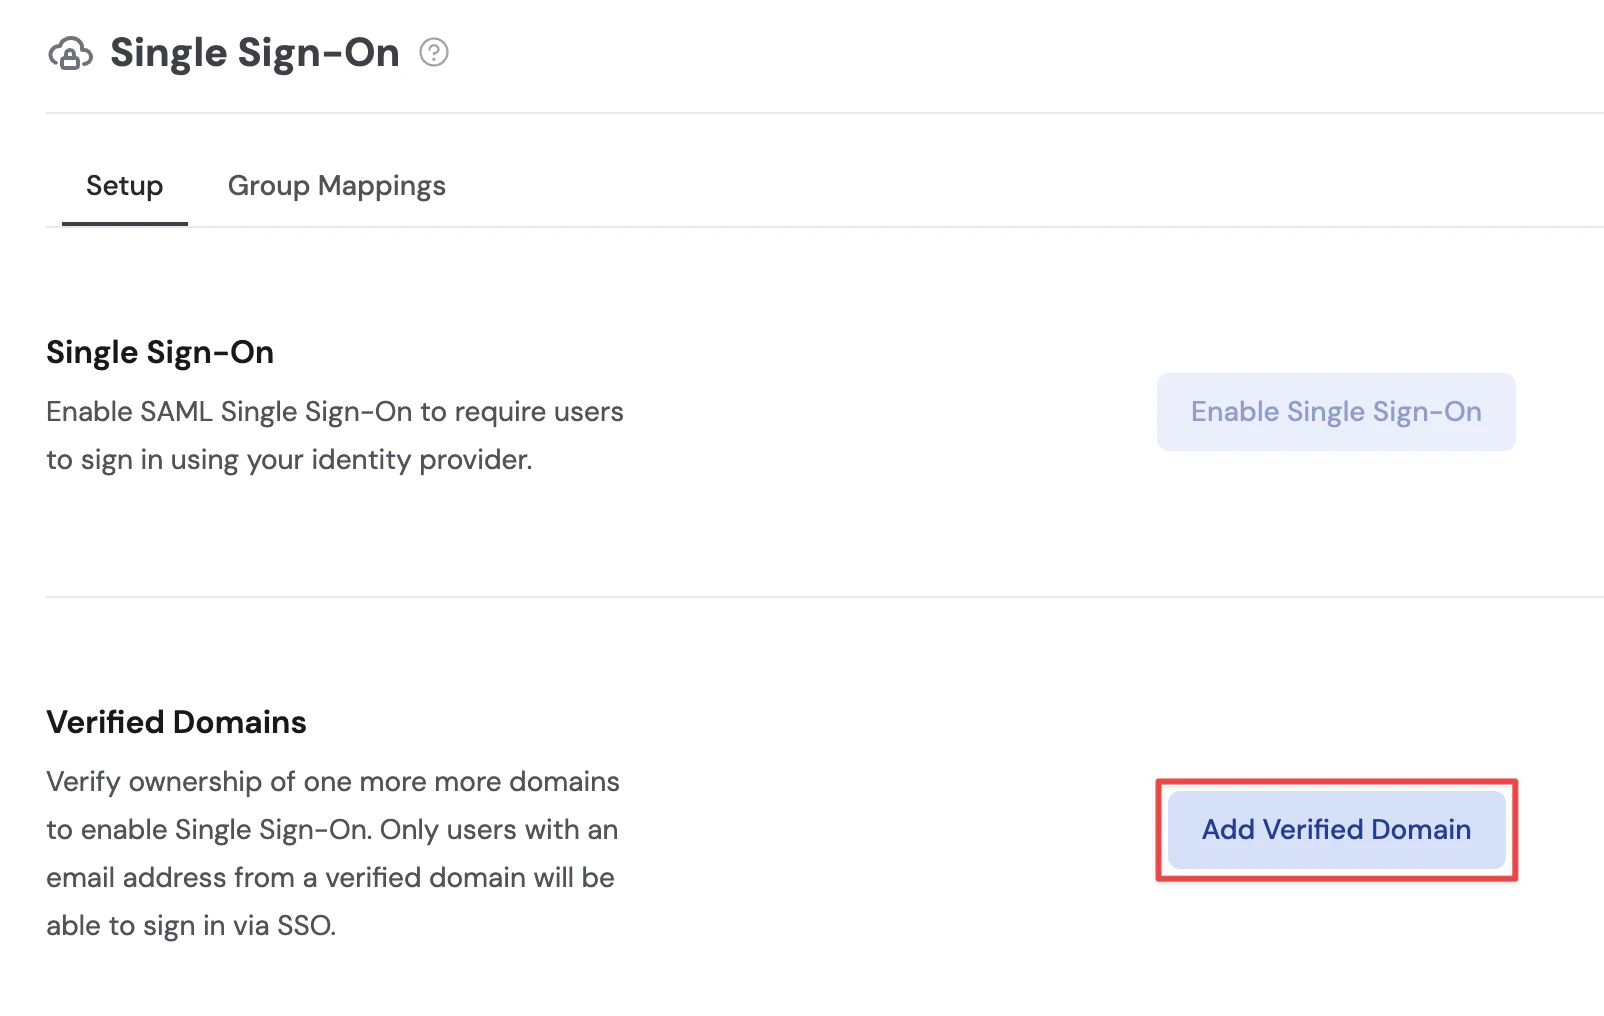
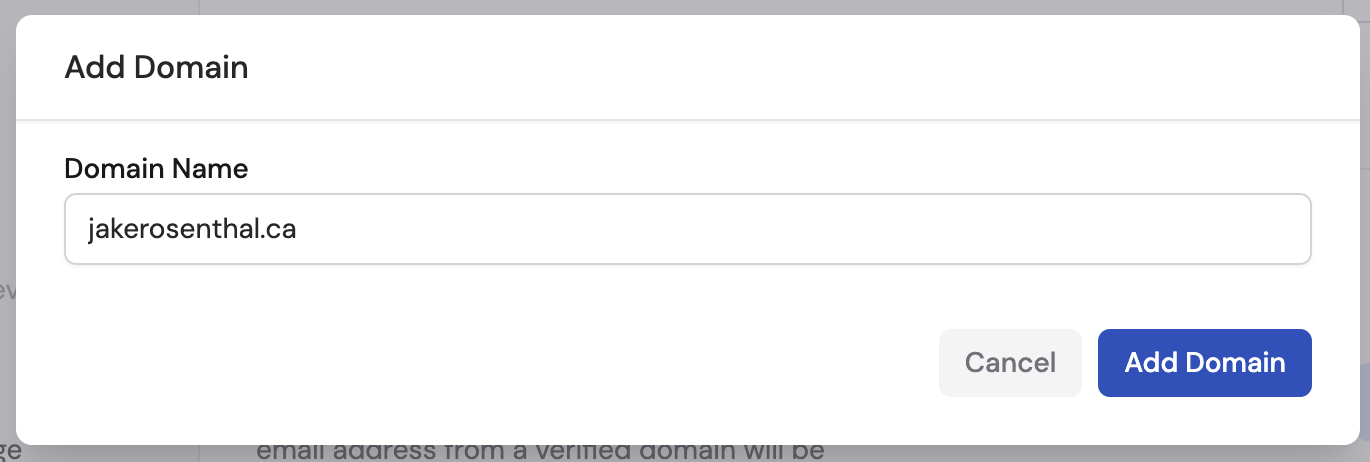
yourcompany.com).4
Add the DNS record
Cassidy will provide a TXT record to add to your domain’s DNS settings. Copy the record value and add it to your DNS provider.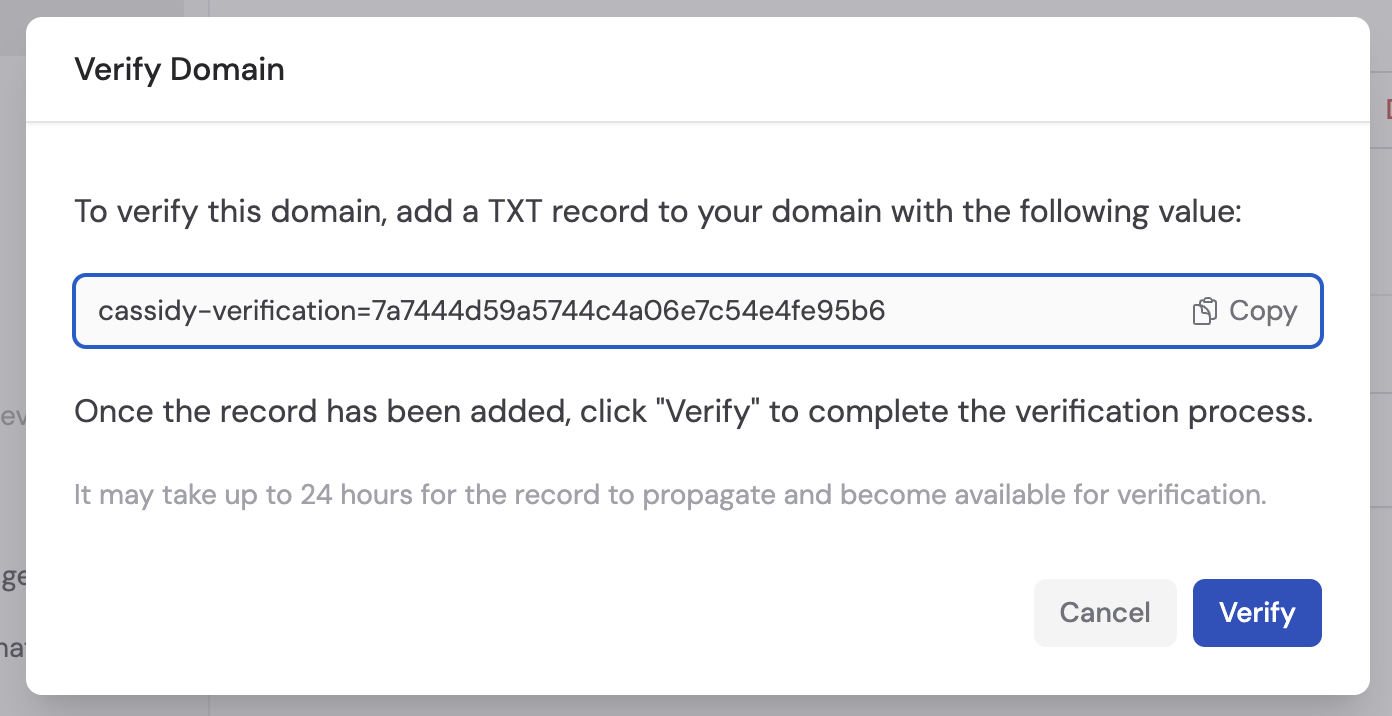
5
Initiate verification
Once you’ve added the TXT record to your DNS provider, return to Cassidy and click Verify Domain.
6
Confirm verification
Once the TXT record is detected, your domain is verified.
Your domain is verified. You can now enable Single Sign-On.
Enable SSO
Once you have at least one verified domain, you can enable SSO.1
Click Enable Single Sign-On
On the Single Sign-On settings page, click Enable Single Sign-On. This opens the SSO configuration modal.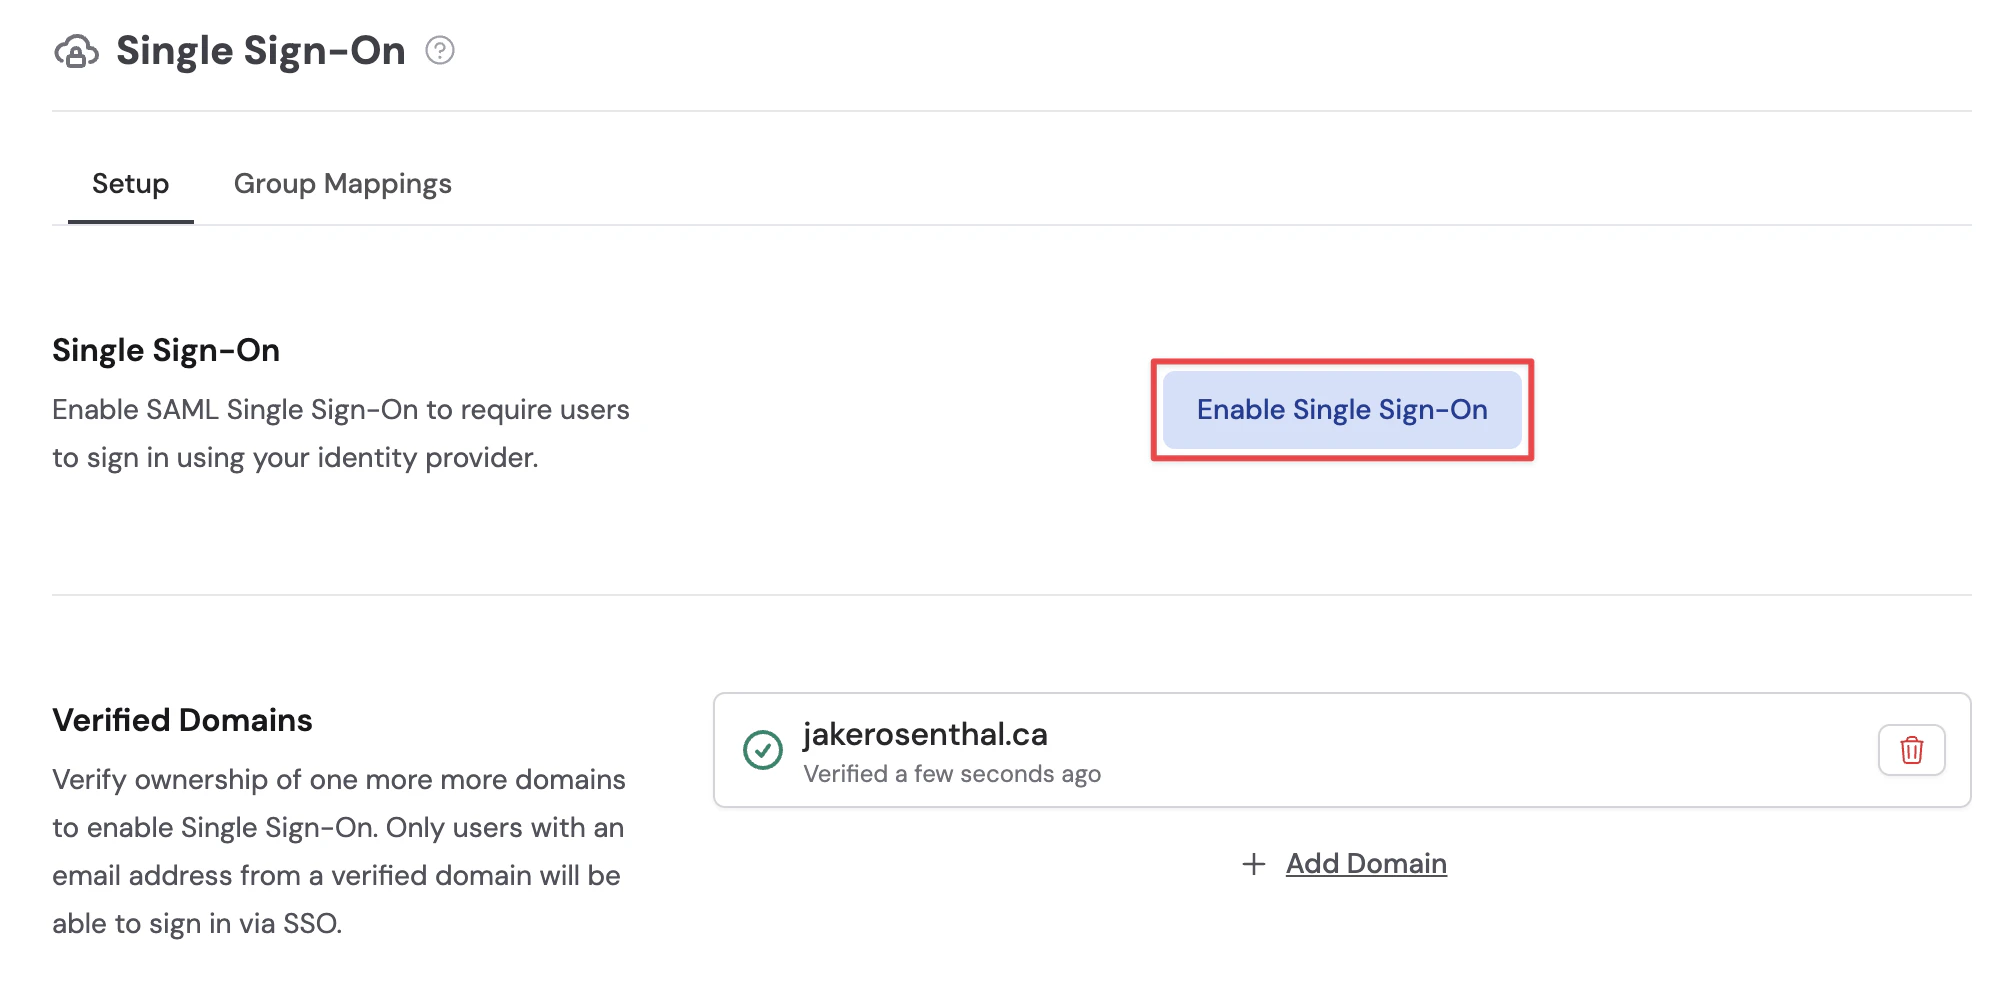
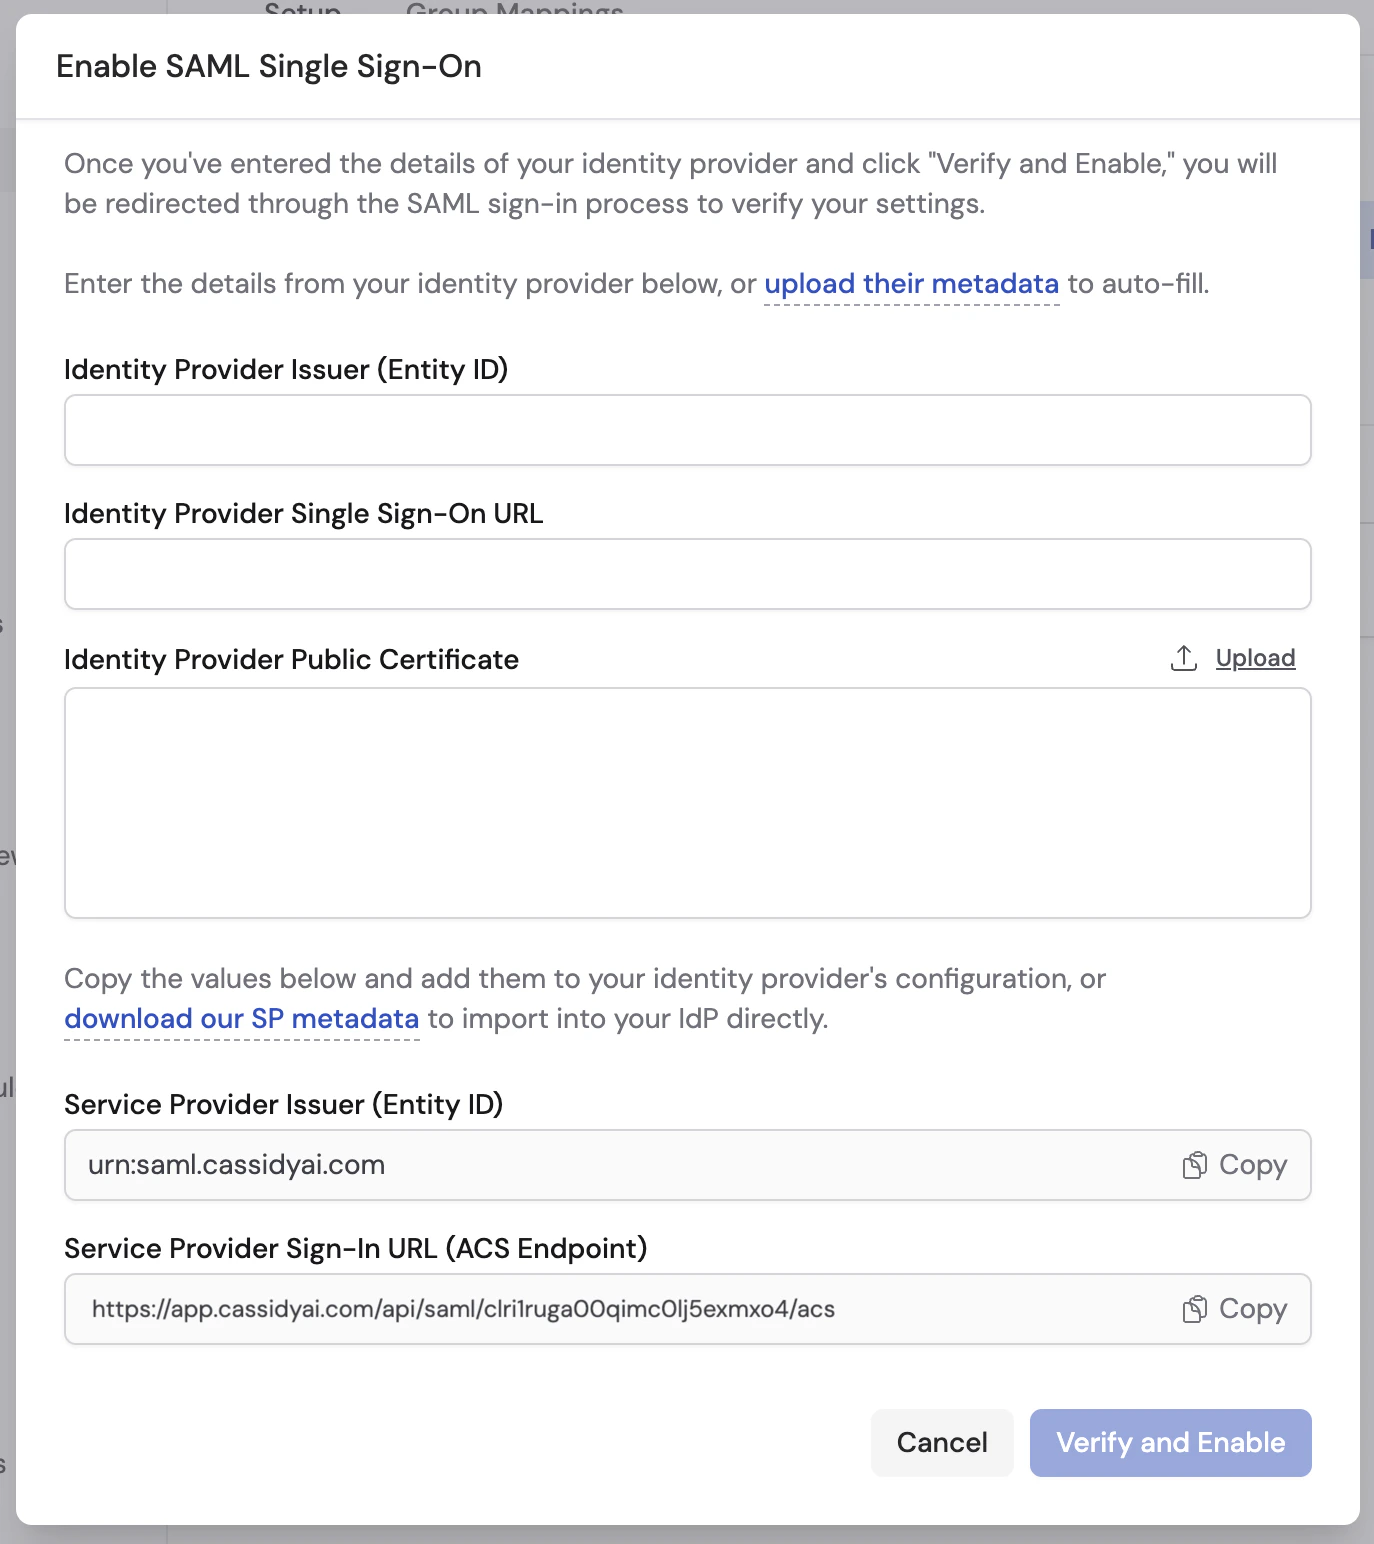
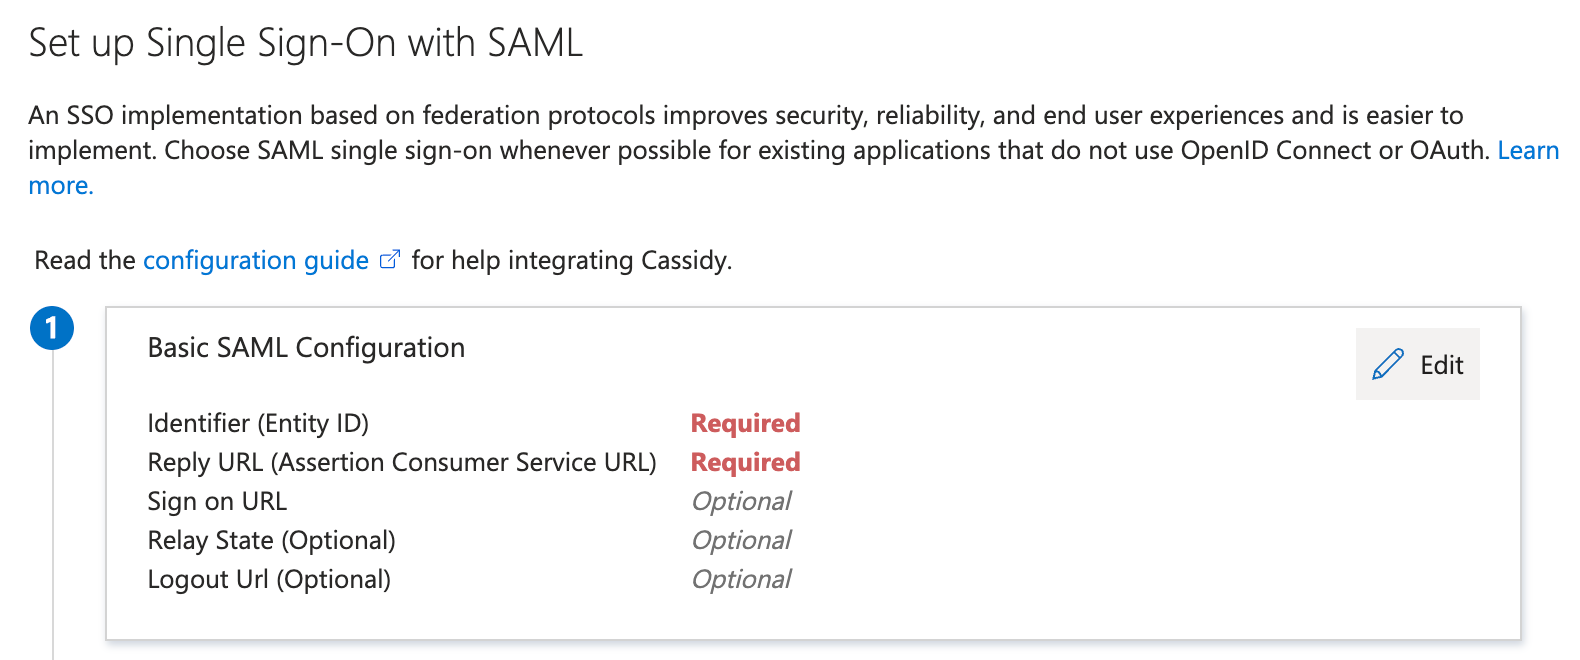
- Identity provider details — Enter your IdP’s Entity ID, SSO URL, and public certificate. You can fill these in manually, or upload your IdP’s metadata XML to auto-fill all three fields at once.
- Service provider details — Copy Cassidy’s Entity ID and Sign-In URL into your IdP’s configuration. Some IdPs also support importing an SP metadata file — click download our SP metadata to get the file.
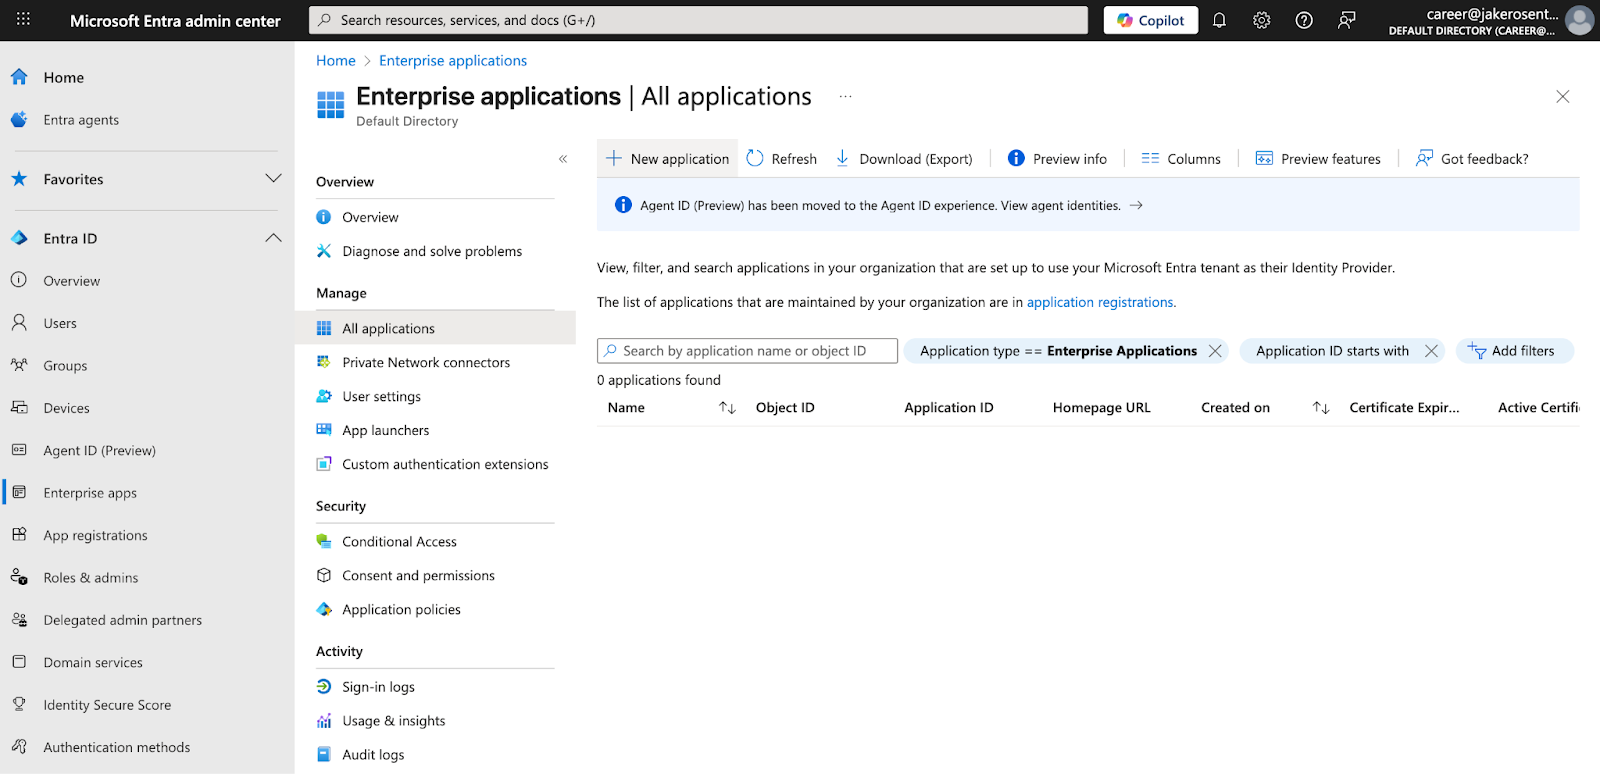
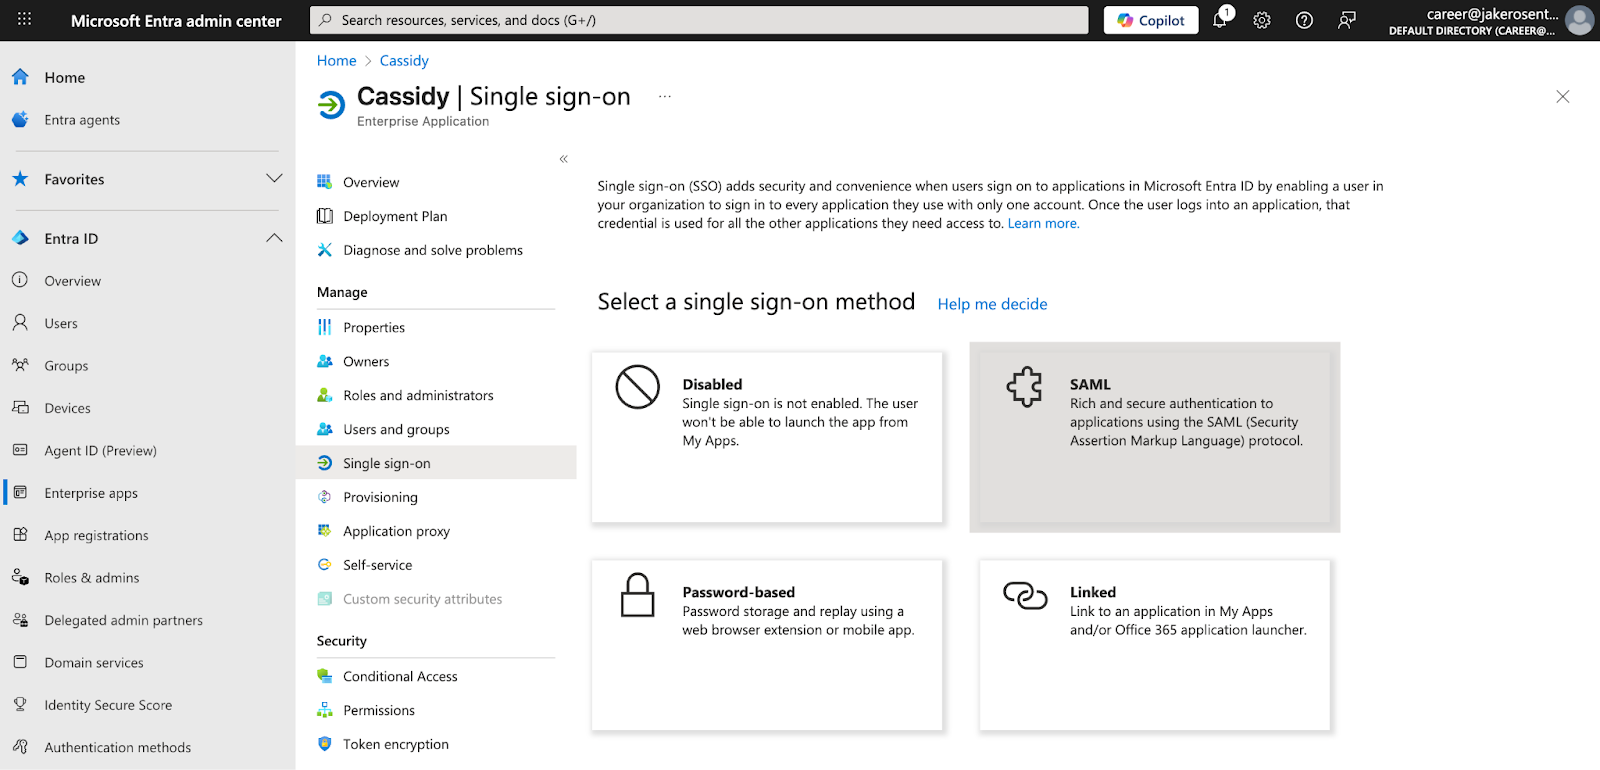
Configure your identity provider
Cassidy works with any SAML 2.0 identity provider. Below are step-by-step guides for Okta and Microsoft Entra ID — if you use a different provider, the general flow is the same: create a SAML application in your IdP, enter Cassidy’s SP values, configure attribute mappings, and copy your IdP’s values back into Cassidy.- Okta
- Microsoft Entra ID
1
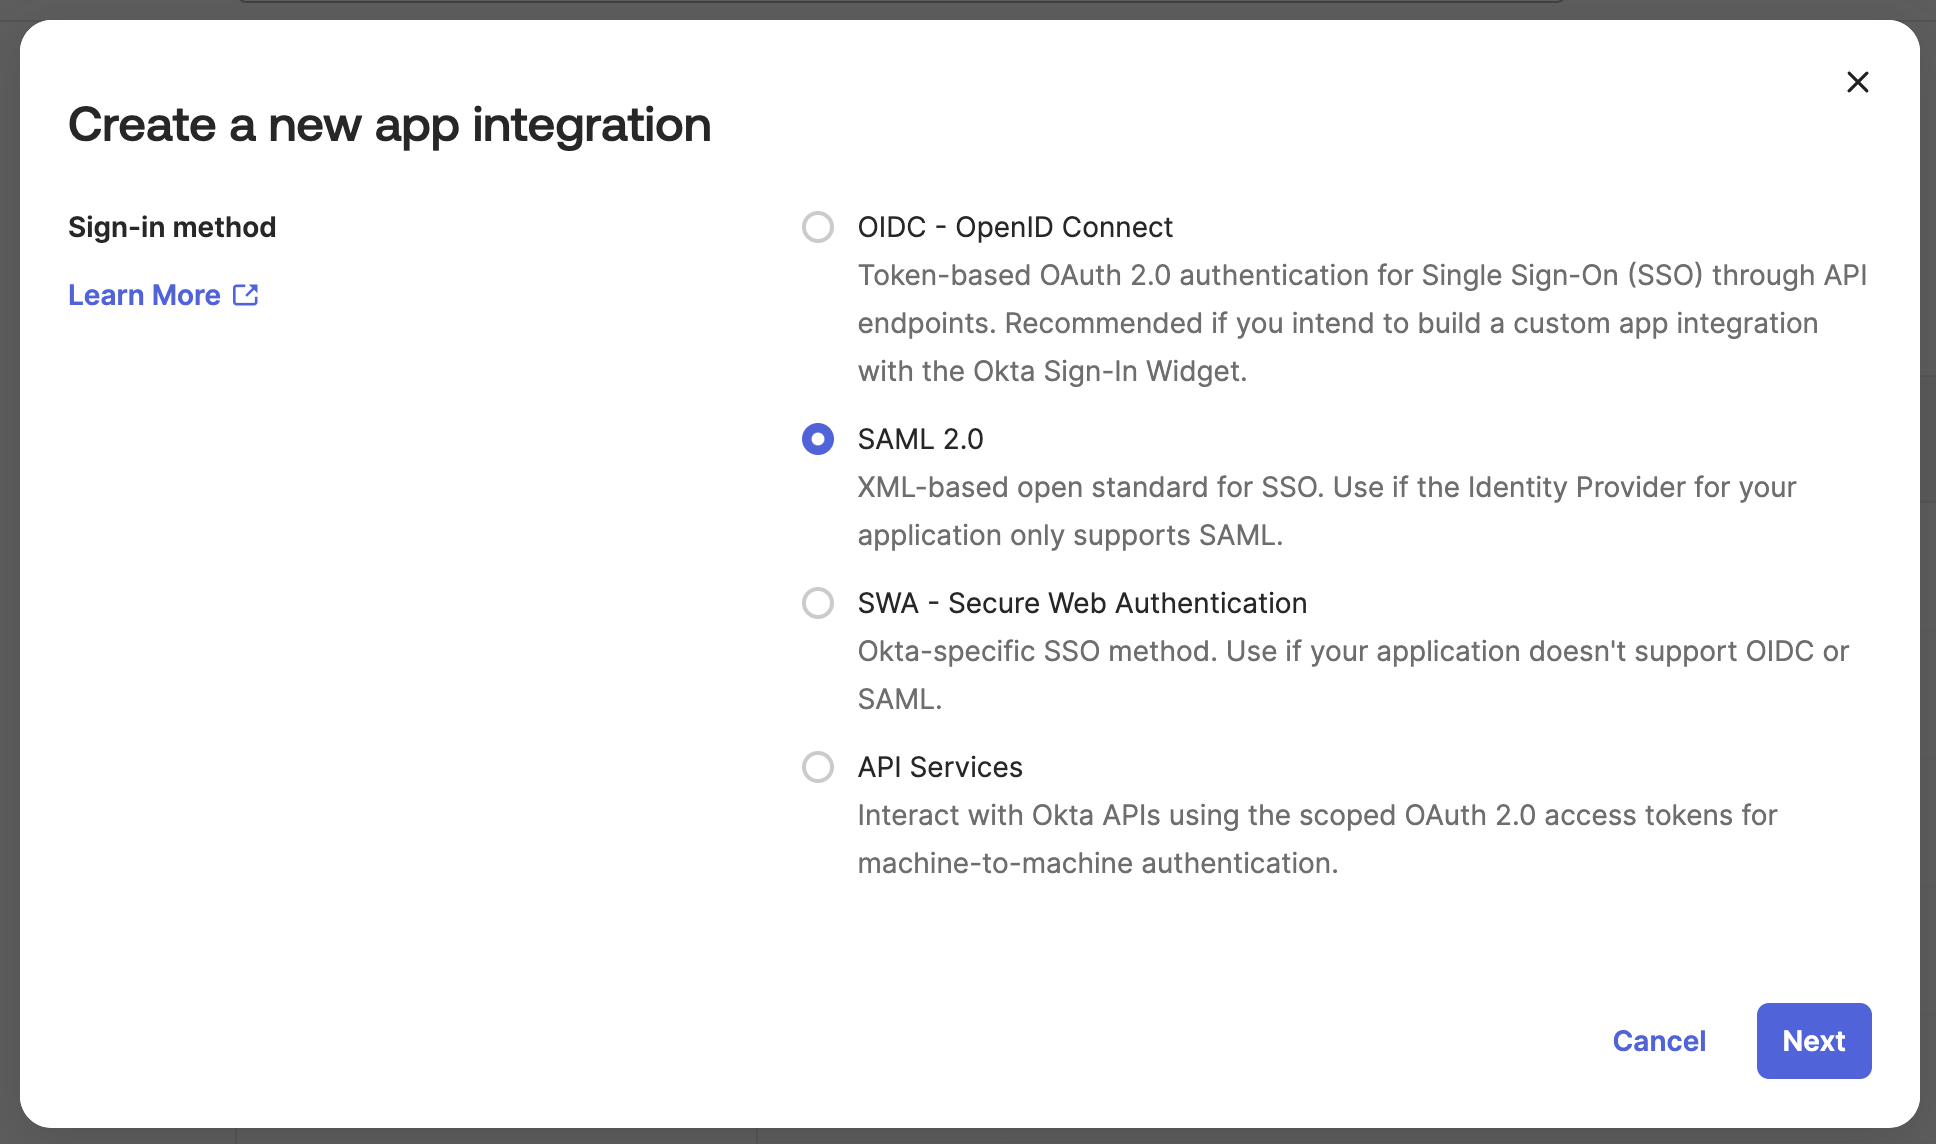
Create a SAML 2.0 application in Okta
In your Okta admin dashboard, go to Applications → Create App Integration. Select SAML 2.0 as the sign-in method.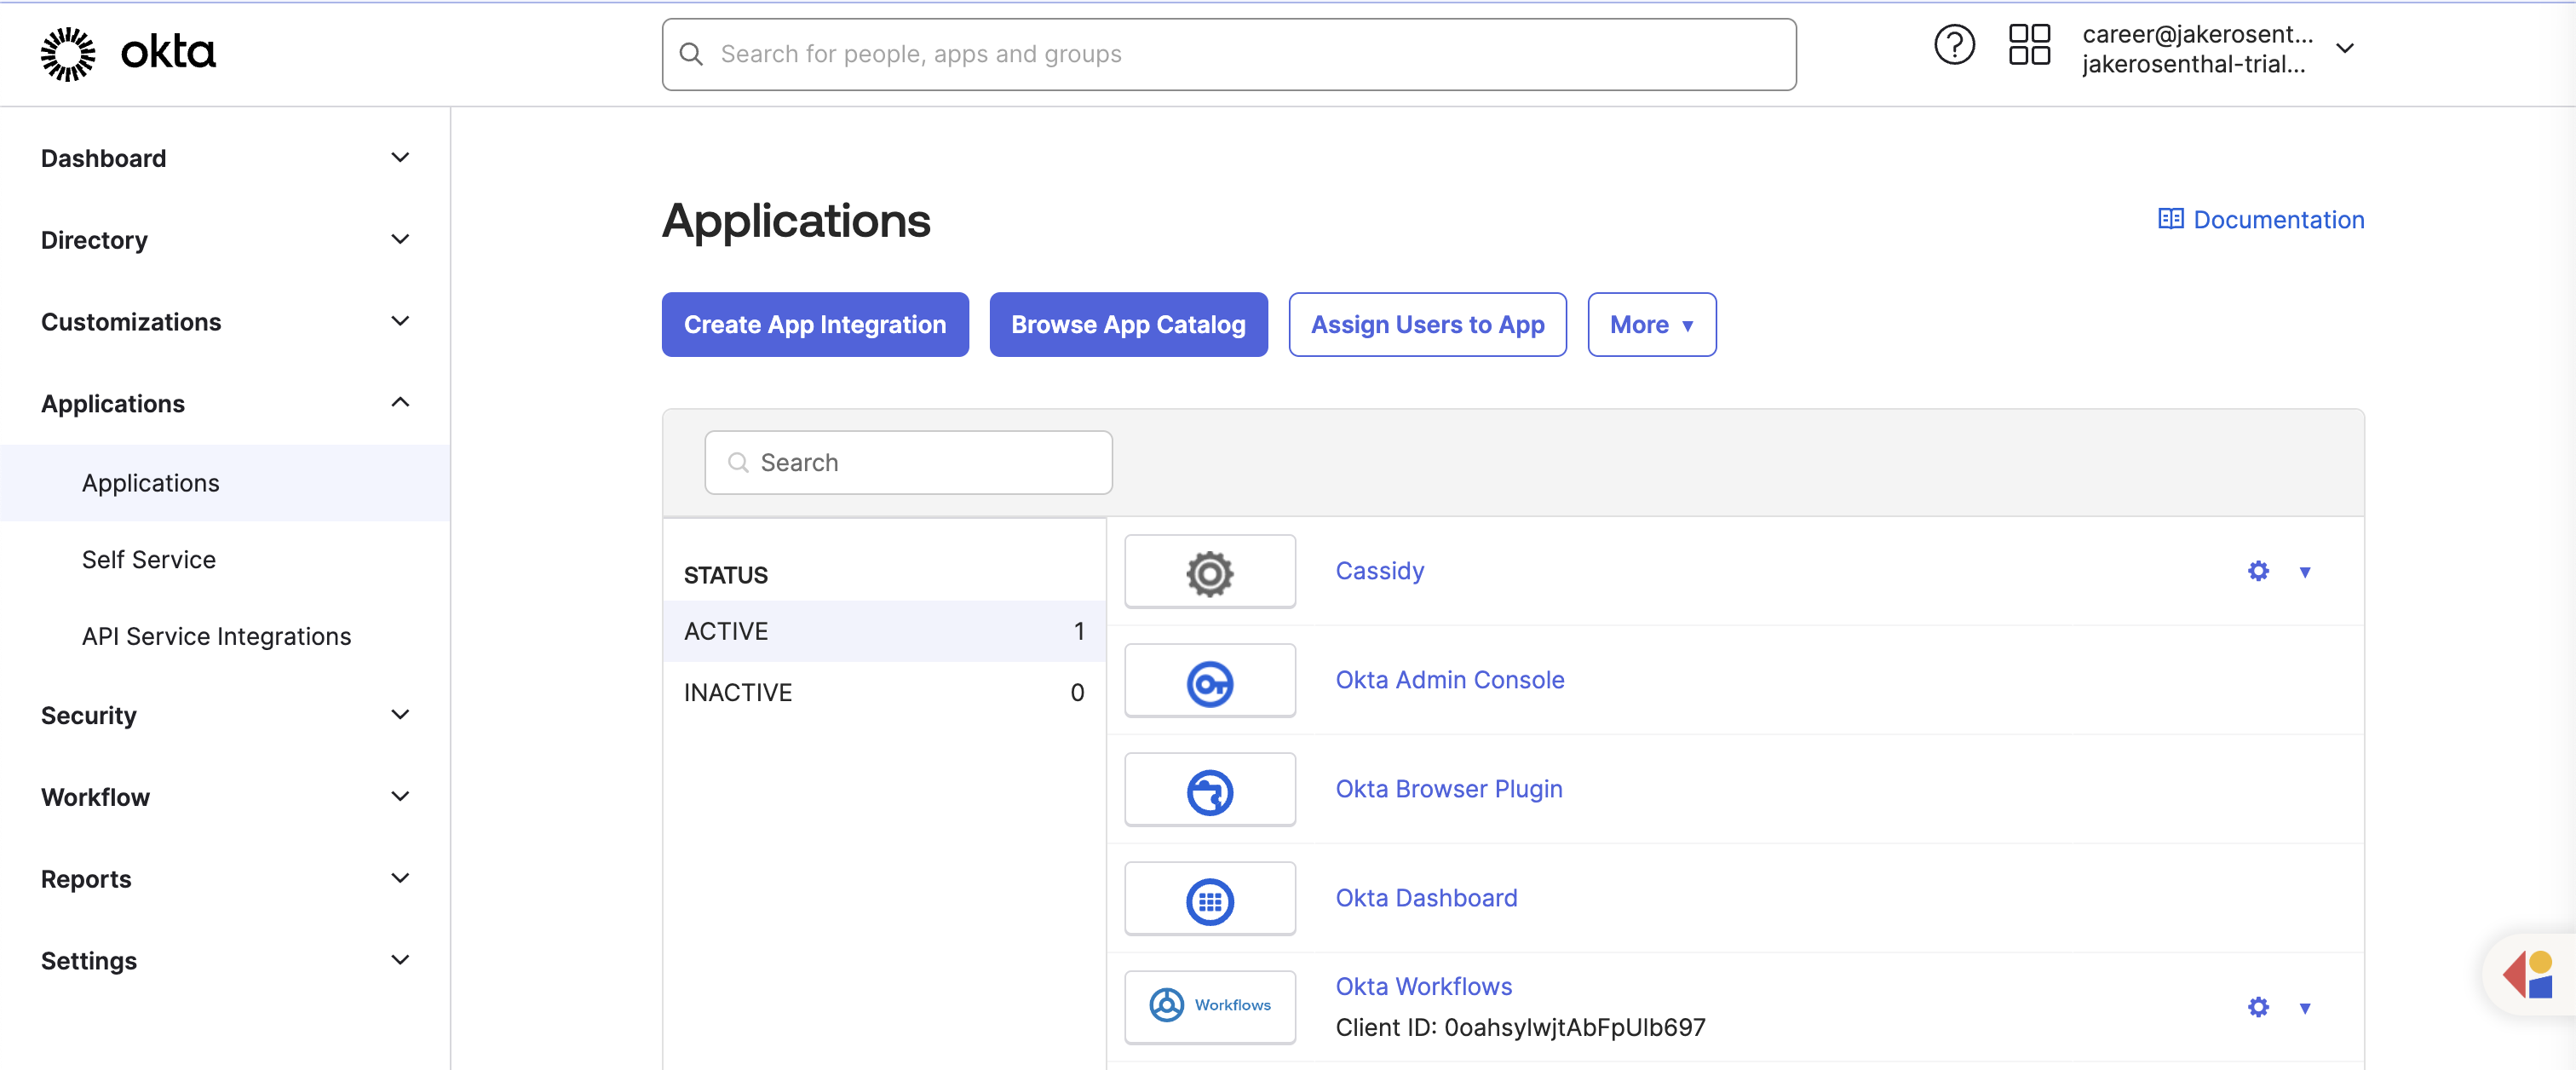
2
Configure SAML settings
Enter the following values from Cassidy’s SSO configuration modal: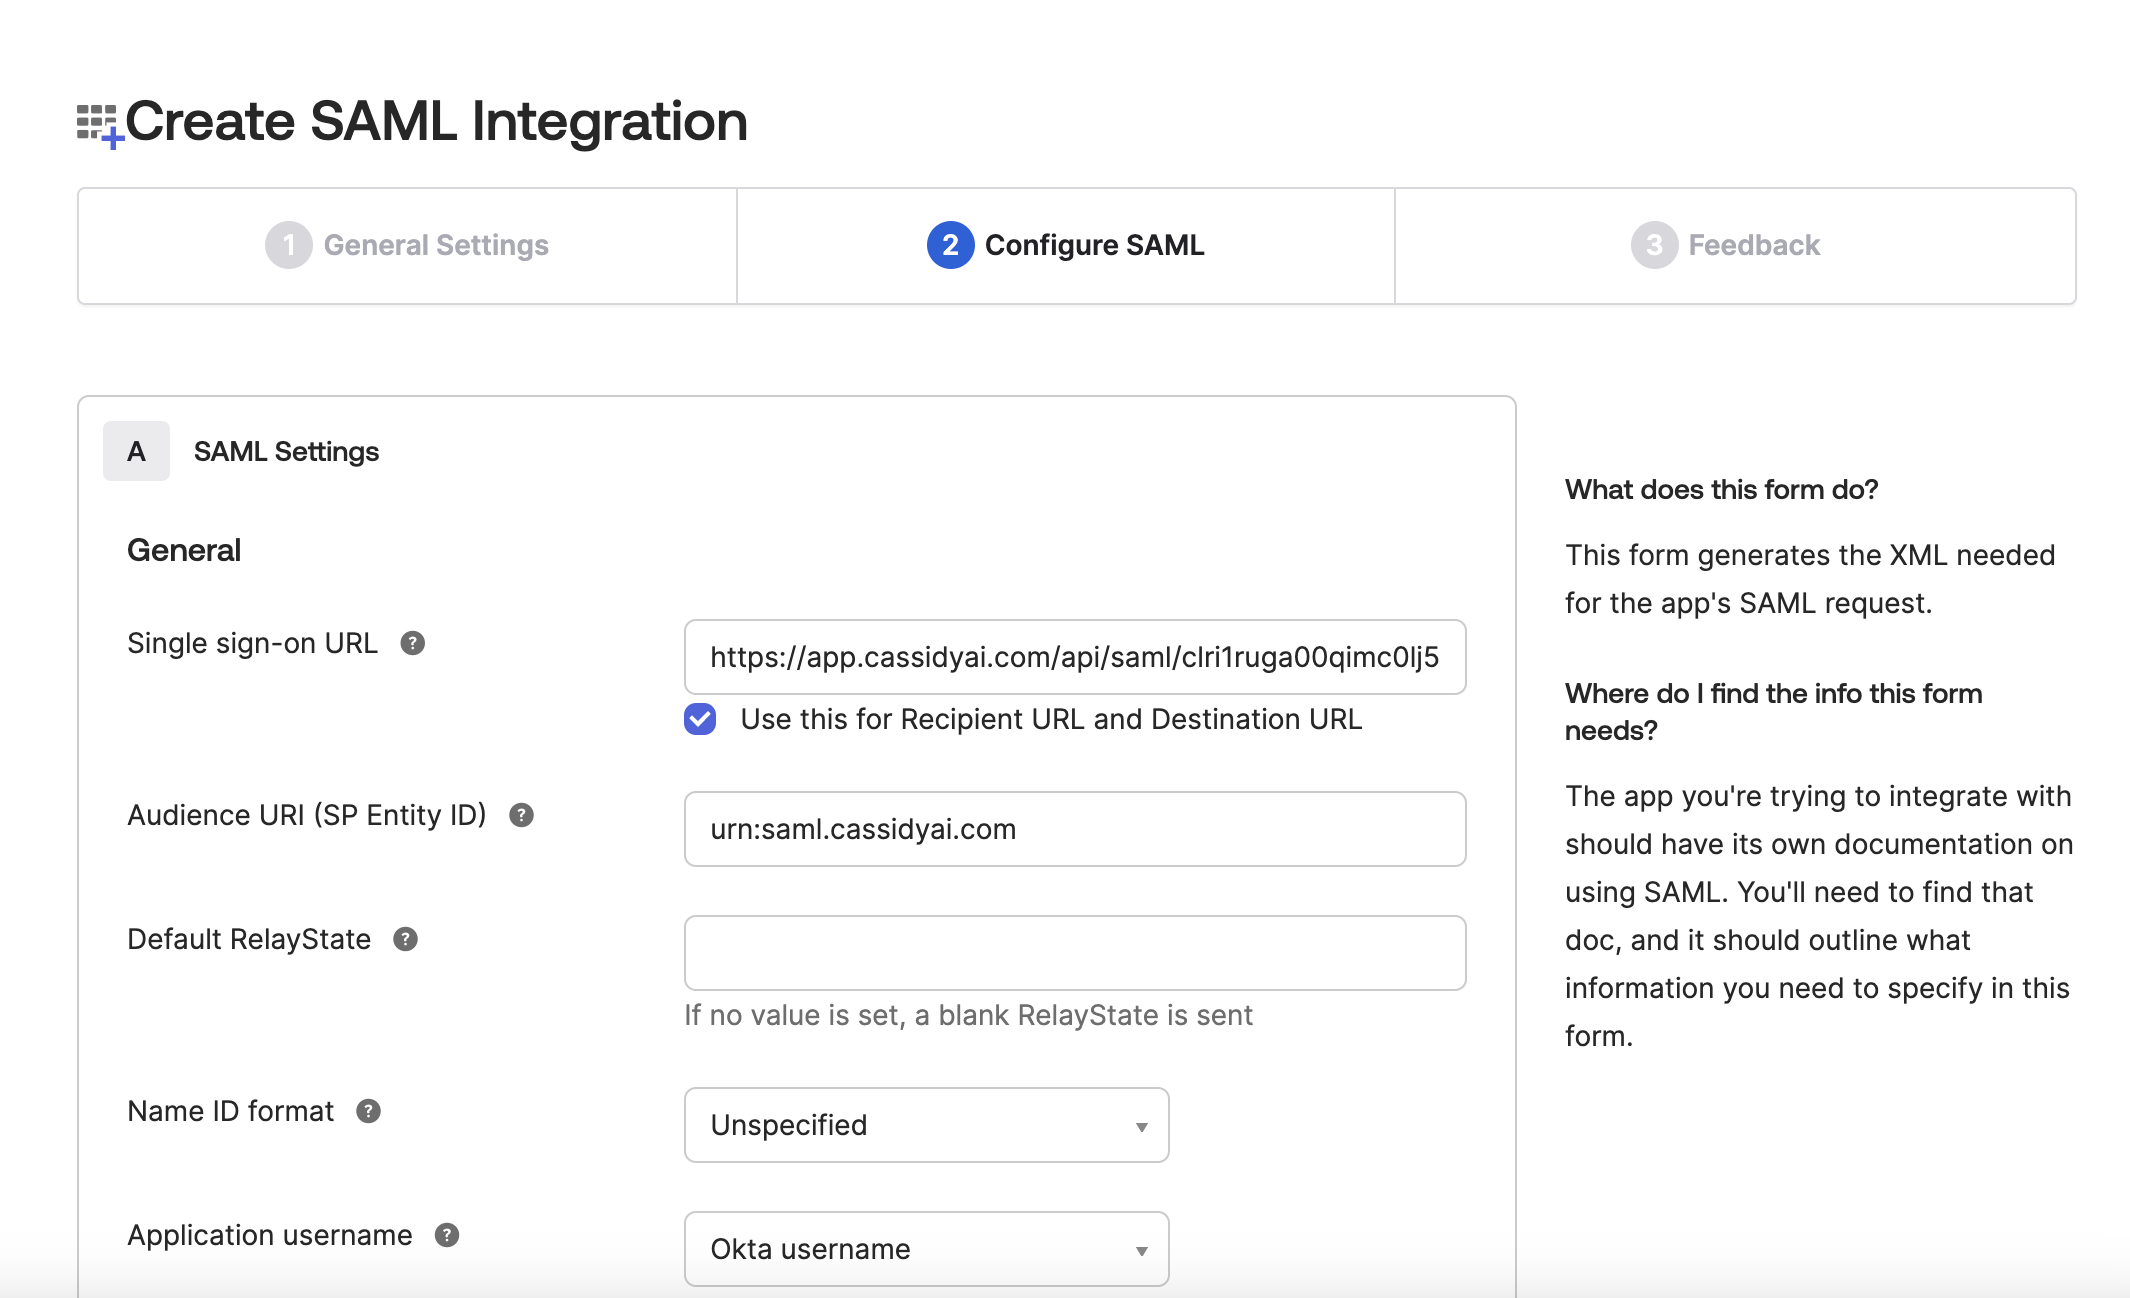
3
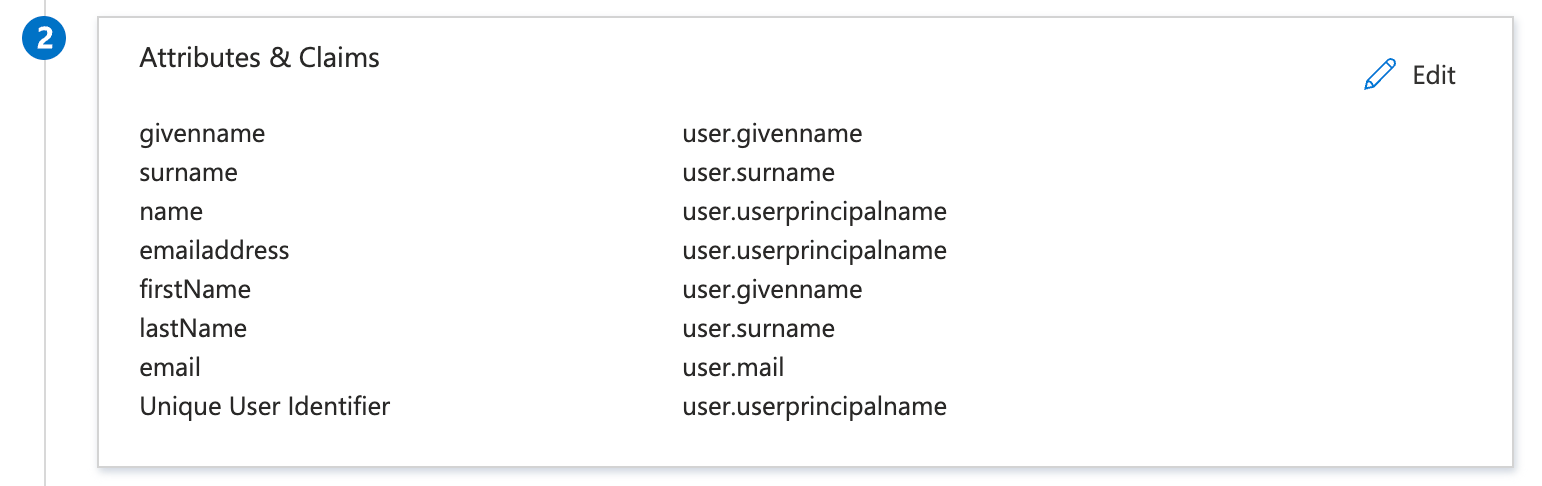
Add attribute statements
Map the following user attributes so Cassidy can identify users: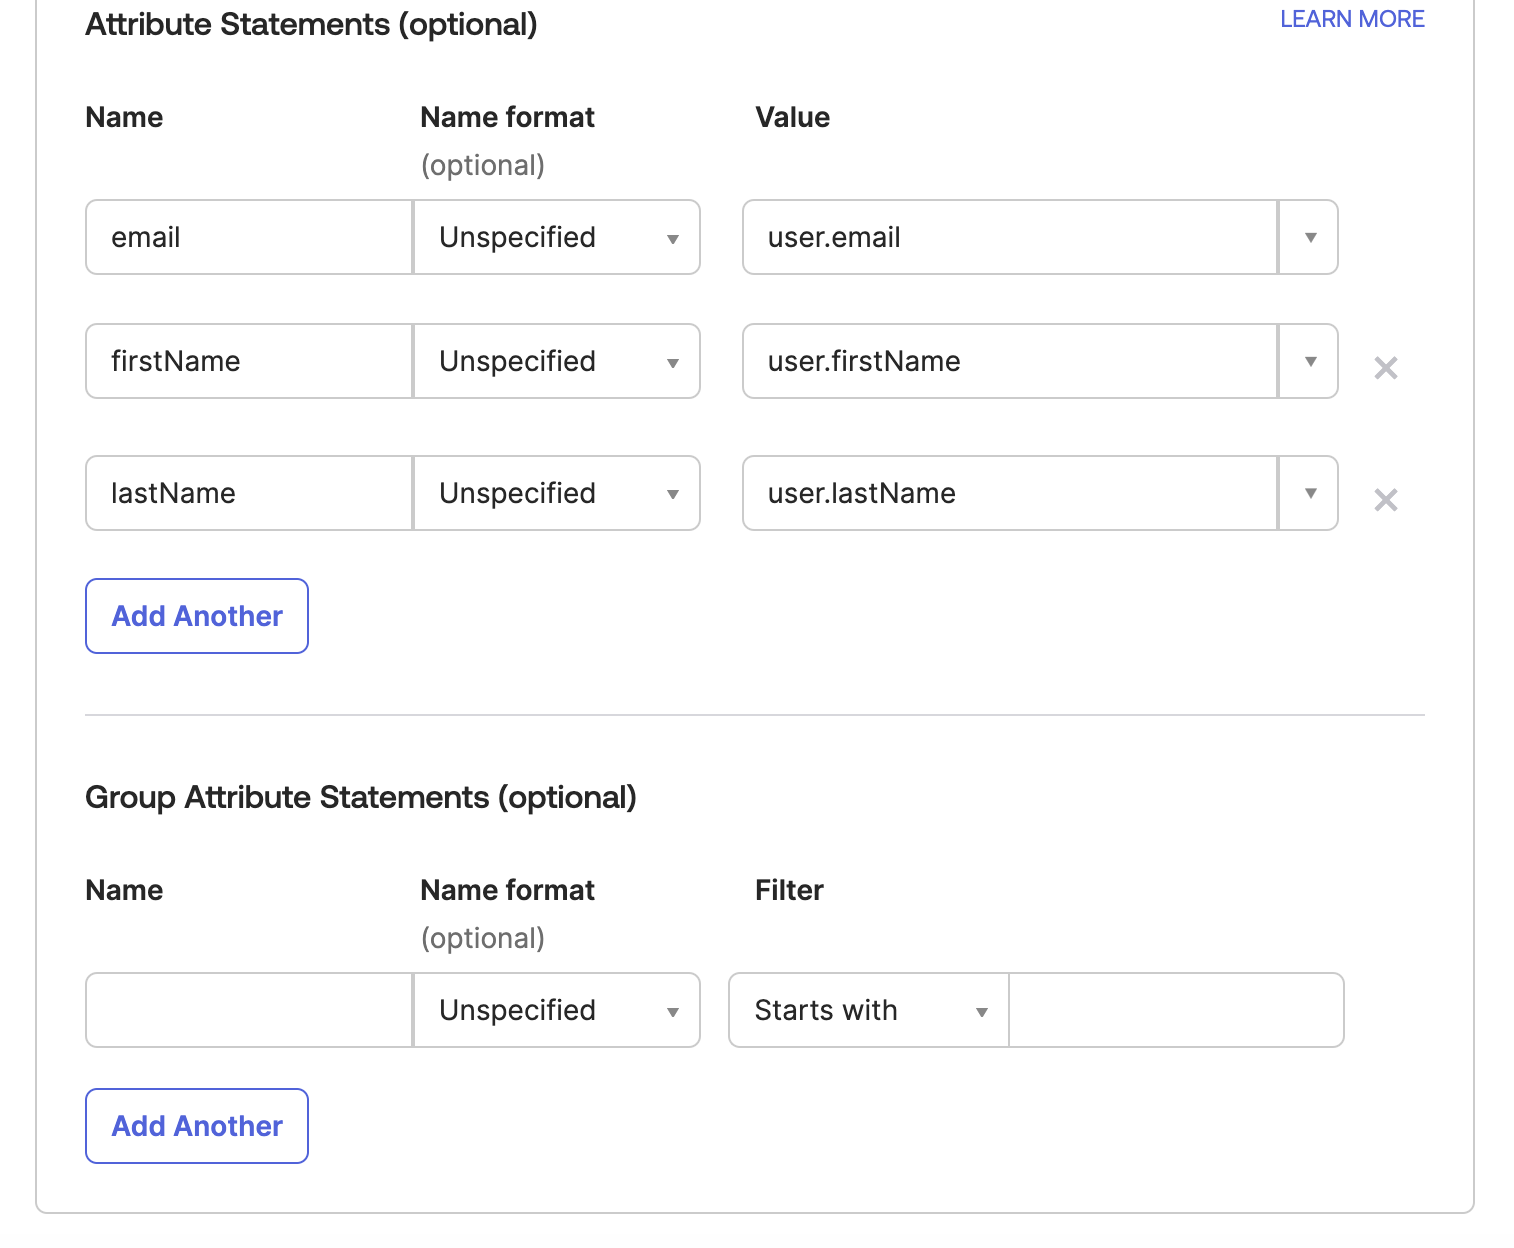
4
Assign users to the app
In Okta, go to the Assignments tab of your new app and assign it to the users or groups who should have access to Cassidy.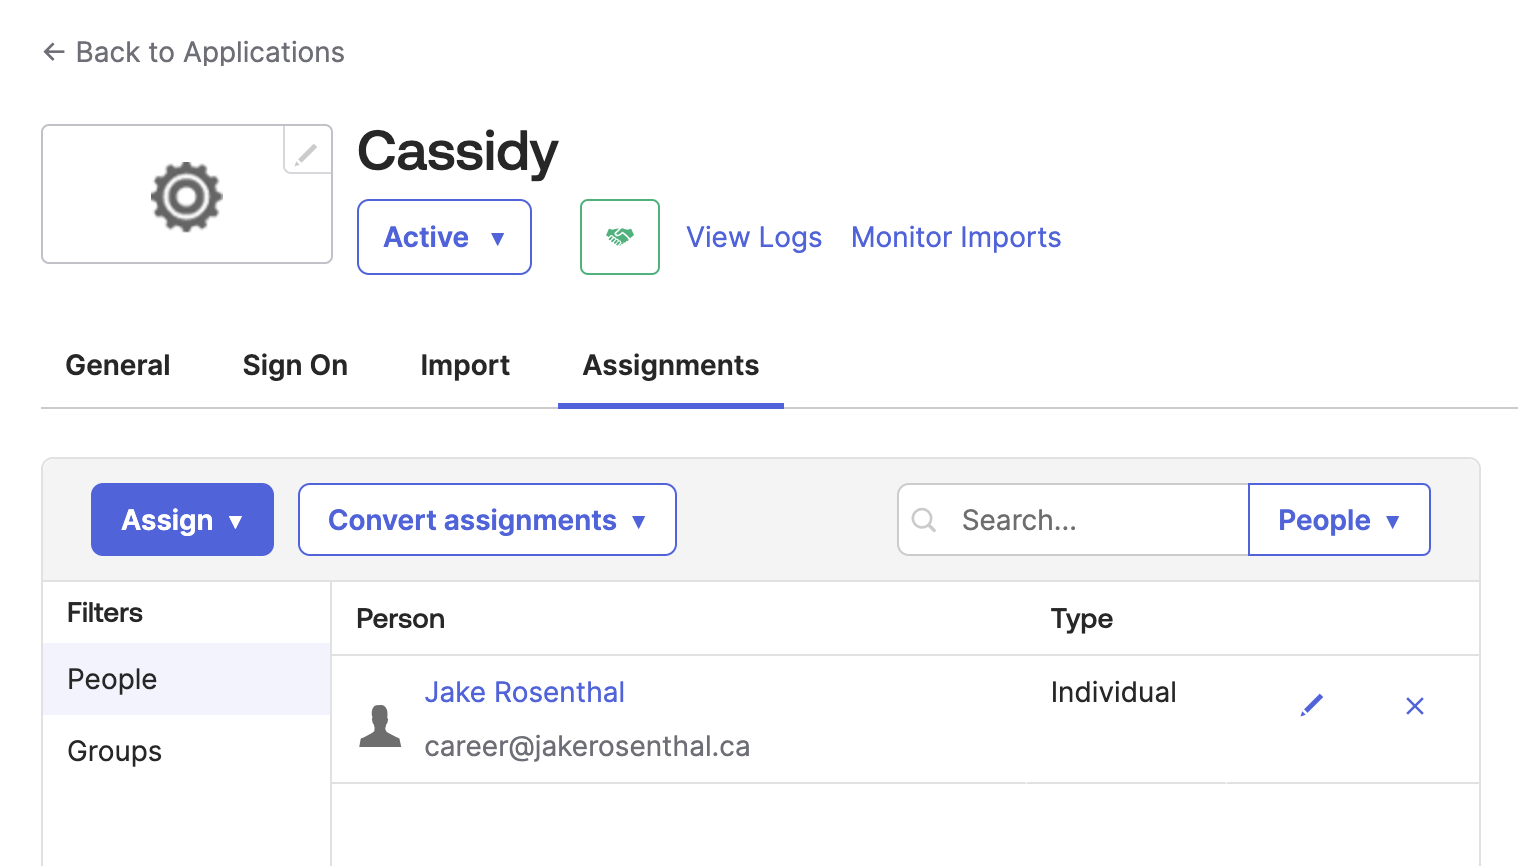
5
Copy Okta values back to Cassidy
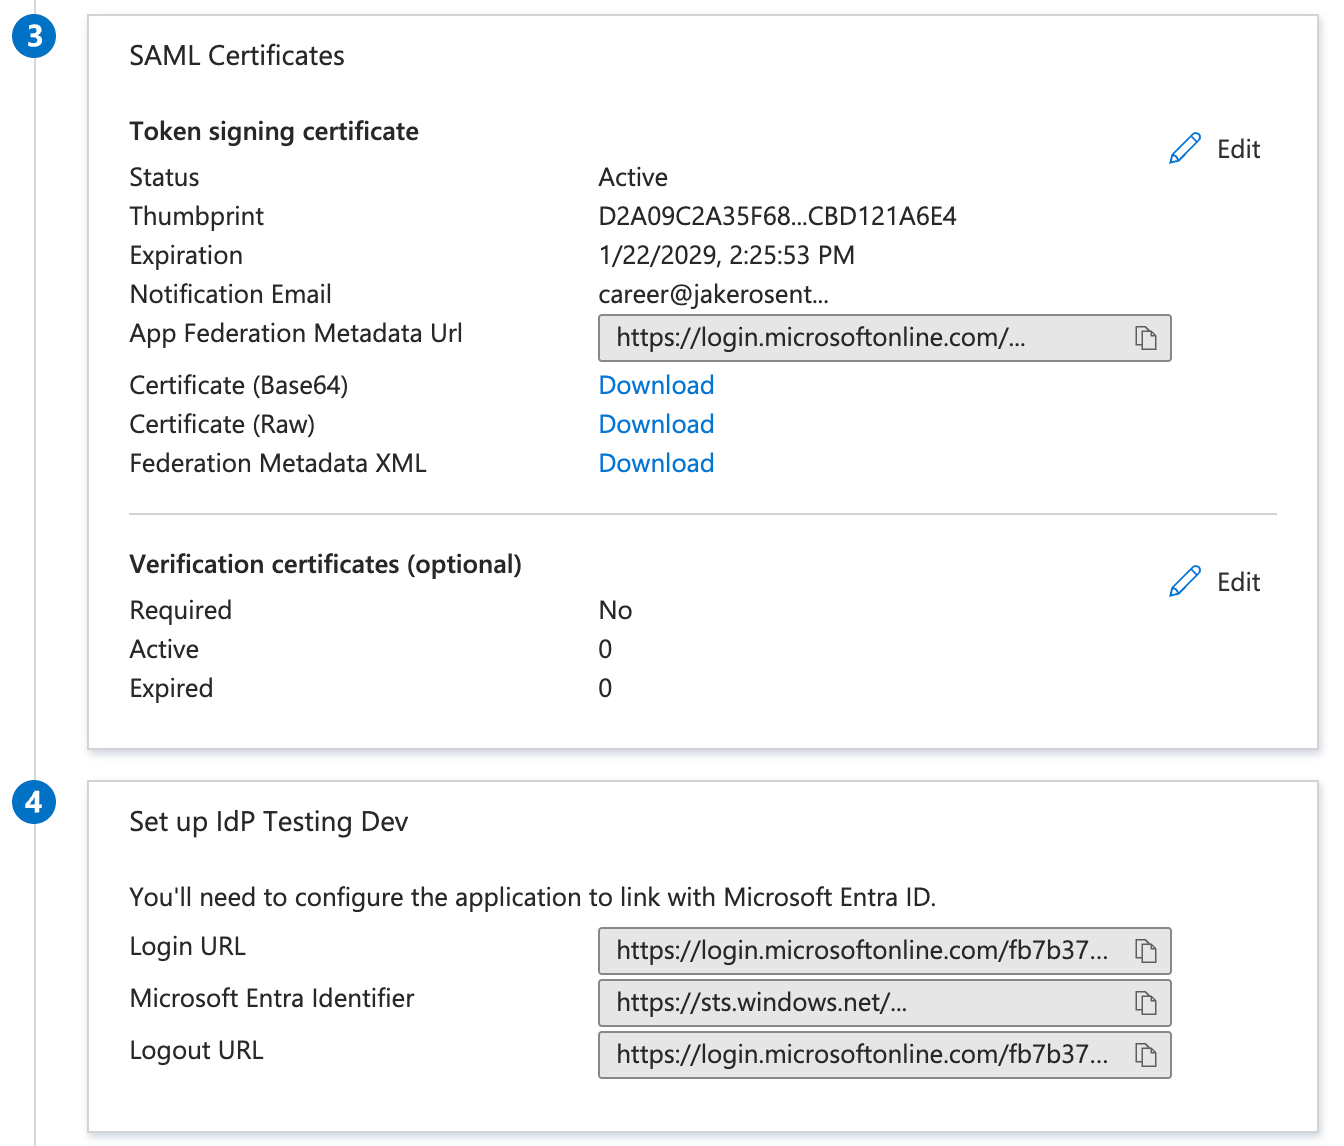
After saving the Okta app, go to the Sign On tab and copy the following values into Cassidy’s SSO configuration modal: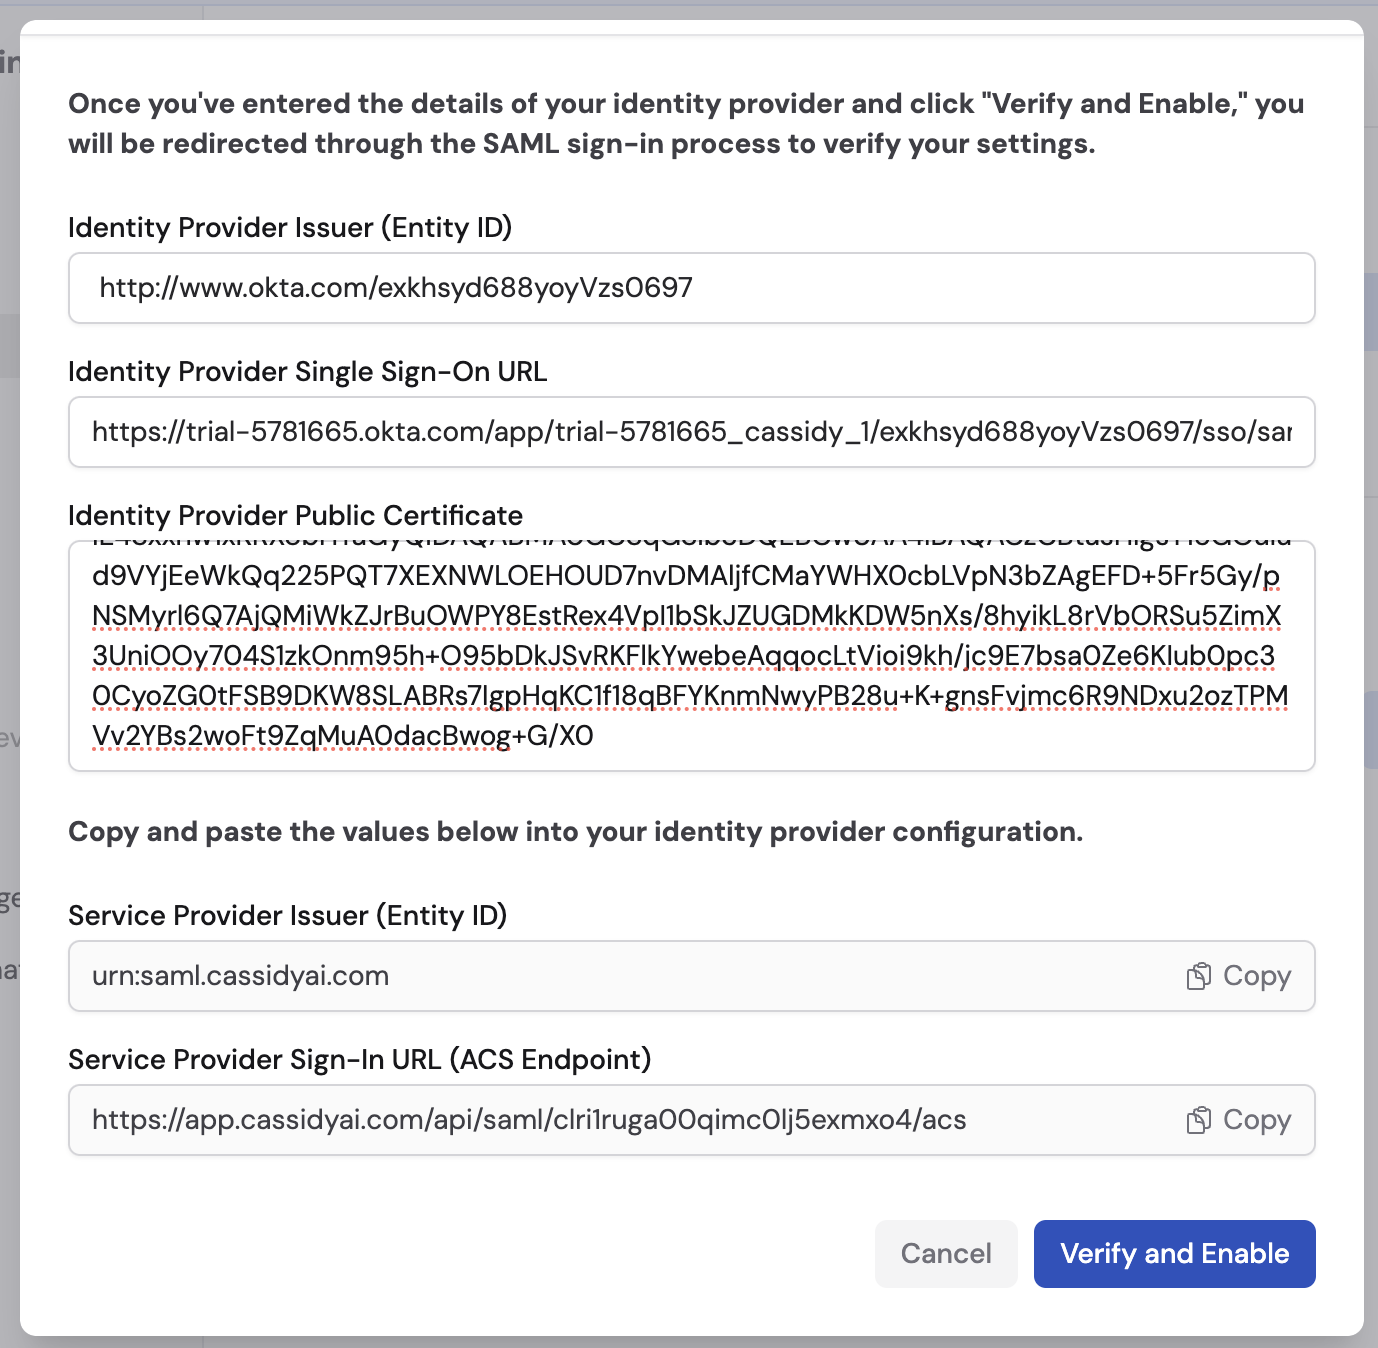
- Sign on URL (also called SSO URL or Login URL)
- Issuer (also called Entity ID)
- Signing Certificate (download the X.509 certificate)
Verify and enable
After entering your IdP settings into the Cassidy configuration modal, click Verify and Enable. You’ll be redirected through the SAML sign-in process to verify your settings are correct.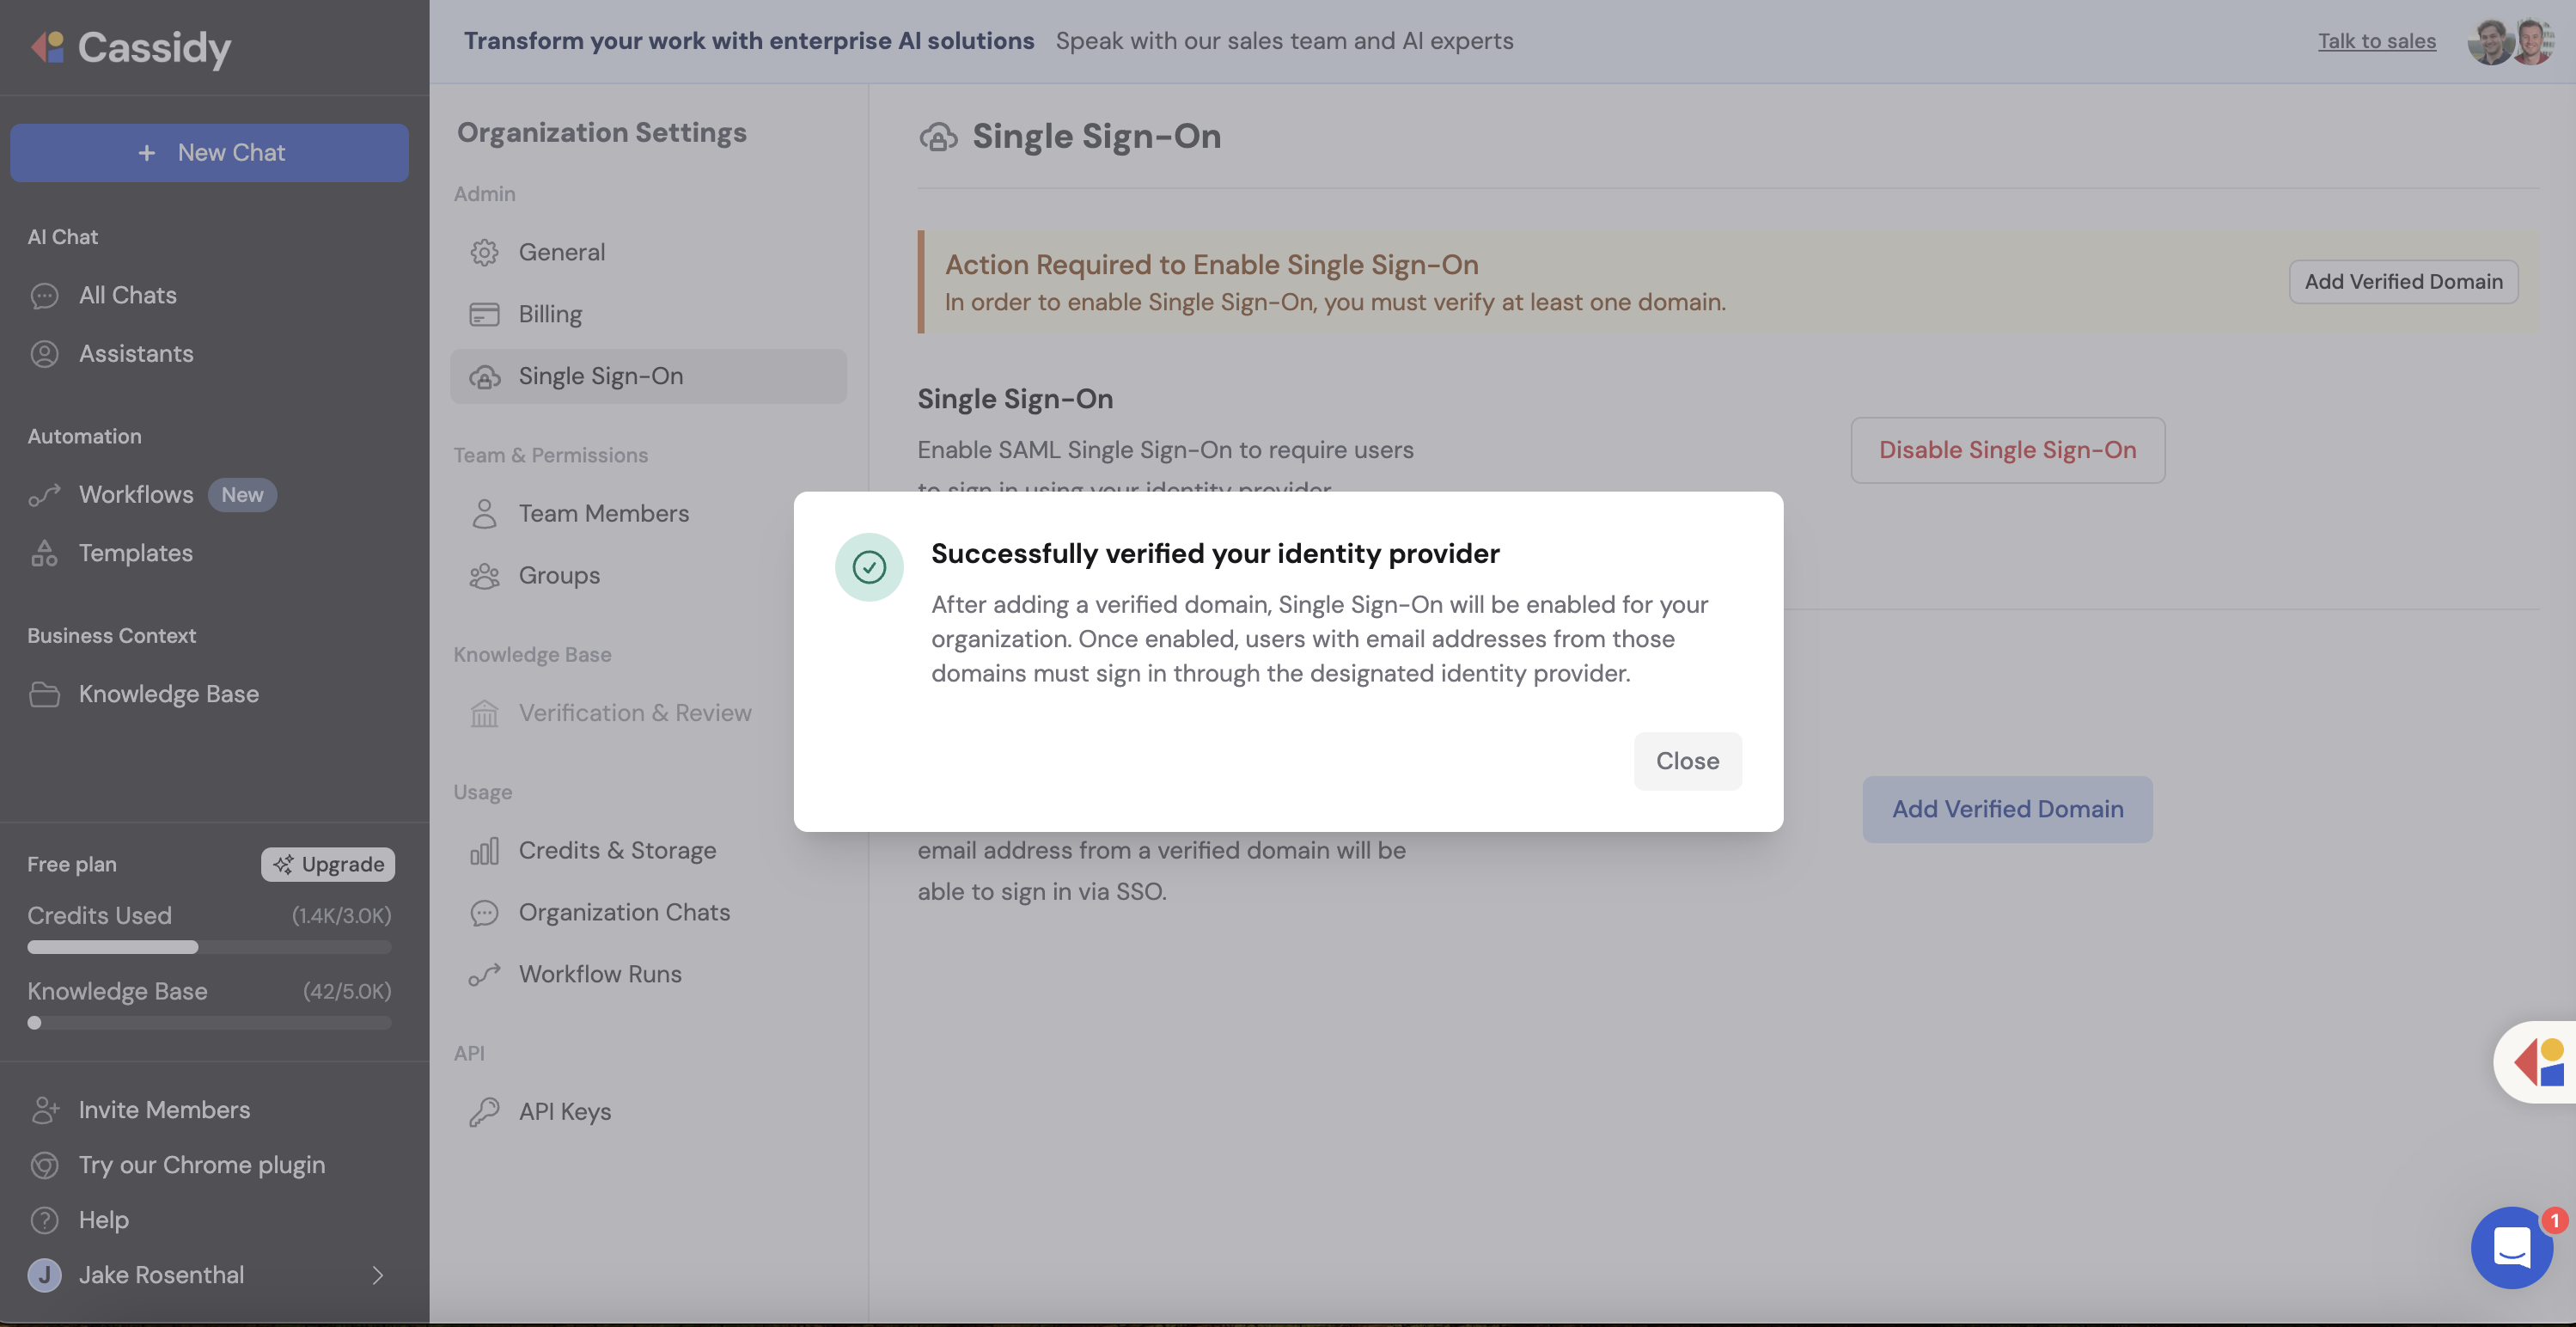
SSO sign-in respects your organization’s join settings. If your organization requires invitations or admin approval for new members, those rules still apply when users sign in through SSO for the first time. See Invite team members for details.
SSO is now enabled. Team members with email addresses on your verified domain will be redirected to your identity provider when signing in.
Set up SAML group mappings
SAML group mappings let you map attributes in your identity provider’s SAML response to Cassidy groups. Use group mappings to automatically place people into the teams that control resource visibility. When a user signs in through your IdP, Cassidy checks the user’s SAML assertion and adds the user to Cassidy groups based on the mappings you’ve configured.Groups control which shared resources a user can see. To automatically grant privileges for what a user can do, use SAML role mappings.
Important behavior
- Case-sensitive — Attribute keys and values must match exactly.
- Additive only — Cassidy adds users to groups when a mapping matches, but does not remove users from groups if the attribute is later removed in your IdP. Users also keep any groups they were already in.
- Visibility only — Group mappings update group membership. They do not grant privileges like creating Agents or managing settings.
- Multi-value attributes supported — If an attribute contains multiple values (e.g., a
groupsattribute with a list of group IDs), the mapping matches if any of the values exactly equals the mapping’s configured value.
Prerequisites
Before turning on mappings, make sure you understand exactly what attributes your IdP is sending in the SAML assertion — mappings only work if the attribute key and value are correct.
- Many IdPs require you to explicitly configure which attributes (including group membership) are included in the SAML assertion. If group membership isn’t being sent, Cassidy won’t have anything to map.
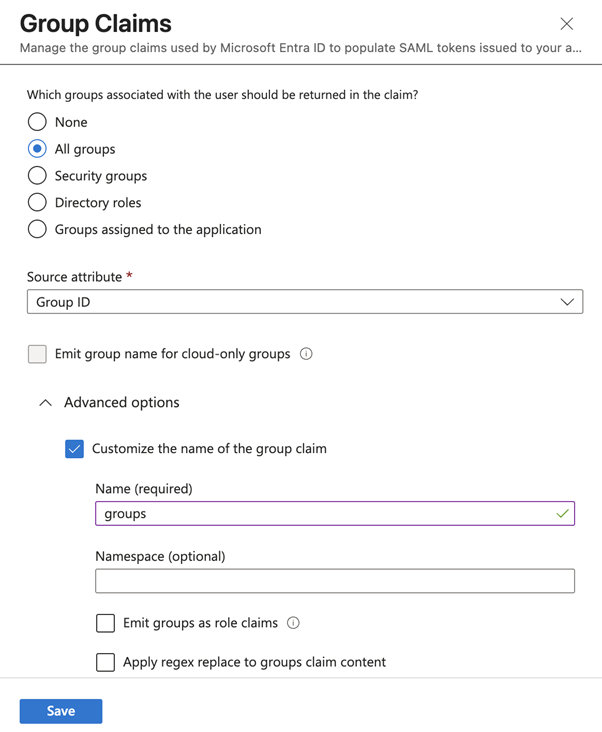
- Microsoft Entra ID often sends group Object IDs rather than group names. If you map by group, you typically need to use the ID values Entra ID sends.
- It’s recommended to inspect and validate a SAML response to confirm the exact attribute key and value your IdP is sending (e.g., using samltool.com) before creating mappings.
- SSO must be enabled for your organization before you can configure group mappings.
Configure mappings
1
Open Group Mappings
In Organization Settings → Single Sign-On, click the Group Mappings tab.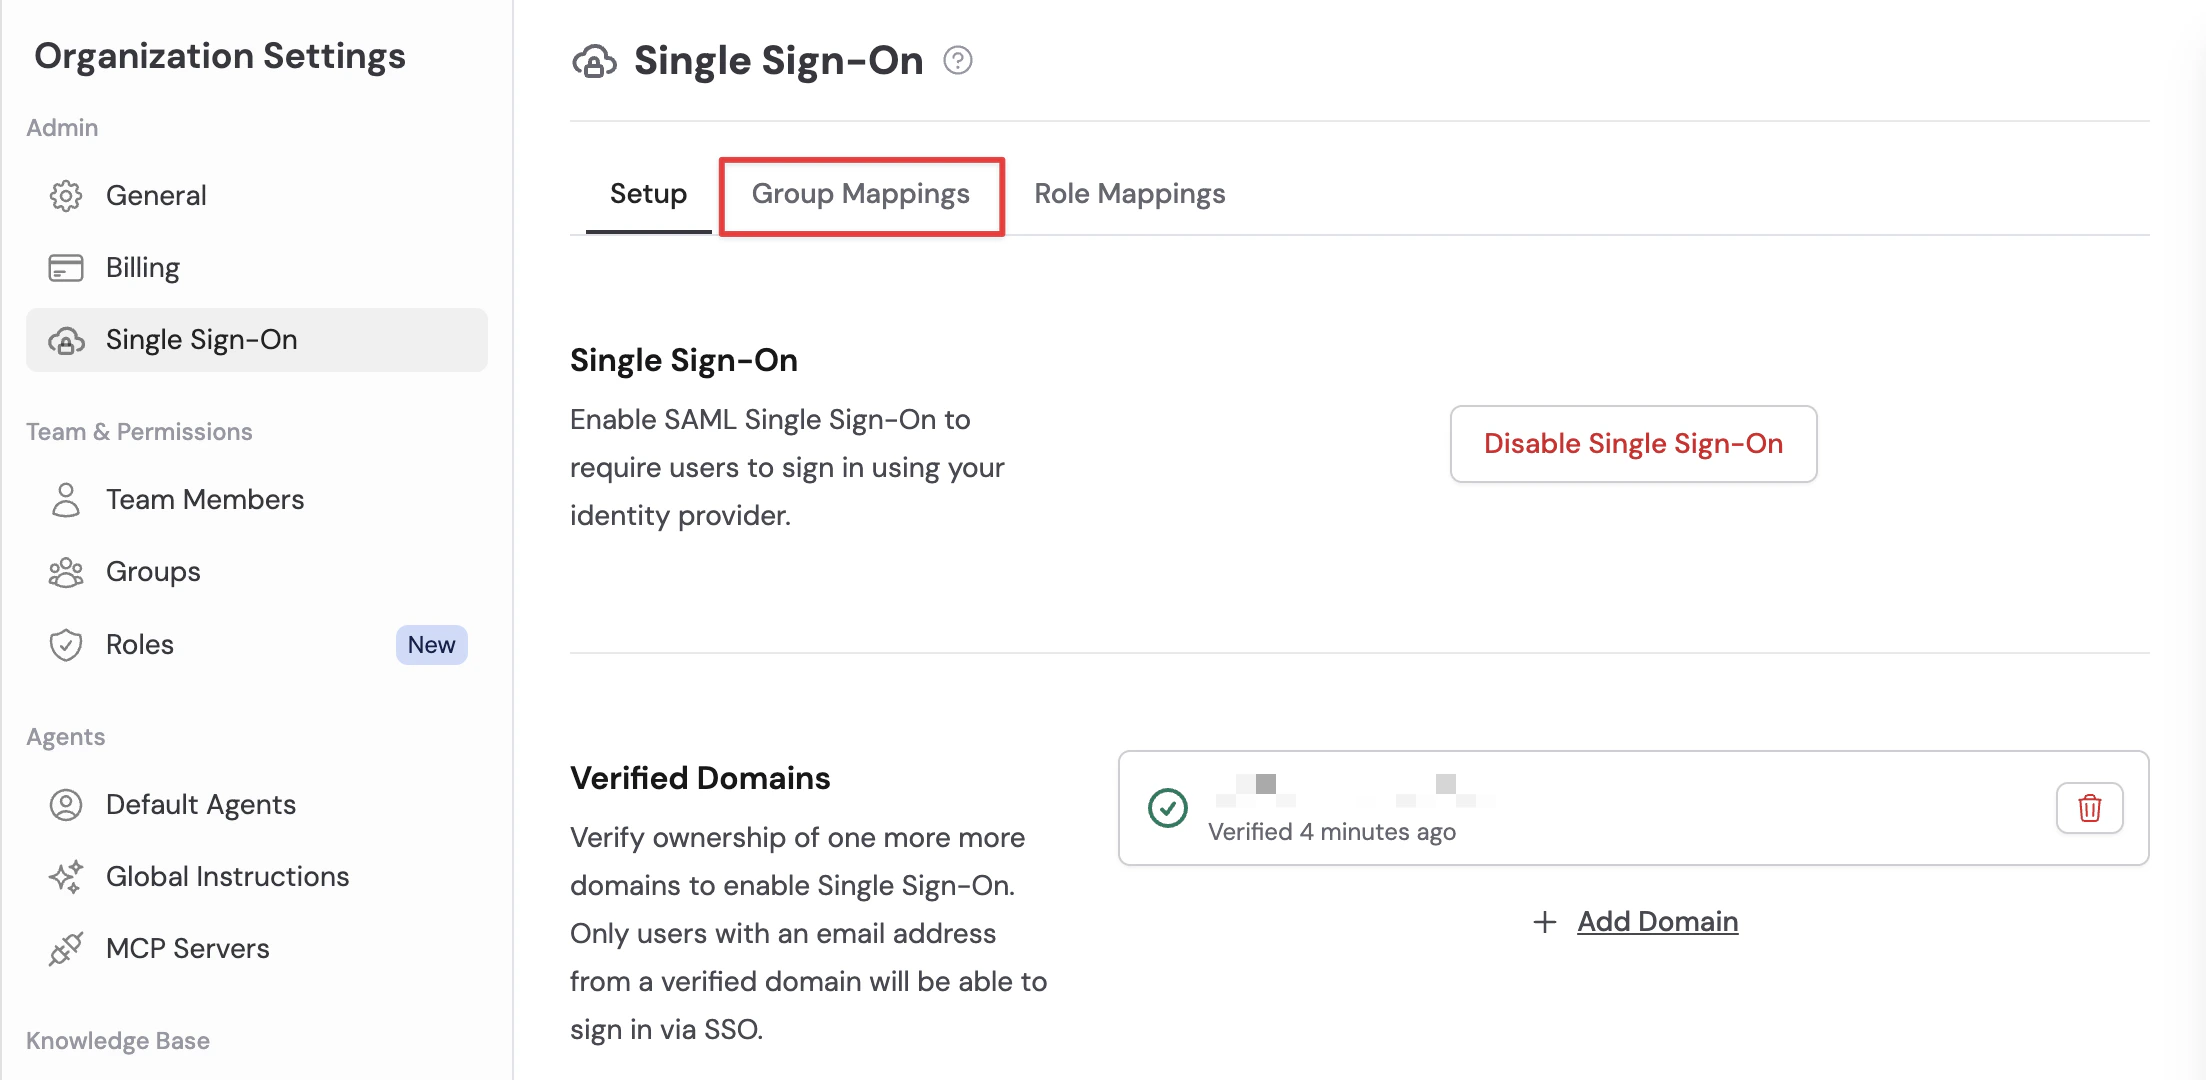
2
Create a new mapping
Click Add Group Mapping to create a new mapping rule. Enter:
- SAML Attribute Key — The attribute name your IdP sends (e.g.,
groups,memberOf, or a custom attribute). - SAML Attribute Value — The specific value to match (e.g., a group name or group Object ID, depending on your IdP).
- Cassidy Group — The Cassidy group to assign users to when the match is found.
3
Ensure your IdP sends group attributes
Your IdP must include group membership in the SAML assertion under the same attribute key you configured in the mapping. If group membership isn’t being sent, Cassidy won’t have anything to map.
- Okta
- Microsoft Entra ID
In Okta, configure a group attribute statement in your SAML application’s settings. This tells Okta to include the user’s group memberships in the SAML assertion.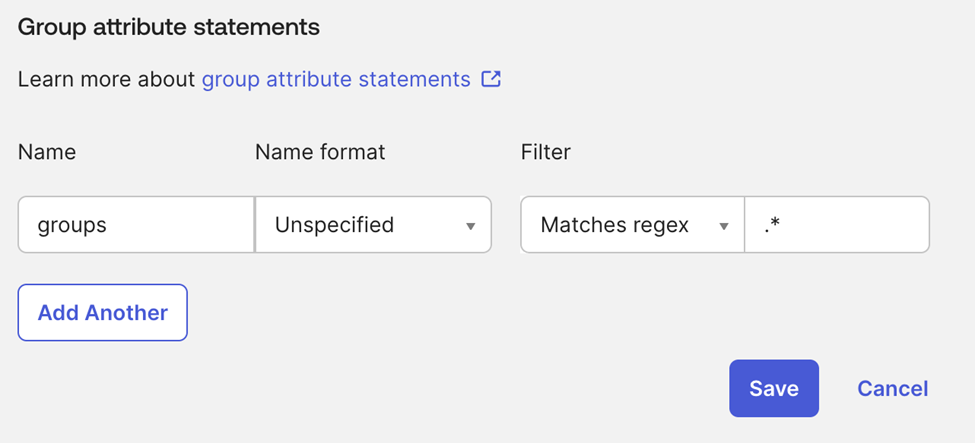
4
Add mappings for each group
Back in Cassidy, repeat step 2 for each group you want to map. The key should match the attribute name your IdP sends, and the value should match the exact value sent by your IdP for each group.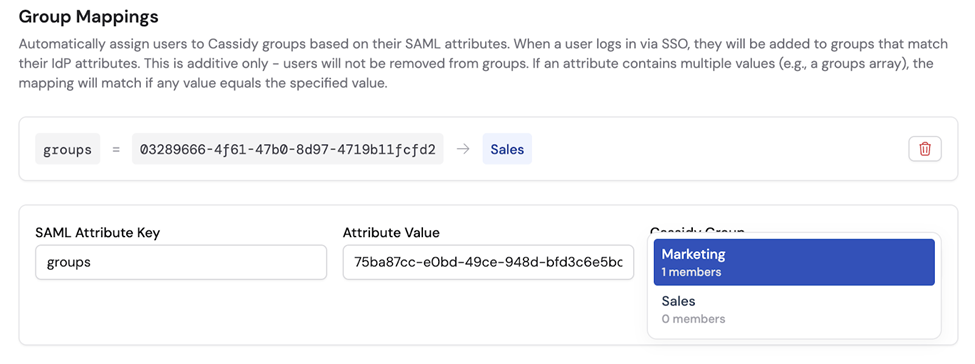
5
Save and test
Click Save. Mappings are applied the next time users sign in via SSO. Have a team member sign in to verify they are automatically assigned to the correct Cassidy groups based on their SAML group membership.
Group mappings are active. Users will be automatically assigned to Cassidy groups on their next SSO login.
Set up SAML role mappings
SAML role mappings let you map attributes in your identity provider’s SAML response to Cassidy roles. When a user signs in through your IdP, Cassidy checks the user’s SAML assertion and grants them any role whose mapping matches. A mapping can target either a built-in managed role (Admin, Member, Viewer) or any custom role you’ve created. Use role mappings for privileges like creating Agents, editing Workflows, inviting team members, managing groups, or configuring organization settings.Important behavior
- Case-insensitive match — Attribute keys are case-sensitive, but attribute values are compared case-insensitively.
- Additive only — Cassidy assigns matching roles when a user signs in but does not remove existing role assignments if the attribute is later removed in your IdP.
- Multi-value attributes supported — If an attribute contains multiple values, the mapping matches if any value equals the mapping’s configured value.
- Multiple mappings stack — A user can match multiple role mappings on a single login, in which case they receive every matching role.
Prerequisites
- SSO must be enabled for your organization before you can configure role mappings.
- Custom-role targets require the destination role to already exist. Create roles in Organization Settings → Roles & Groups first.
- As with group mappings, validate the exact attribute key and value your IdP sends (for example using samltool.com) before creating mappings.
Configure mappings
1
Open Role Mappings
In Organization Settings → Single Sign-On, click the Role Mappings tab.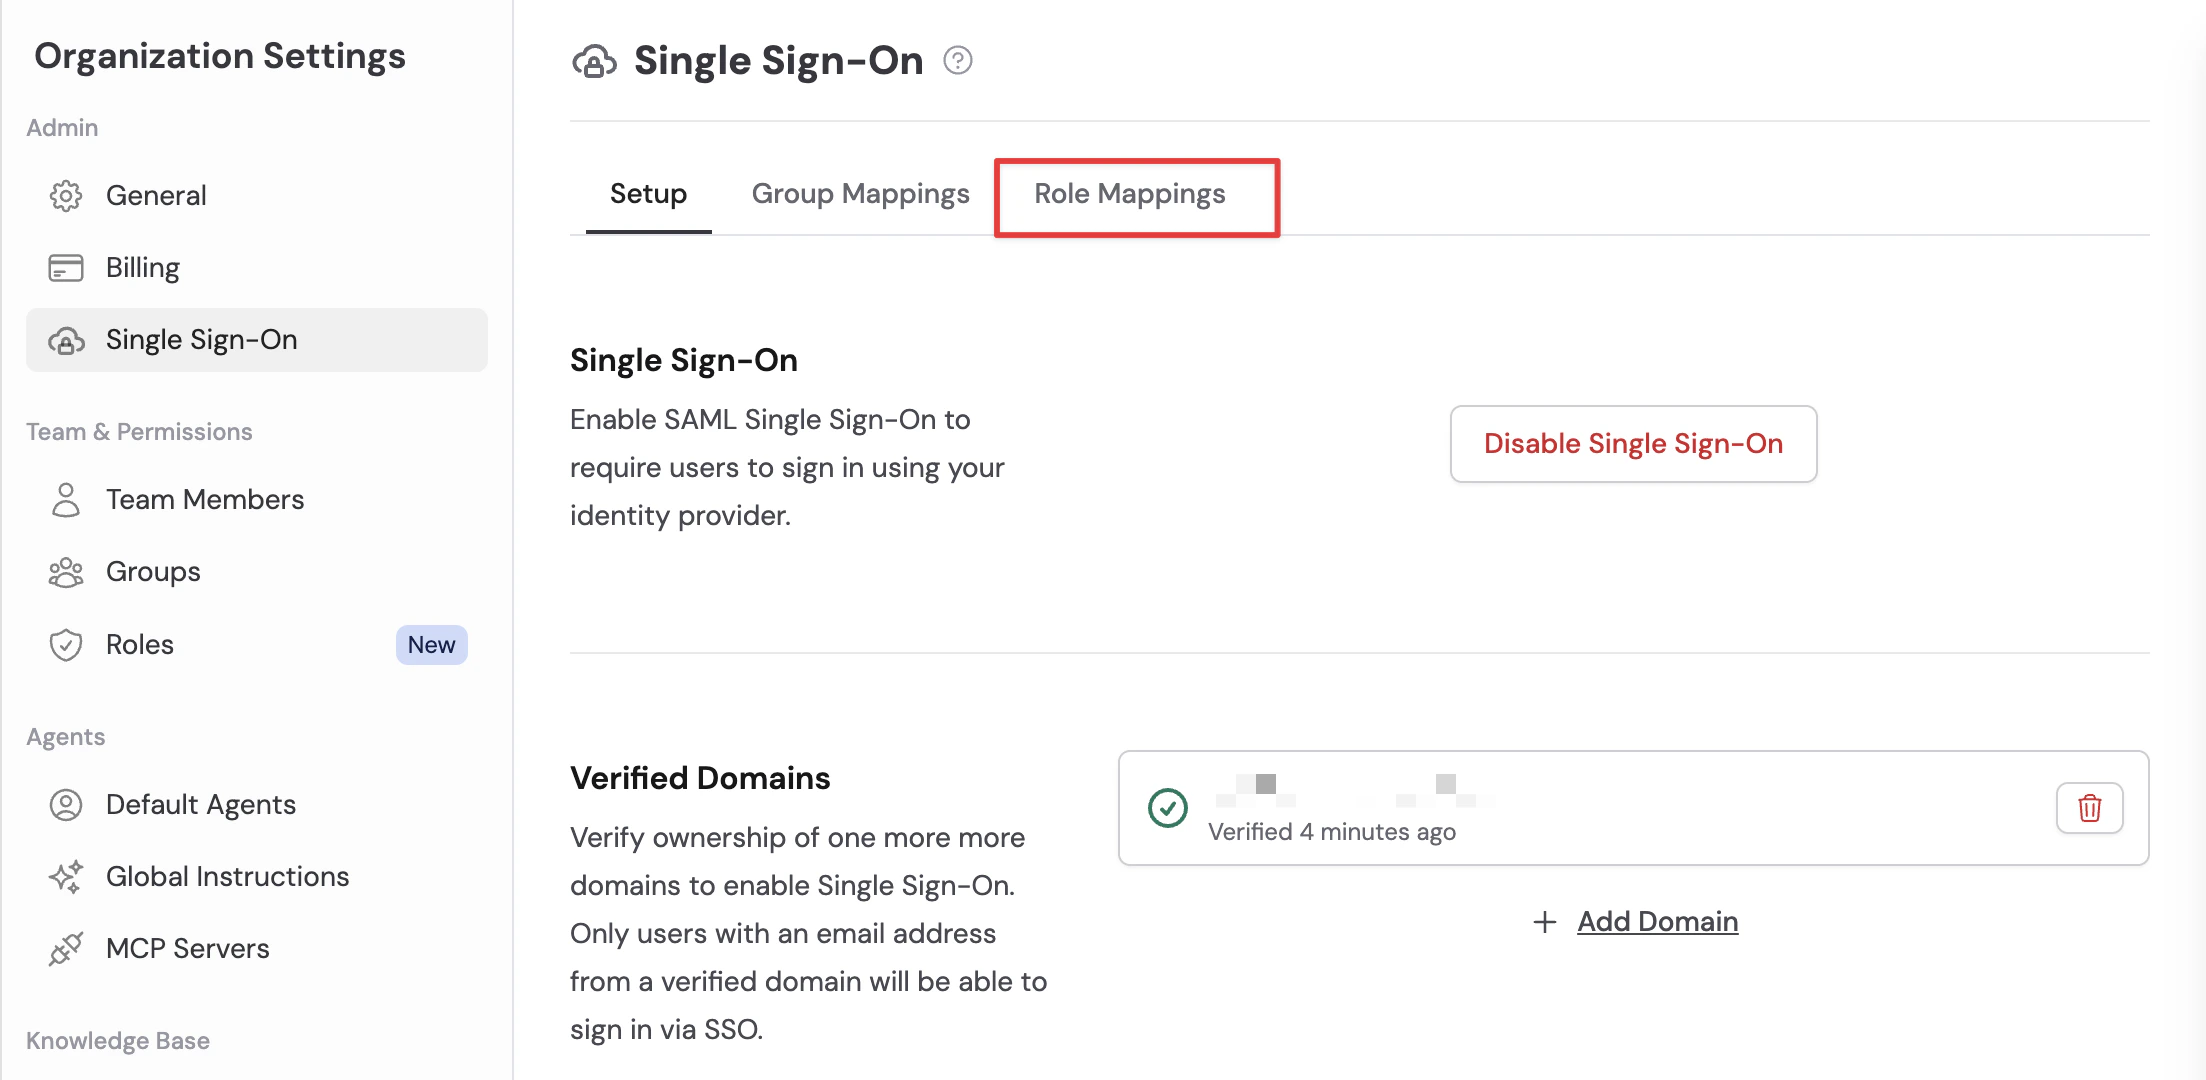
2
Create a new mapping
Click Add Role Mapping to create a new mapping rule. Enter: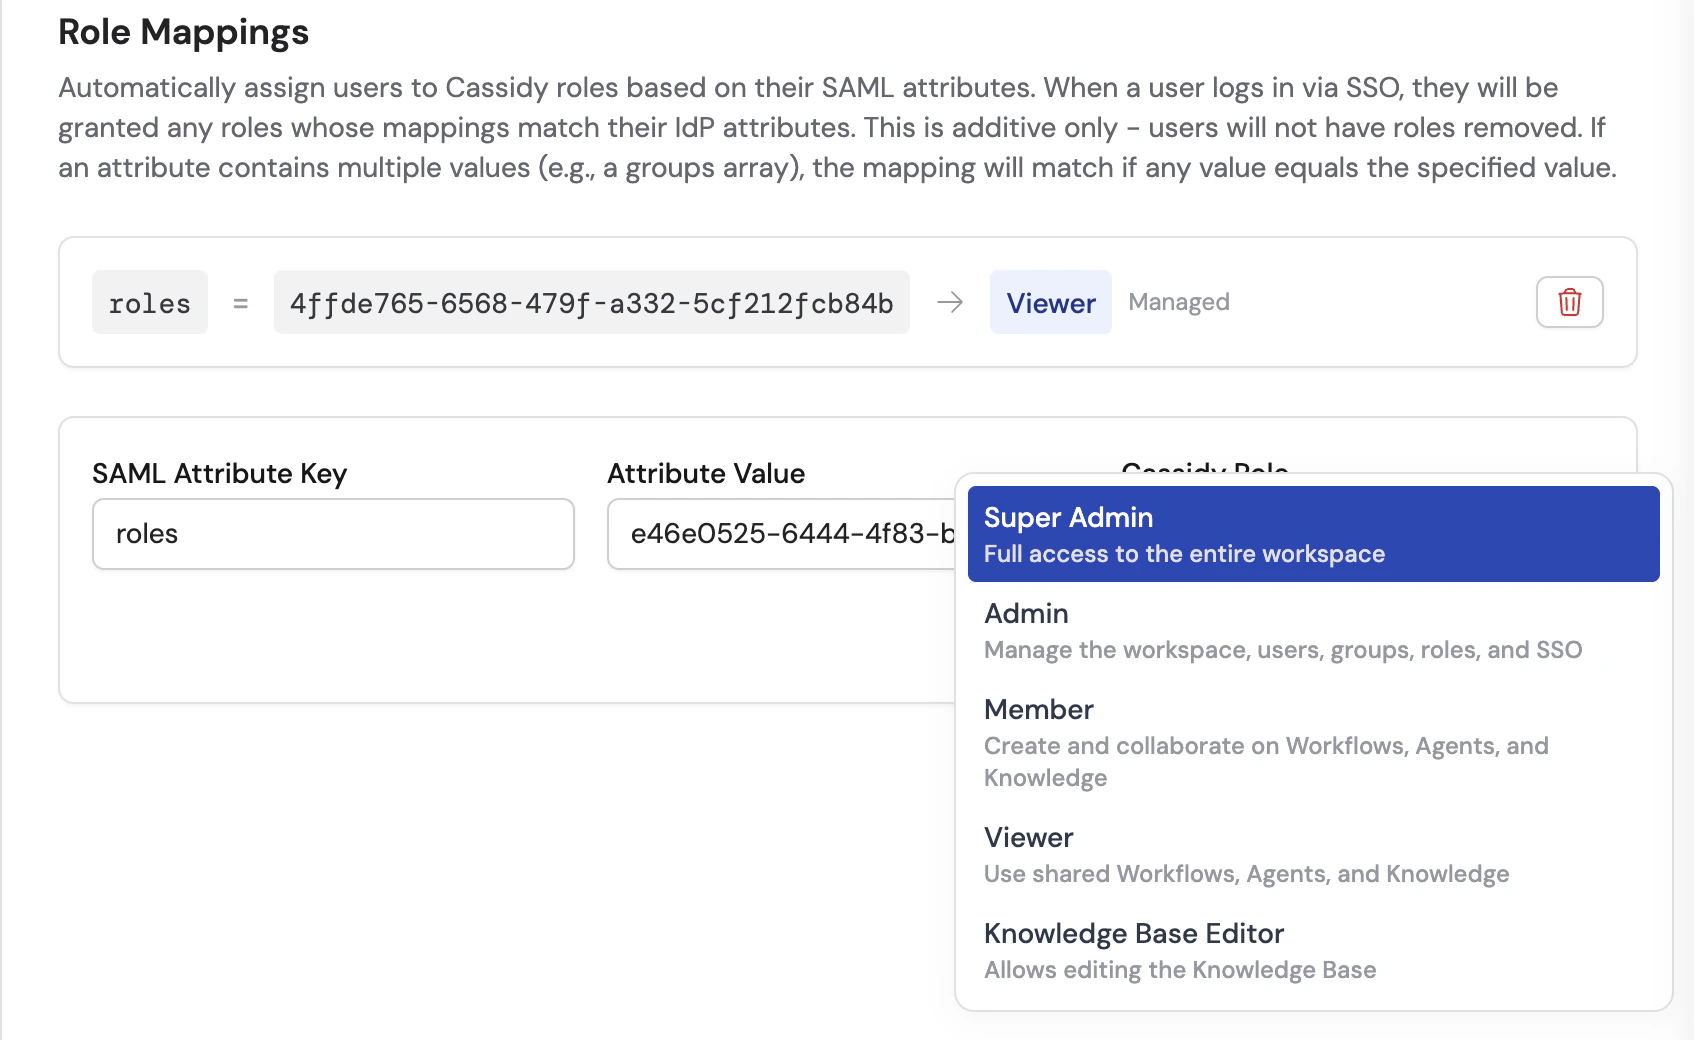
- SAML Attribute Key — The attribute name your IdP sends (e.g.,
groups,memberOf, or a custom attribute). - SAML Attribute Value — The specific value to match (e.g., a group name or Object ID, depending on your IdP).
- Cassidy Role — The managed or custom role to grant when the match is found.
3
Add mappings for each role
Repeat step 2 for each role you want SSO to grant. A user matching multiple mappings receives all the matching roles, and their effective privileges are the union of those roles.
4
Save and test
Mappings are applied the next time users sign in via SSO. Have a team member sign in to verify they are automatically granted the correct roles.
Role mappings are active. Users will be automatically granted matching roles on their next SSO login.
Next steps
Assign roles and groups
Create and configure the roles and groups that SSO maps to.
Invite team members
Manually invite users who aren’t covered by SSO.