Organize Agents with folders
Folders help keep your Agent library organized and let you set permissions at the folder level.1
Navigate to Agents
Click Agents in the left sidebar.
2
Create a folder
Click Create a Folder or the + icon next to the Folders heading in the sidebar.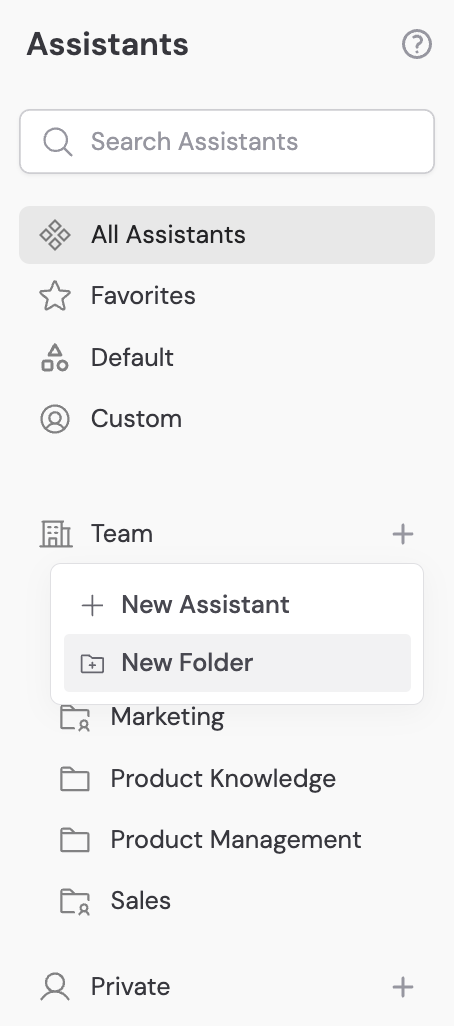
3
Name the folder and set permissions
Enter a name and choose an access level: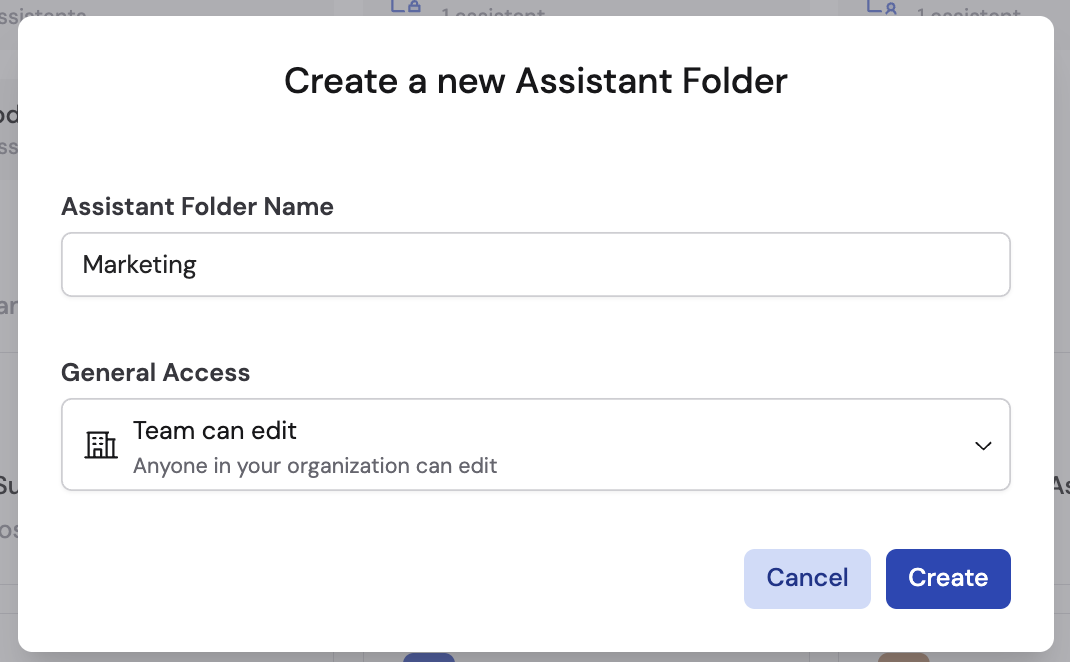
- Team can edit — Anyone in your organization can view and edit Agents in this folder.
- Team can view — Anyone can view but not edit.
- Restricted — Only specific people and groups you add can access the folder.
4
Move Agents into the folder
Drag and drop Agents from the main area into the folder. You can move Agents between folders at any time.
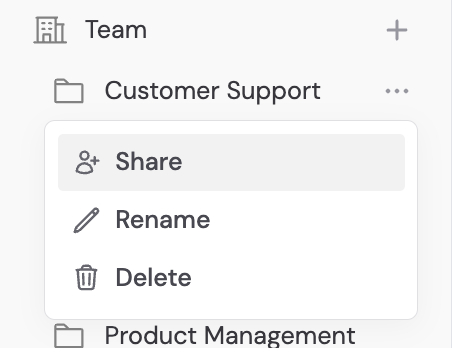
Manage permissions
From the Agents page
Update folder permissions by clicking … on a folder and selecting Share. From there you can:- Change the access type between Team can edit, Team can view, and Restricted.
- When using Restricted access, add specific people or groups who should have access. Start typing a name or email address and select from the list. For each person or group, set either Can edit or Can view permissions.
- Remove access by clicking the x next to a person or group.
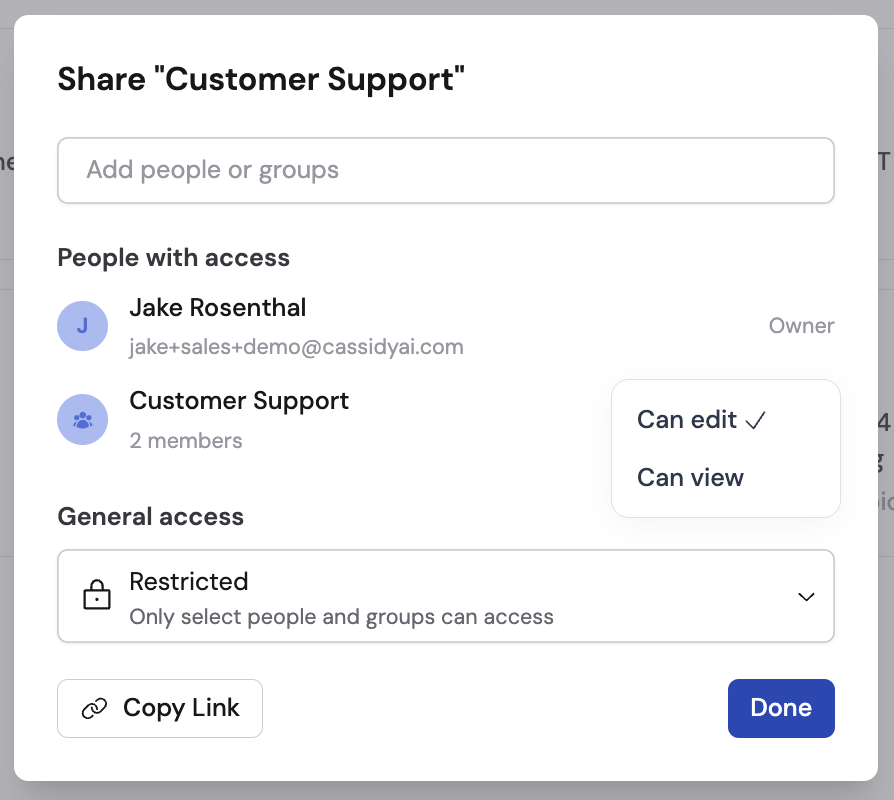
Set up roles and groups to simplify permission management. Instead of adding individuals one by one, create groups like “Sales Team” or “Support Leads” and grant access to the entire group at once.
From the Agent editor
You can also manage permissions while editing an Agent:1
Open sharing options
In the Agent editor, click … and select Organize & Share Agent under Sharing.
2
Choose a location
Select where to save the Agent — Team, Private, or a specific folder. You can create new folders directly from this dialog.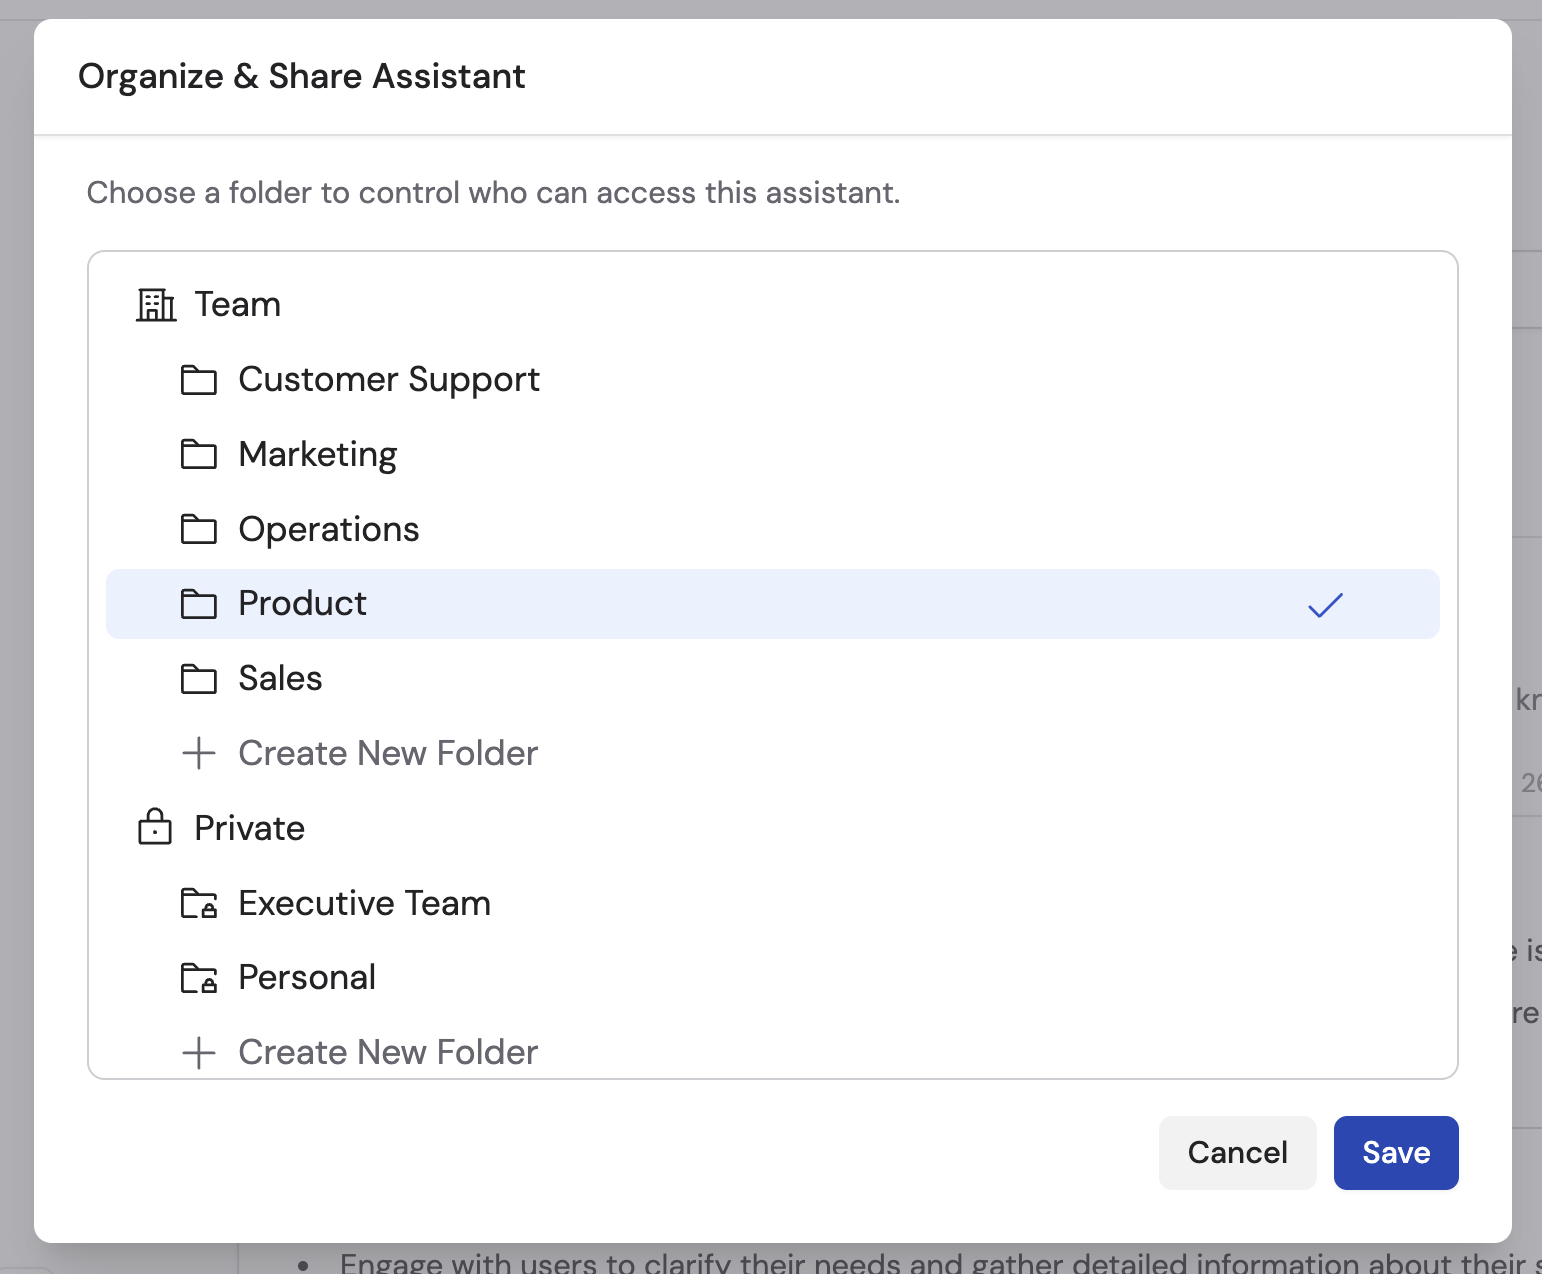
3
Save changes
Click Save to apply the new permissions.
Publish versions and review history
Agents use a versioning system so you can test changes before making them live.Save drafts
While editing, click Draft then Save Without Publishing to save your changes without making them available to end users. This lets you iterate on changes over time.Publish a version
1
Open the publish dialog
Click Publish or go to Draft and select Publish Current Draft.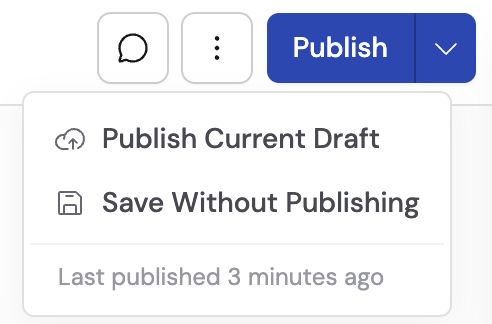
2
Add version details
Enter a Version Name and optional description to document what changed. This helps you track changes over time.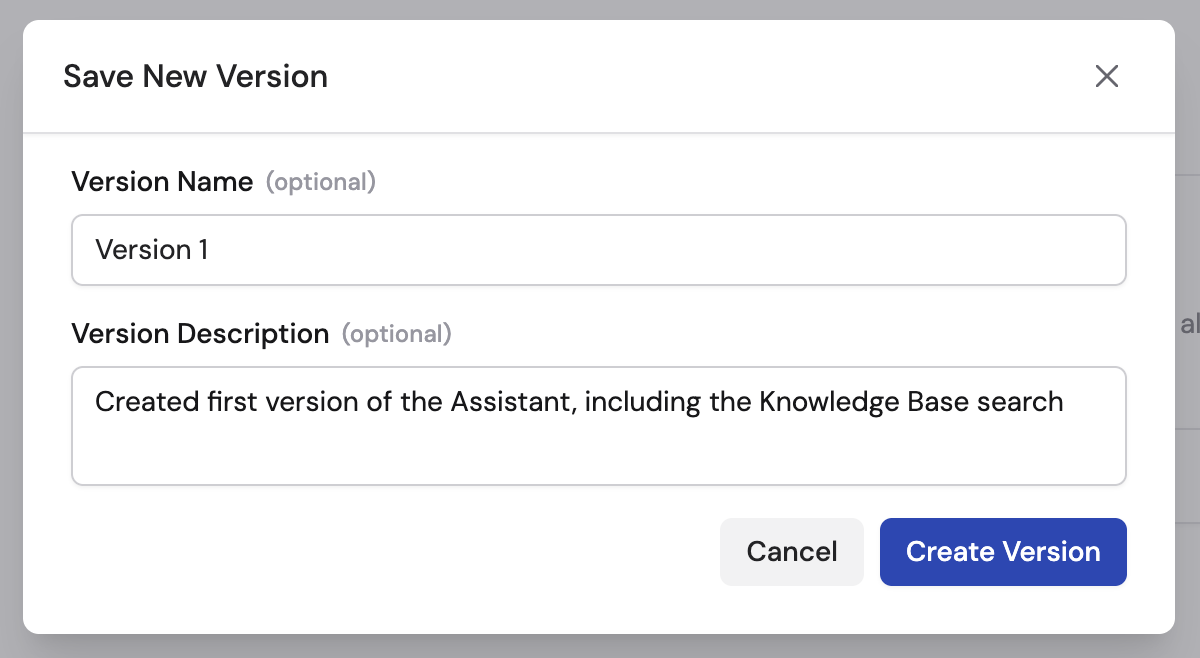
3
Confirm the publish
Click Create Version to save the version, or Publish to save and immediately make it live.
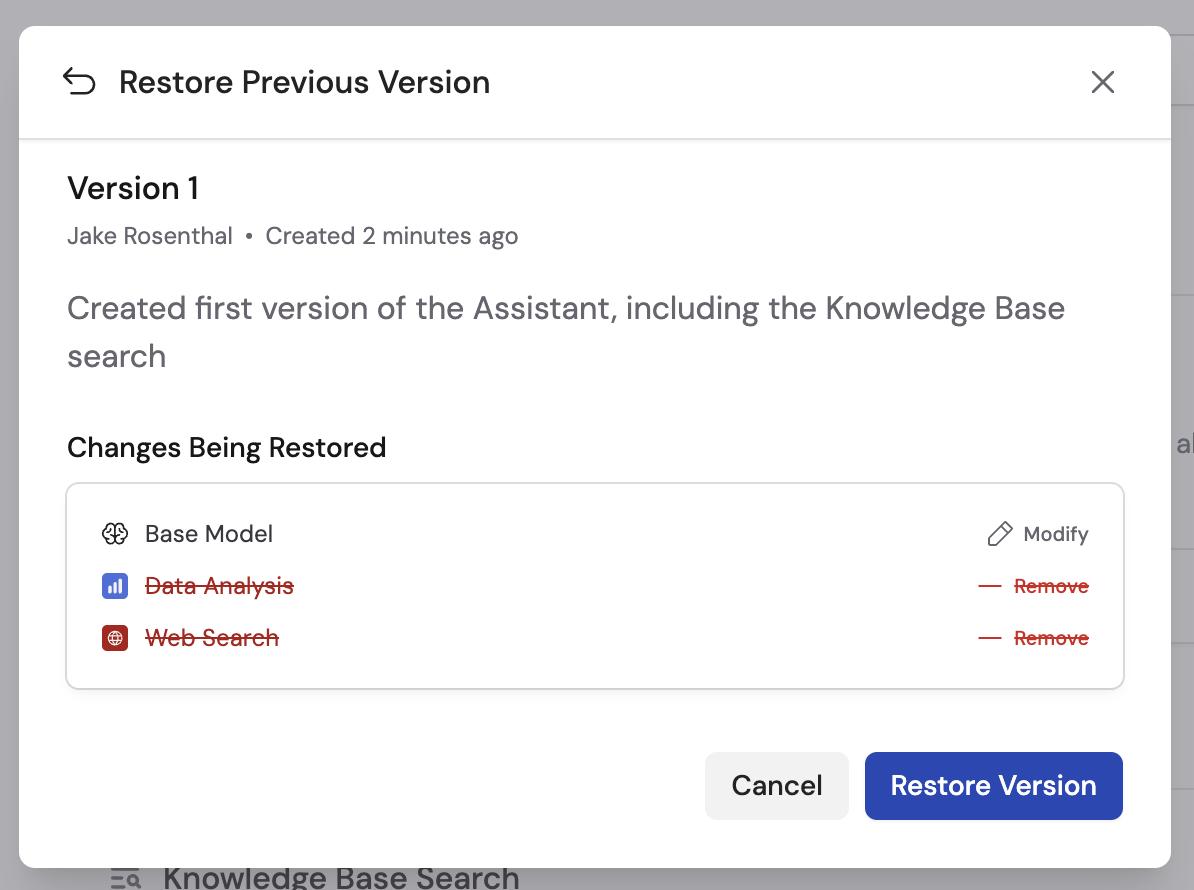
Review version history
Open the Draft dropdown at the top of the Agent editor to see all published versions and what changed since each one.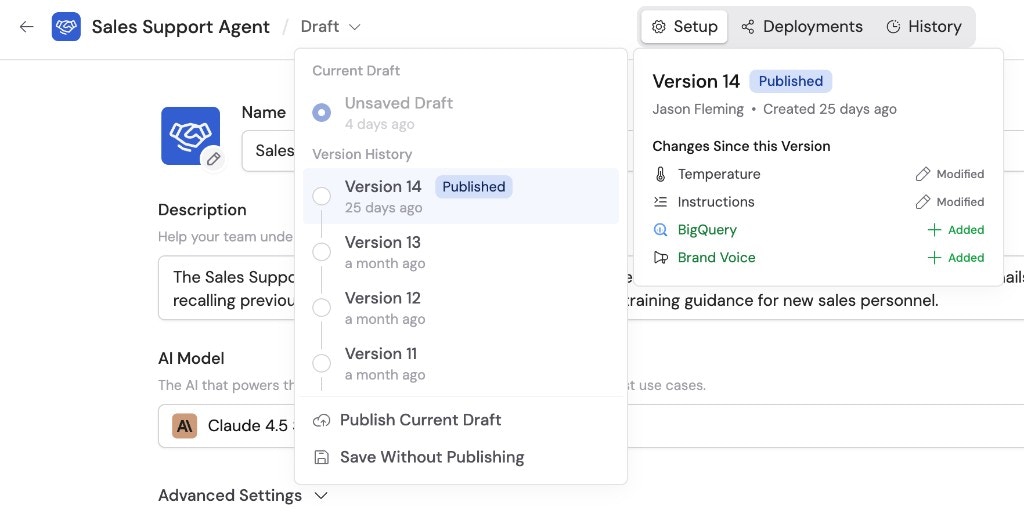
Next steps
Build and configure an Agent
Create a new Agent or edit an existing one.
Assign roles and groups
Set up user groups to simplify permission management.