

Skills require Code Execution & File Creation. Newer Agents include this
setting by default. An older custom Agent may need an editor to enable it
under Advanced Settings and publish the Agent again.
Understand where a Skill is available
- Installed for you: The Skill follows you across chats you start directly in Cassidy with compatible default and custom Agents.
- Attached to an Agent: The Skill is available while someone uses that Agent.
- Added to a Workflow AI action: The Skill is available to that specific Generate Text action.
Install a Skill for yourself
Install a Skill when you want it available regardless of which compatible Agent you choose.1
Open your Skills
Click Customize in the sidebar, then select Skills. You can also
choose Manage skills from the chat slash menu.The Skills page opens with your installed Skills and the rest of your
team’s library.
2
Browse your team's library
Use the sidebar to browse all Skills, team Skills, private Skills, or
shared folders.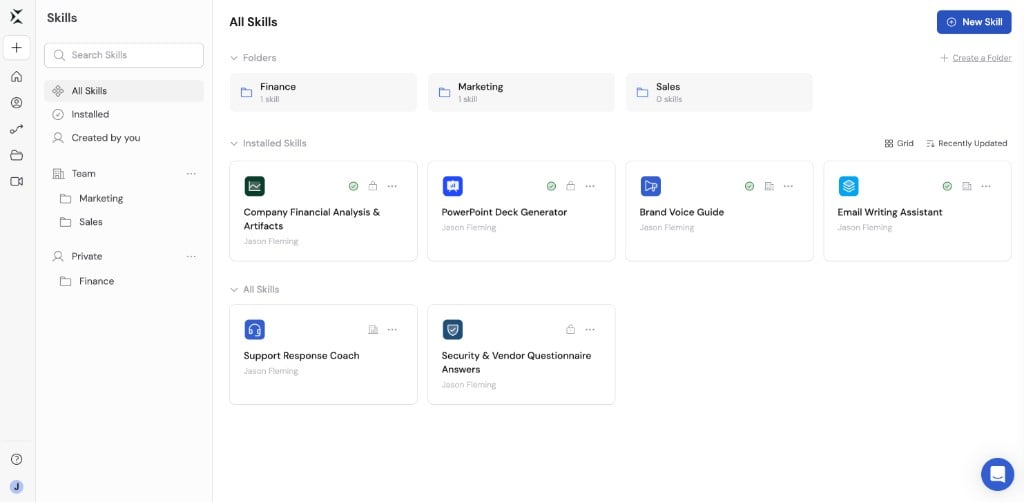
3
Review and install the Skill
Open a Skill to review its description, resources, and tools, then click
Install this Skill.Cassidy warns you when the Skill references Knowledge Base sources or
Workflows you cannot access. Once installed, the Skill appears in your
active Skills and under My Skills in the chat slash menu.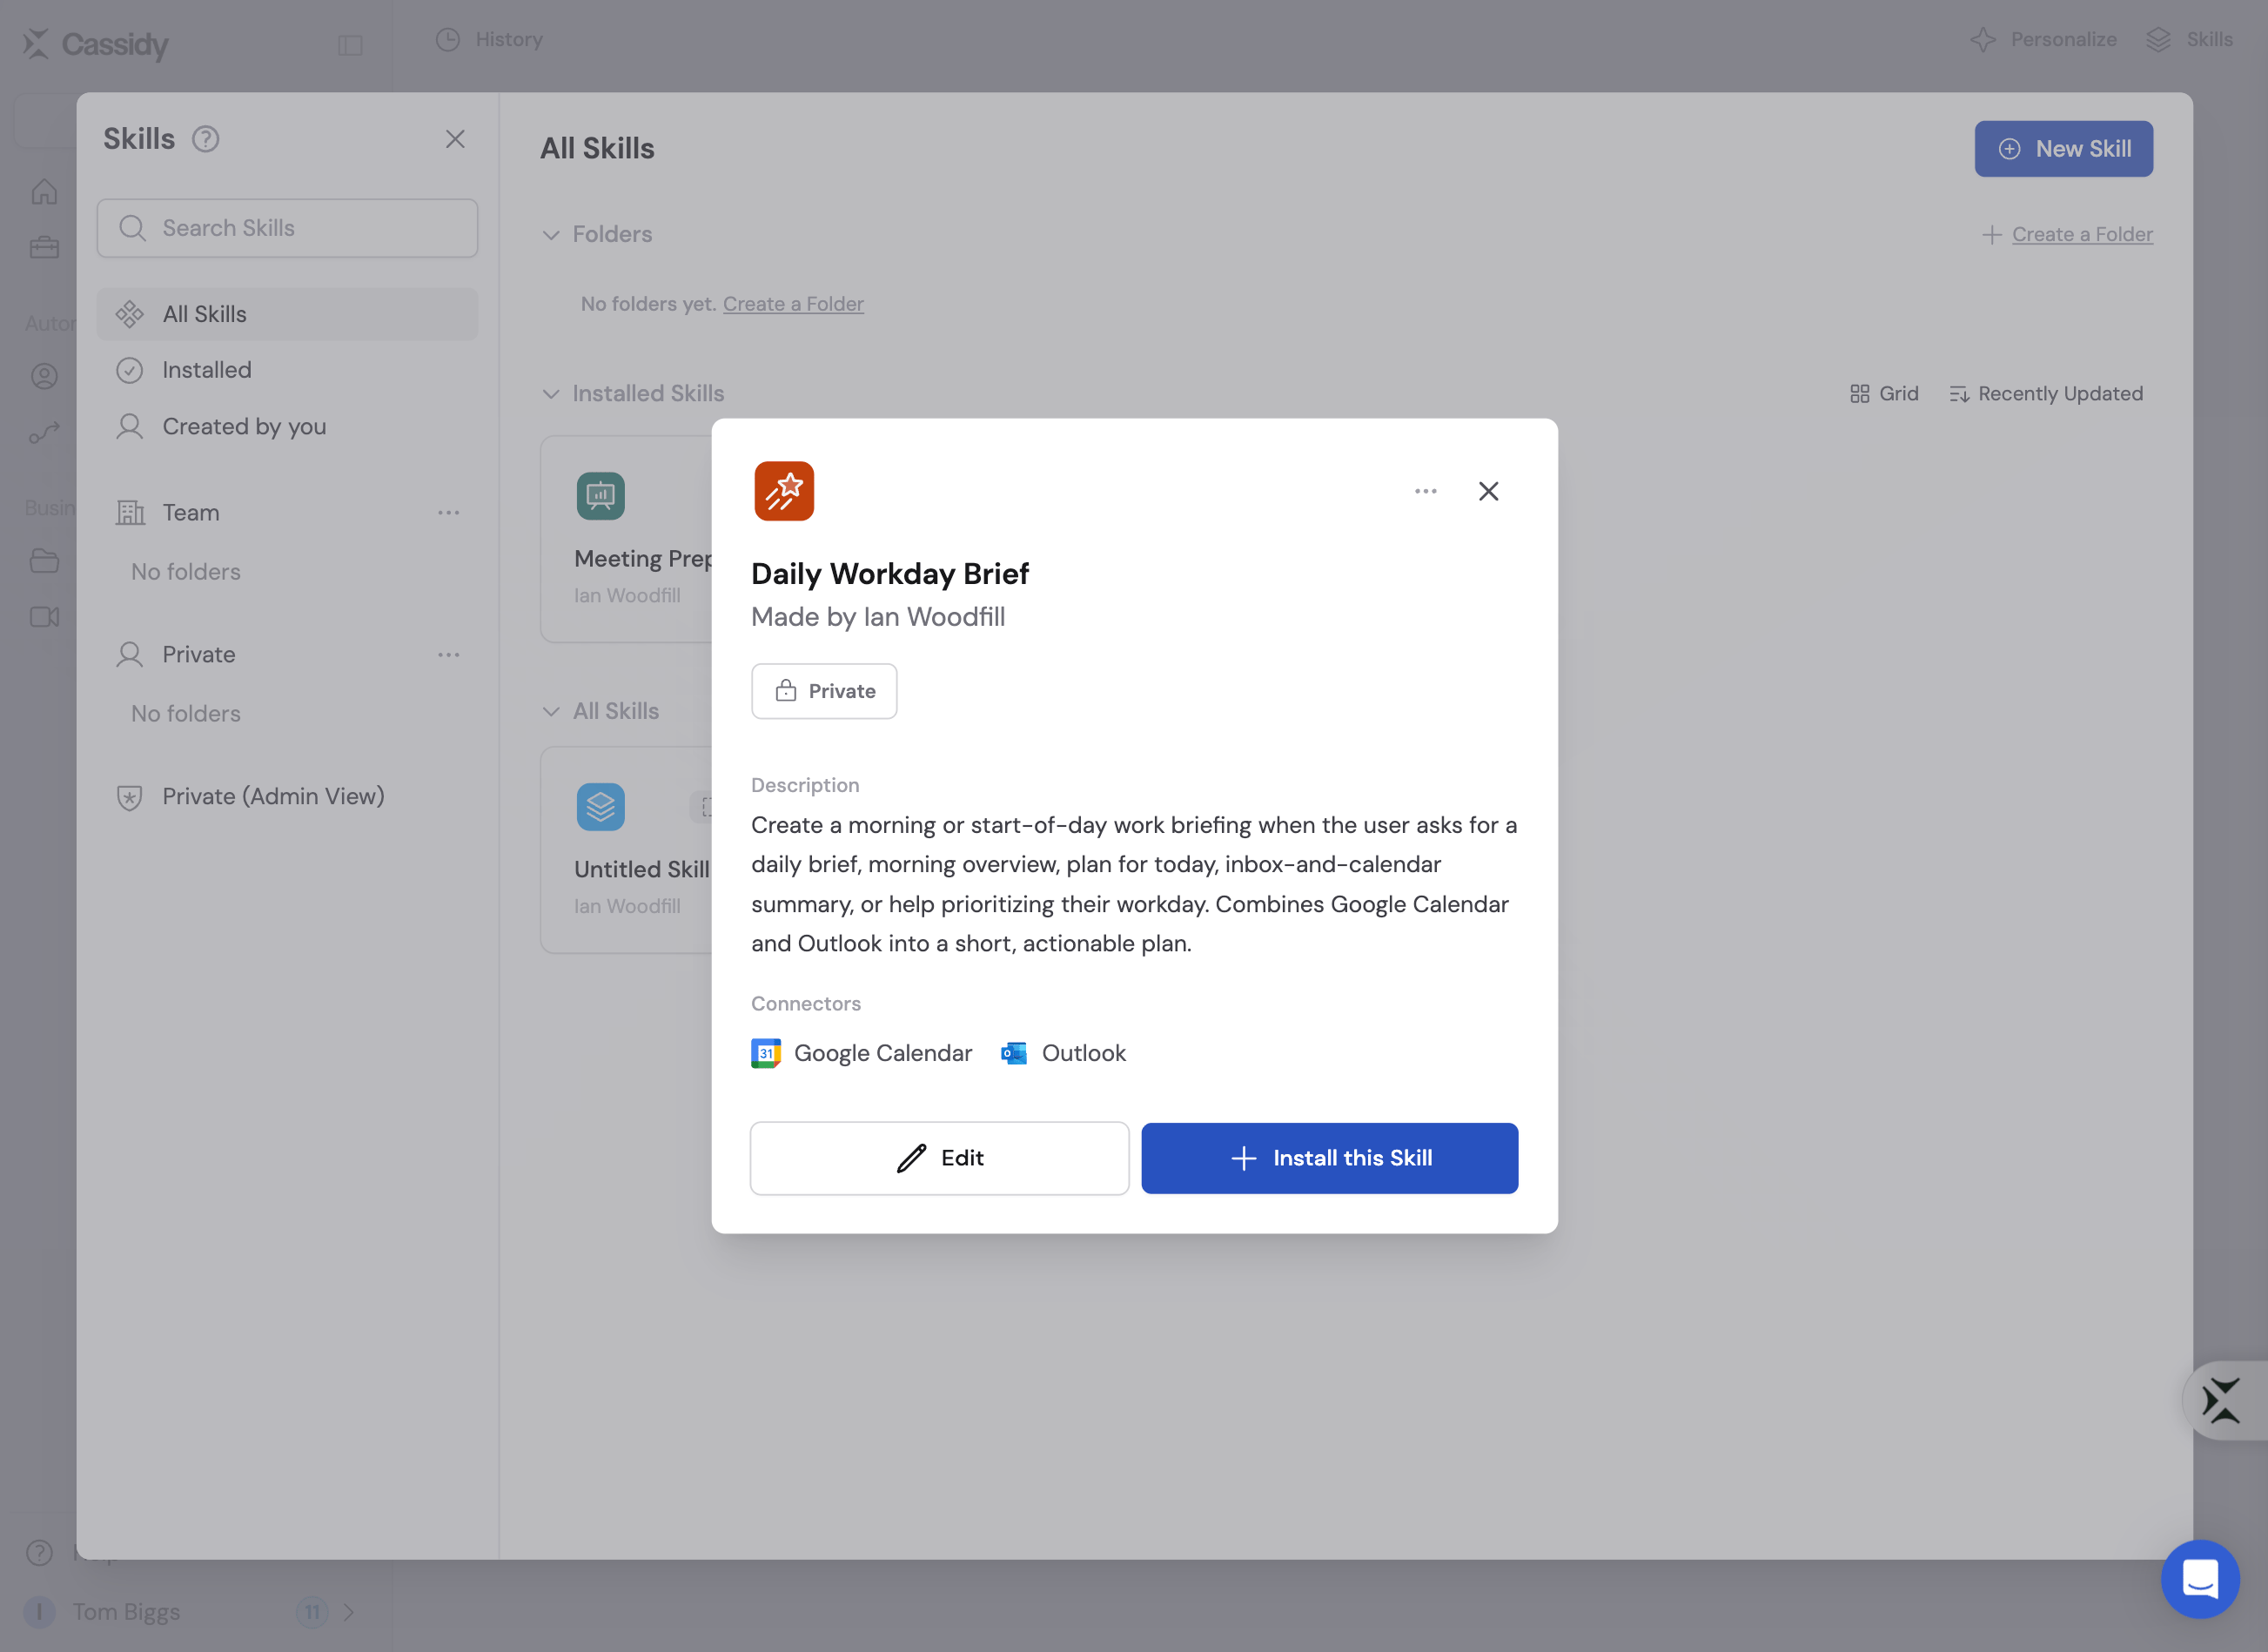
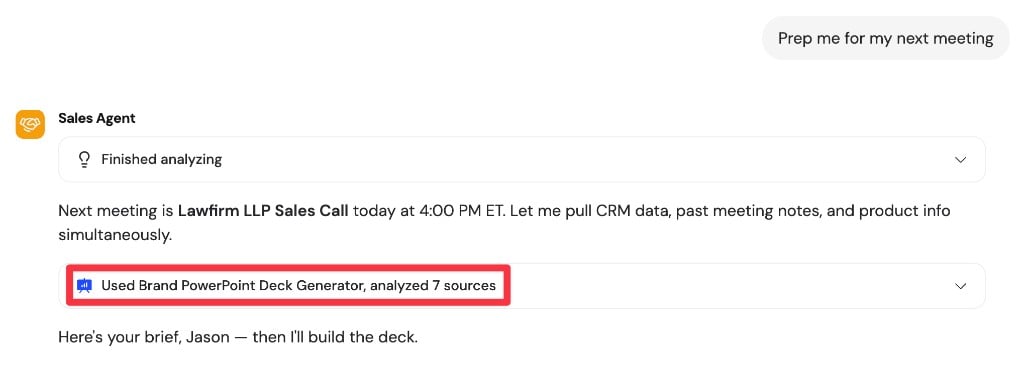
Let Cassidy choose a Skill
Once a Skill is available, Cassidy can select it when its description matches your request. For example:- You install a Customer Follow-up Email Skill.
- You open your regular sales Agent.
- You ask for a follow-up email using customer call notes.
- Cassidy loads the Skill’s playbook and applies it to the draft.
Choose a Skill yourself
Use the slash menu when you already know which Skill you want.1
Open the slash menu
Type / in the chat box.
2
Choose the Skill
Select a Skill under: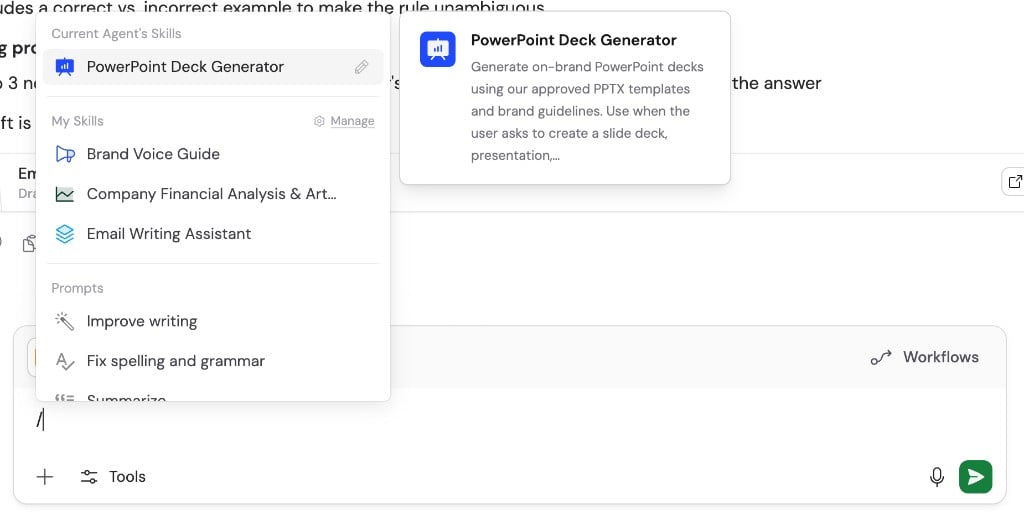
- Current Agent’s Skills: Skills attached to the Agent you are using
- My Skills: Skills installed personally or by an administrator
3
Describe the task
Continue writing your request after the Skill reference, then send the message.
Attach a Skill to an Agent
Attach a Skill when it should be available whenever someone uses a particular Agent.1
Open the Agent editor
Go to Agents, open the Agent, and click Edit.
2
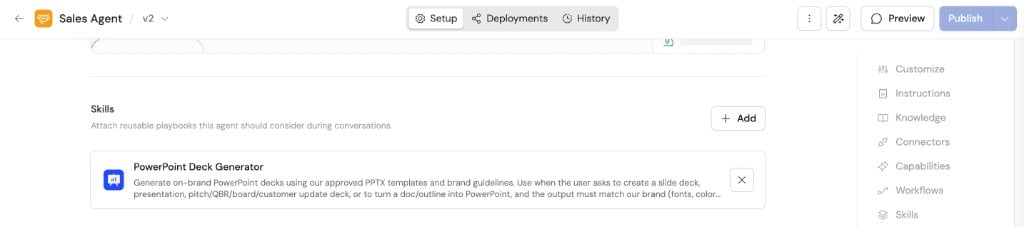
Add the Skill
Find Skills, click Add, and choose a published Skill.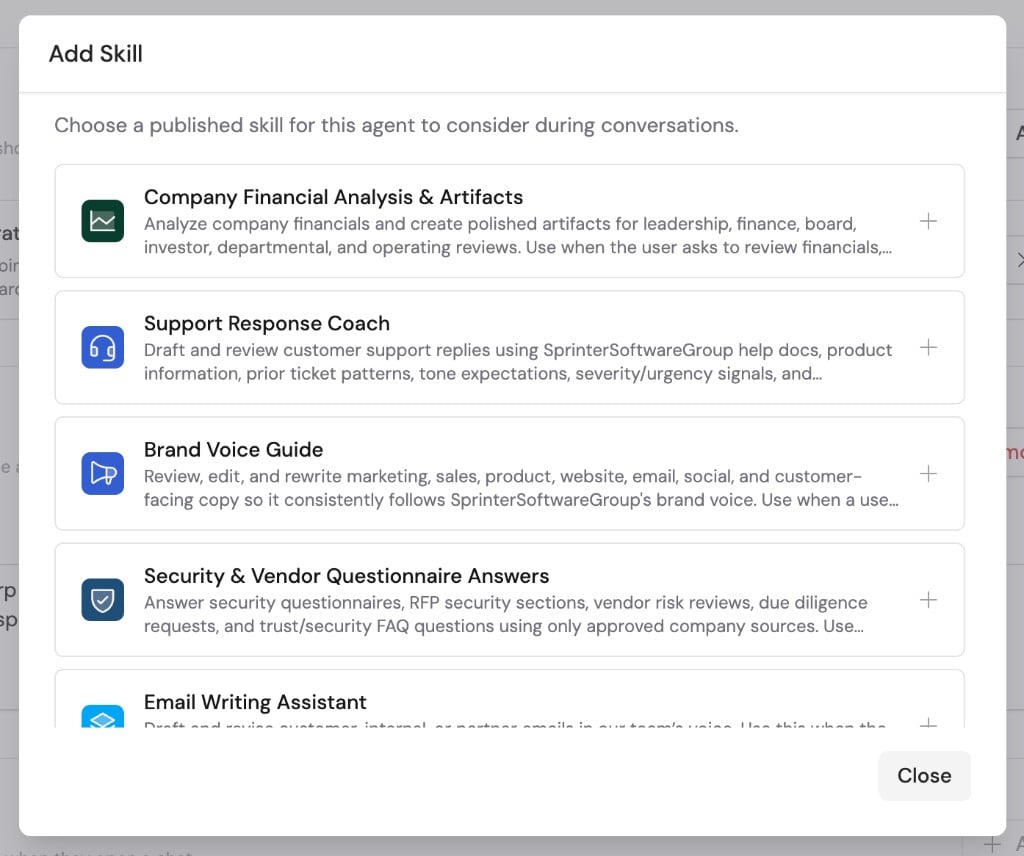
3
Check compatibility
Confirm Code Execution & File Creation is enabled under Advanced
Settings.
4
Publish the Agent
Publish the Agent so the change becomes available to users.
Add a Skill to a Workflow AI action
Skills can provide instructions and resources to Generate Text and Generate Text with Agent actions. For Generate Text with Agent, action-level Skills are added to any Skills already attached to the selected Agent.1
Open the AI action
In the Workflow builder, select a Generate Text or Generate Text with Agent action.
2
Add the Skill
Expand Skills, click Add Skill, and choose a published Skill.Adding the first Skill automatically enables Code Execution & File Creation for that action.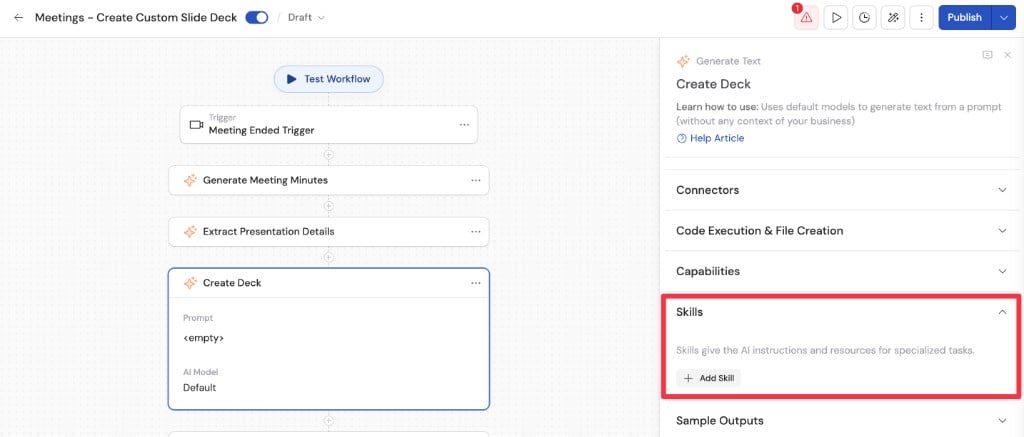
3
Test and publish
Run the Workflow with realistic inputs, check the result, and publish the Workflow.
If a Skill is unavailable
Check:- The Skill has a published version.
- You can view the Skill.
- The Agent has Code Execution & File Creation enabled.
- You can access the Skill’s referenced resources.
- You are using a chat started directly in Cassidy, or the Skill is explicitly attached to the Agent or Workflow action.
Next steps
Build and improve Skills
Improve selection, instructions, resources, and testing.
Share Skills with your team
Control who can discover and install a Skill.