

Before you start: You need permission to create Skills. This tutorial
includes sample content, so you do not need to prepare your own examples.
What you will build
In this tutorial, you will create a Skill that helps customer-facing teams write follow-up emails. The Skill will:- Use your organization’s tone
- Lead with the customer’s stated goal
- Follow an approved structure
- Include clear next steps
- Avoid commitments the sender has not approved
Create the Skill
1
Open Skills
Click Customize in the sidebar, then select Skills.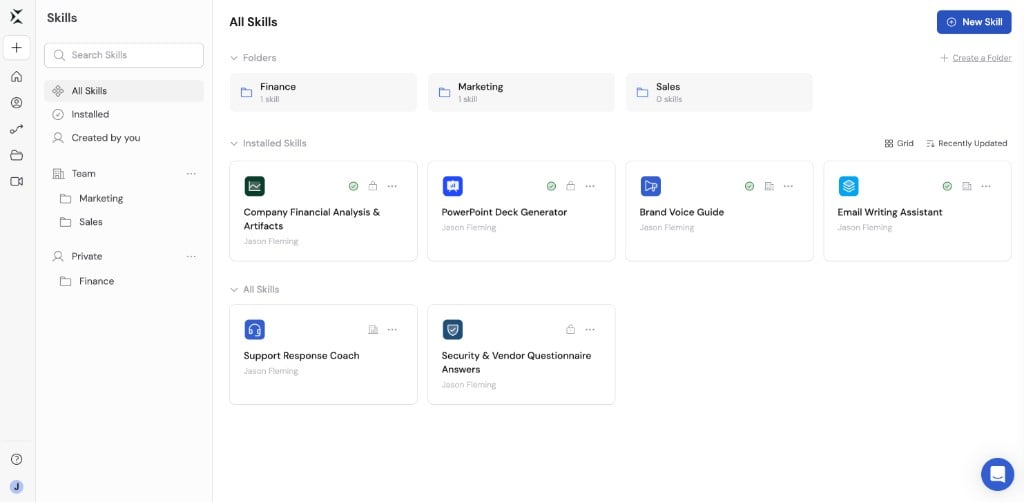
2
Describe the Skill
Click New Skill. Under Create a Custom Skill, describe the reusable work you want Cassidy to learn.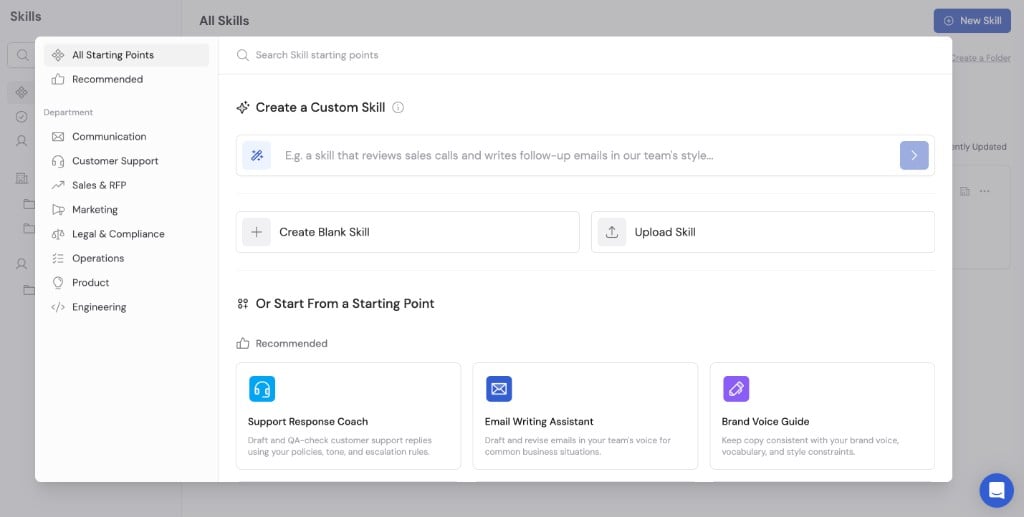
Create a Customer Follow-up Email Skill for our sales and customer success teams. It should summarize the customer’s stated goal, connect our recommendation to that goal, and end with clear next steps. Use a warm, concise tone. Follow the email examples I provide. Never invent commitments, pricing, dates, or product capabilities. Ask the sender to review any commitment before including it.
3
Provide examples and context
Cassidy may ask focused follow-up questions or request examples.Provide:
- One or two strong follow-up emails
- Your brand or communication guidelines
- Required sections or formatting
- Situations that require human review
- Requests the Skill should not handle
4
Review the draft
When Cassidy creates the draft, open it and review:
- Name: Is it easy for coworkers to recognize?
- Description: Does it clearly say when the Skill should be used?
- Instructions: Do they match your real process?
- Examples and files: Are they current and appropriate to share?
- Boundaries: Does the Skill know when to ask for human review?
5
Publish it privately
Click Publish, choose Private, and confirm.Publishing privately makes the Skill usable without sharing it with the rest of your organization. This gives you a safe place to test the first version.
Confirm installation and test it
1
Confirm the Skill is installed
Publishing automatically installs the Skill for the person who publishes it.Open the published Skill and confirm that it appears under Installed.The Skill now follows you across chats you start directly in Cassidy with default and custom Agents that have Code Execution & File Creation enabled.
2
Try the primary task
Open a new chat and send this request:
Draft a follow-up email from these notes: Northstar Health wants to reduce support-ticket routing time. Priya will send pilot requirements Thursday, and Jordan will schedule a review Tuesday. We did not discuss pricing or a launch date.Check that the result:
- Uses the expected structure and tone
- Reflects the customer’s actual goal
- Includes accurate next steps
- Does not invent commitments
3
Test the boundaries
Try at least two more requests:
- An incomplete request that should make the Agent ask for information
- An unrelated request that should not use the Skill
4
Improve and republish
Return to the Skill editor, update the draft, and publish the improved version.When you are satisfied with the results, move the Skill to Team or a shared folder so other people can find it.
You now have a tested, published Skill that you can continue improving.
Other ways to start
After you understand the standard creation flow, you can also:- Choose a starting point for a guided beginning
- Choose Create Blank Skill when you already know exactly how to configure it
- Choose Upload Skill when you have an existing compatible Skill package
Next steps
Build and improve Skills
Write clearer instructions, add resources, and test difficult cases.
Share Skills with your team
Choose who can find and use the finished Skill.