How Connectors differ from other integrations
Cassidy has three types of integrations, each serving a different purpose:
Connectors vs. Knowledge Base integrations — Knowledge Base integrations import and index content so your Agents can search it semantically. Connectors skip the import entirely and query the external system live, which means results are always up to date but limited to what the external API exposes.
Connectors vs. Workflow integrations — Workflow integrations connect apps for repeatable, multi-step automations that run on a schedule or in response to a trigger. Connectors are for ad-hoc, real-time queries that happen naturally during a conversation with an Agent.
Available Connectors
MCP Servers
Connect custom MCP servers to give Agents access to any external system through standardized tool interfaces.
Cassidy Meetings
Search meeting transcripts, read AI summaries, and reference discussions with timestamped citations.
HubSpot
Search and retrieve contacts, deals, companies, and tickets from your HubSpot CRM.
Salesforce
Read and write records, opportunities, accounts, and cases in Salesforce.
Airtable
Read and write records across your Airtable bases and tables.
Snowflake
Query your Snowflake data warehouse directly from a conversation.
Asana
Look up and manage tasks, projects, and subtasks in Asana.
BigQuery
Query your BigQuery data warehouse directly from a conversation.
Google Calendar
View, create, and update calendar events from a conversation.
Google Sheets
Read and write data in Google Sheets spreadsheets.
Monday.com
Read and manage items, boards, and updates in Monday.com.
ServiceNow
Search, create, and manage ServiceNow records and incidents.
MCP (Model Context Protocol)
For systems that don’t have a native Connector, you can connect any external tool using MCP. Admins register MCP servers, scope access per user or group, and control permissions on every tool the server exposes. All actions are logged and data is accessed in real time, never stored.Set up MCP
Register MCP servers and add them to your Agents.
Connection methods
When you add a Connector, you choose how users authenticate with the external tool.- Per-user connection (recommended) — Each user connects their own account when they first interact with the Connector. The Connector respects that user’s individual permissions in the external tool, so everyone only sees data they’re authorized to access.
- Shared connection — An admin connects a single account that all users go through. This gives the team centralized access to the same data without requiring individual sign-ins, but everyone shares the same permission level.
Permission controls
For Connectors that support both reading and writing data, you can control what the Agent is allowed to do. Configure each available action with one of three permission levels:- Always Allow — The Agent can perform the action without asking. Best for low-risk read operations.
- Needs Approval — The Agent asks the user for approval before performing the action. Best for write operations where you want a human in the loop.
- Disabled — The Agent cannot perform the action at all.
Add a Connector to an Agent
1
Open the Agent editor
Go to Agents, find the Agent you want to configure, and click Edit.
2
Navigate to Connectors
In the Setup tab, scroll to the Connectors section and click + Add.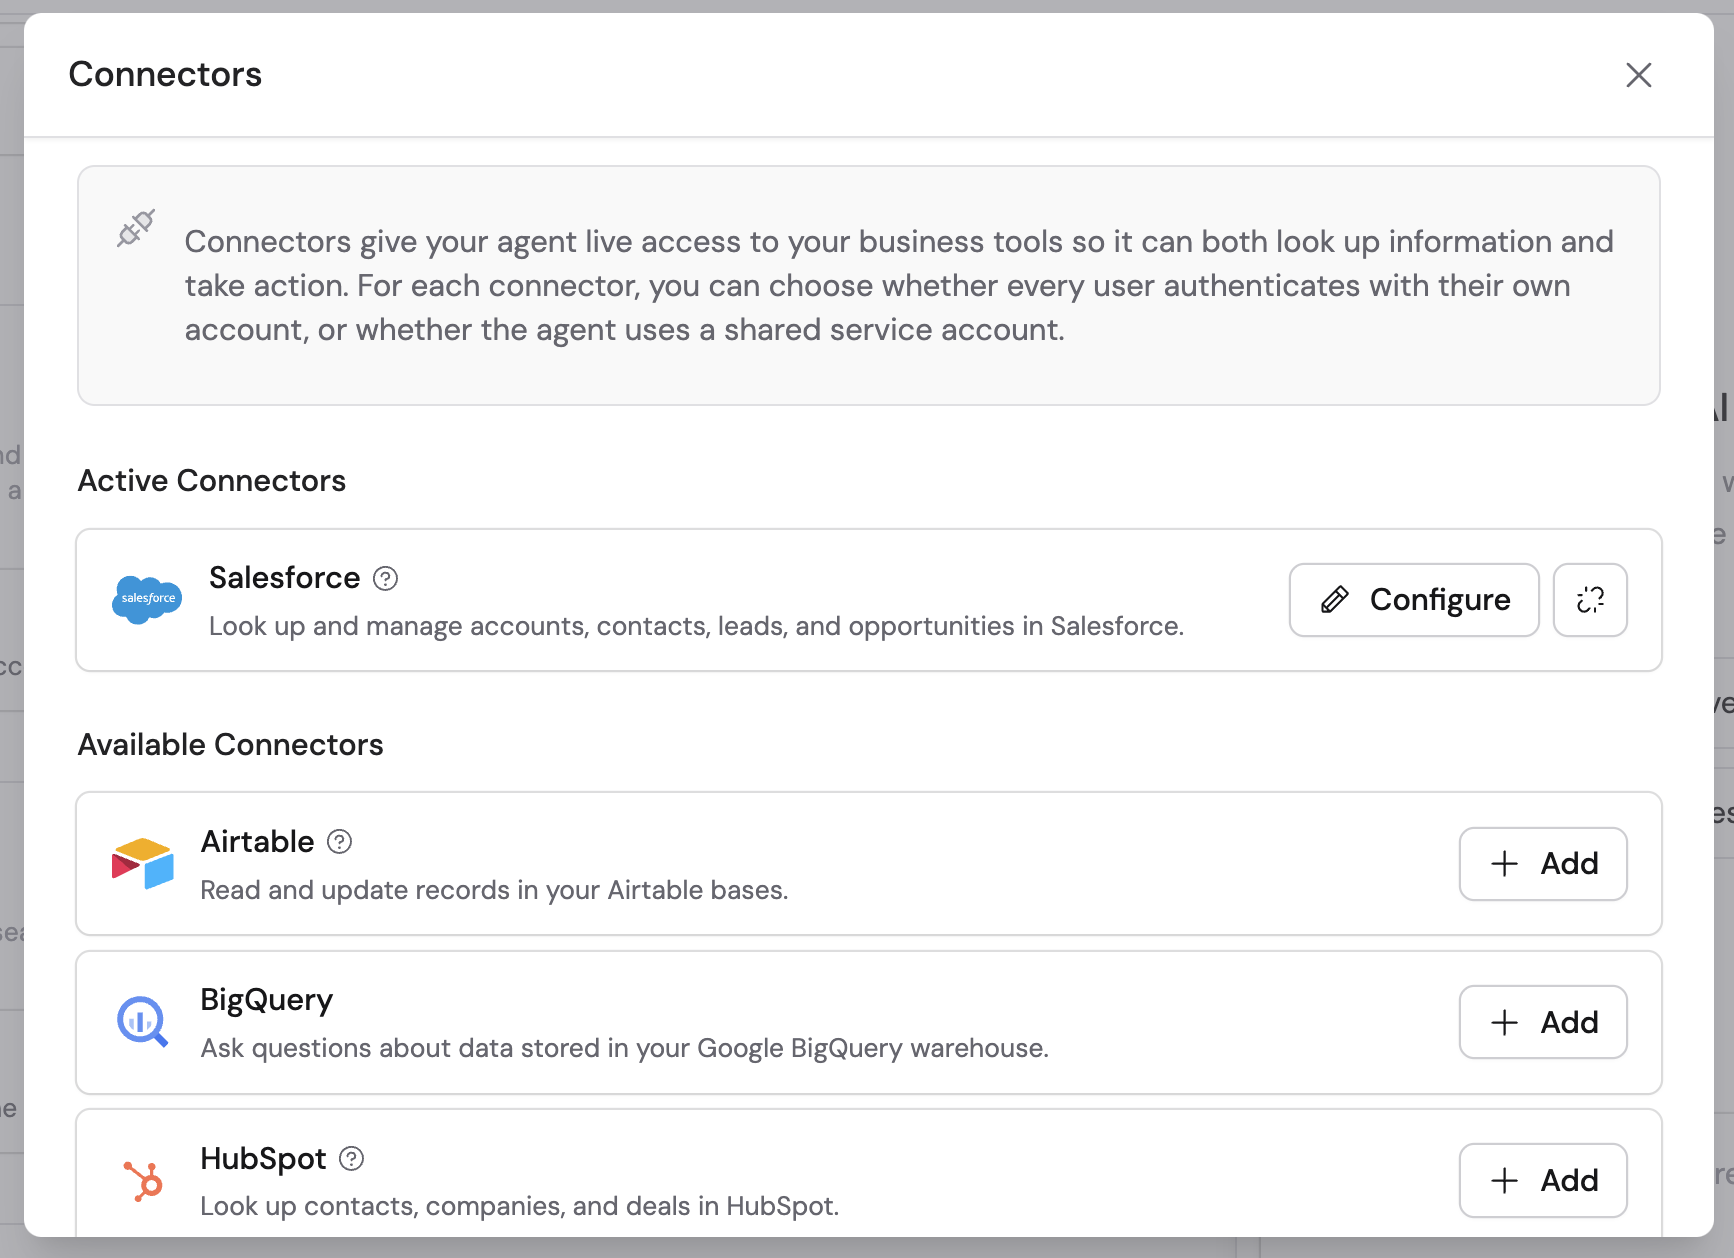
3
Select a Connector
Choose the Connector you want to enable from the dropdown.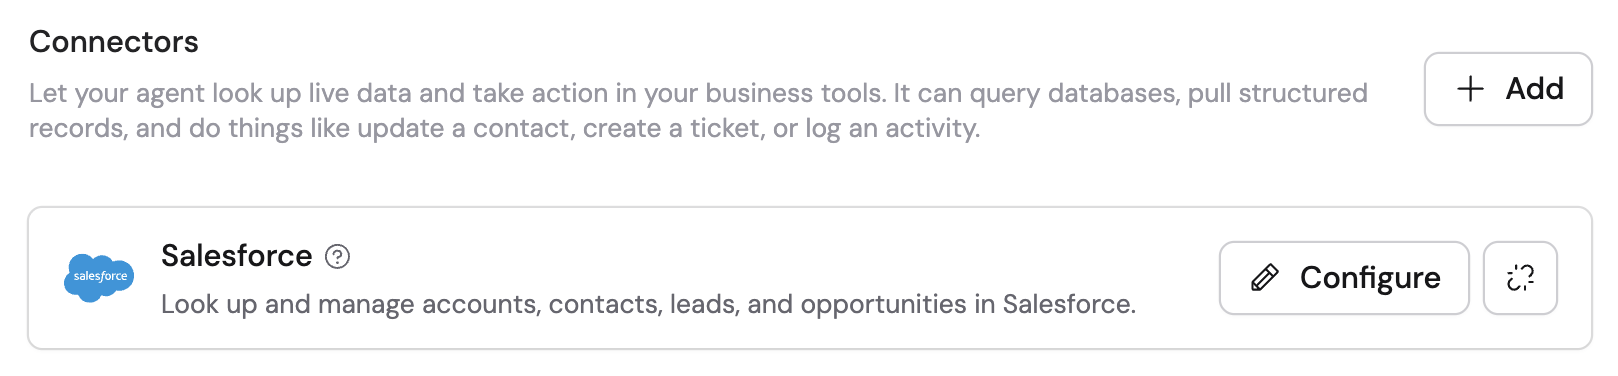
4
Configure authentication
Choose a connection method:
- Per-user connection — Each user connects their own account.
- Shared connection — An admin connects a shared account for the team.
5
Set action permissions
For each available action, choose one of:
- Always Allow — The Agent can perform this action without asking.
- Needs Approval — The Agent requests approval before performing the action.
- Disabled — The Agent cannot perform this action.
6
Save and publish
Click Save or Publish to make the Connector available to users.
Monitor Connector usage
When an Agent uses a Connector during a conversation, you can review what happened by expanding the Analyzed Sources section in the chat response. This shows the specific queries and actions the Agent performed, including any data it retrieved or modified. If an action is set to Needs Approval, you’ll see an approval prompt in the chat where you can accept or reject the action before it executes.Connectors in Workflows
Connectors aren’t limited to Agents — you can also add them directly to a Generate Text action in a Workflow. This lets the AI query live data from your business tools as part of an automated process, without needing a full Agent.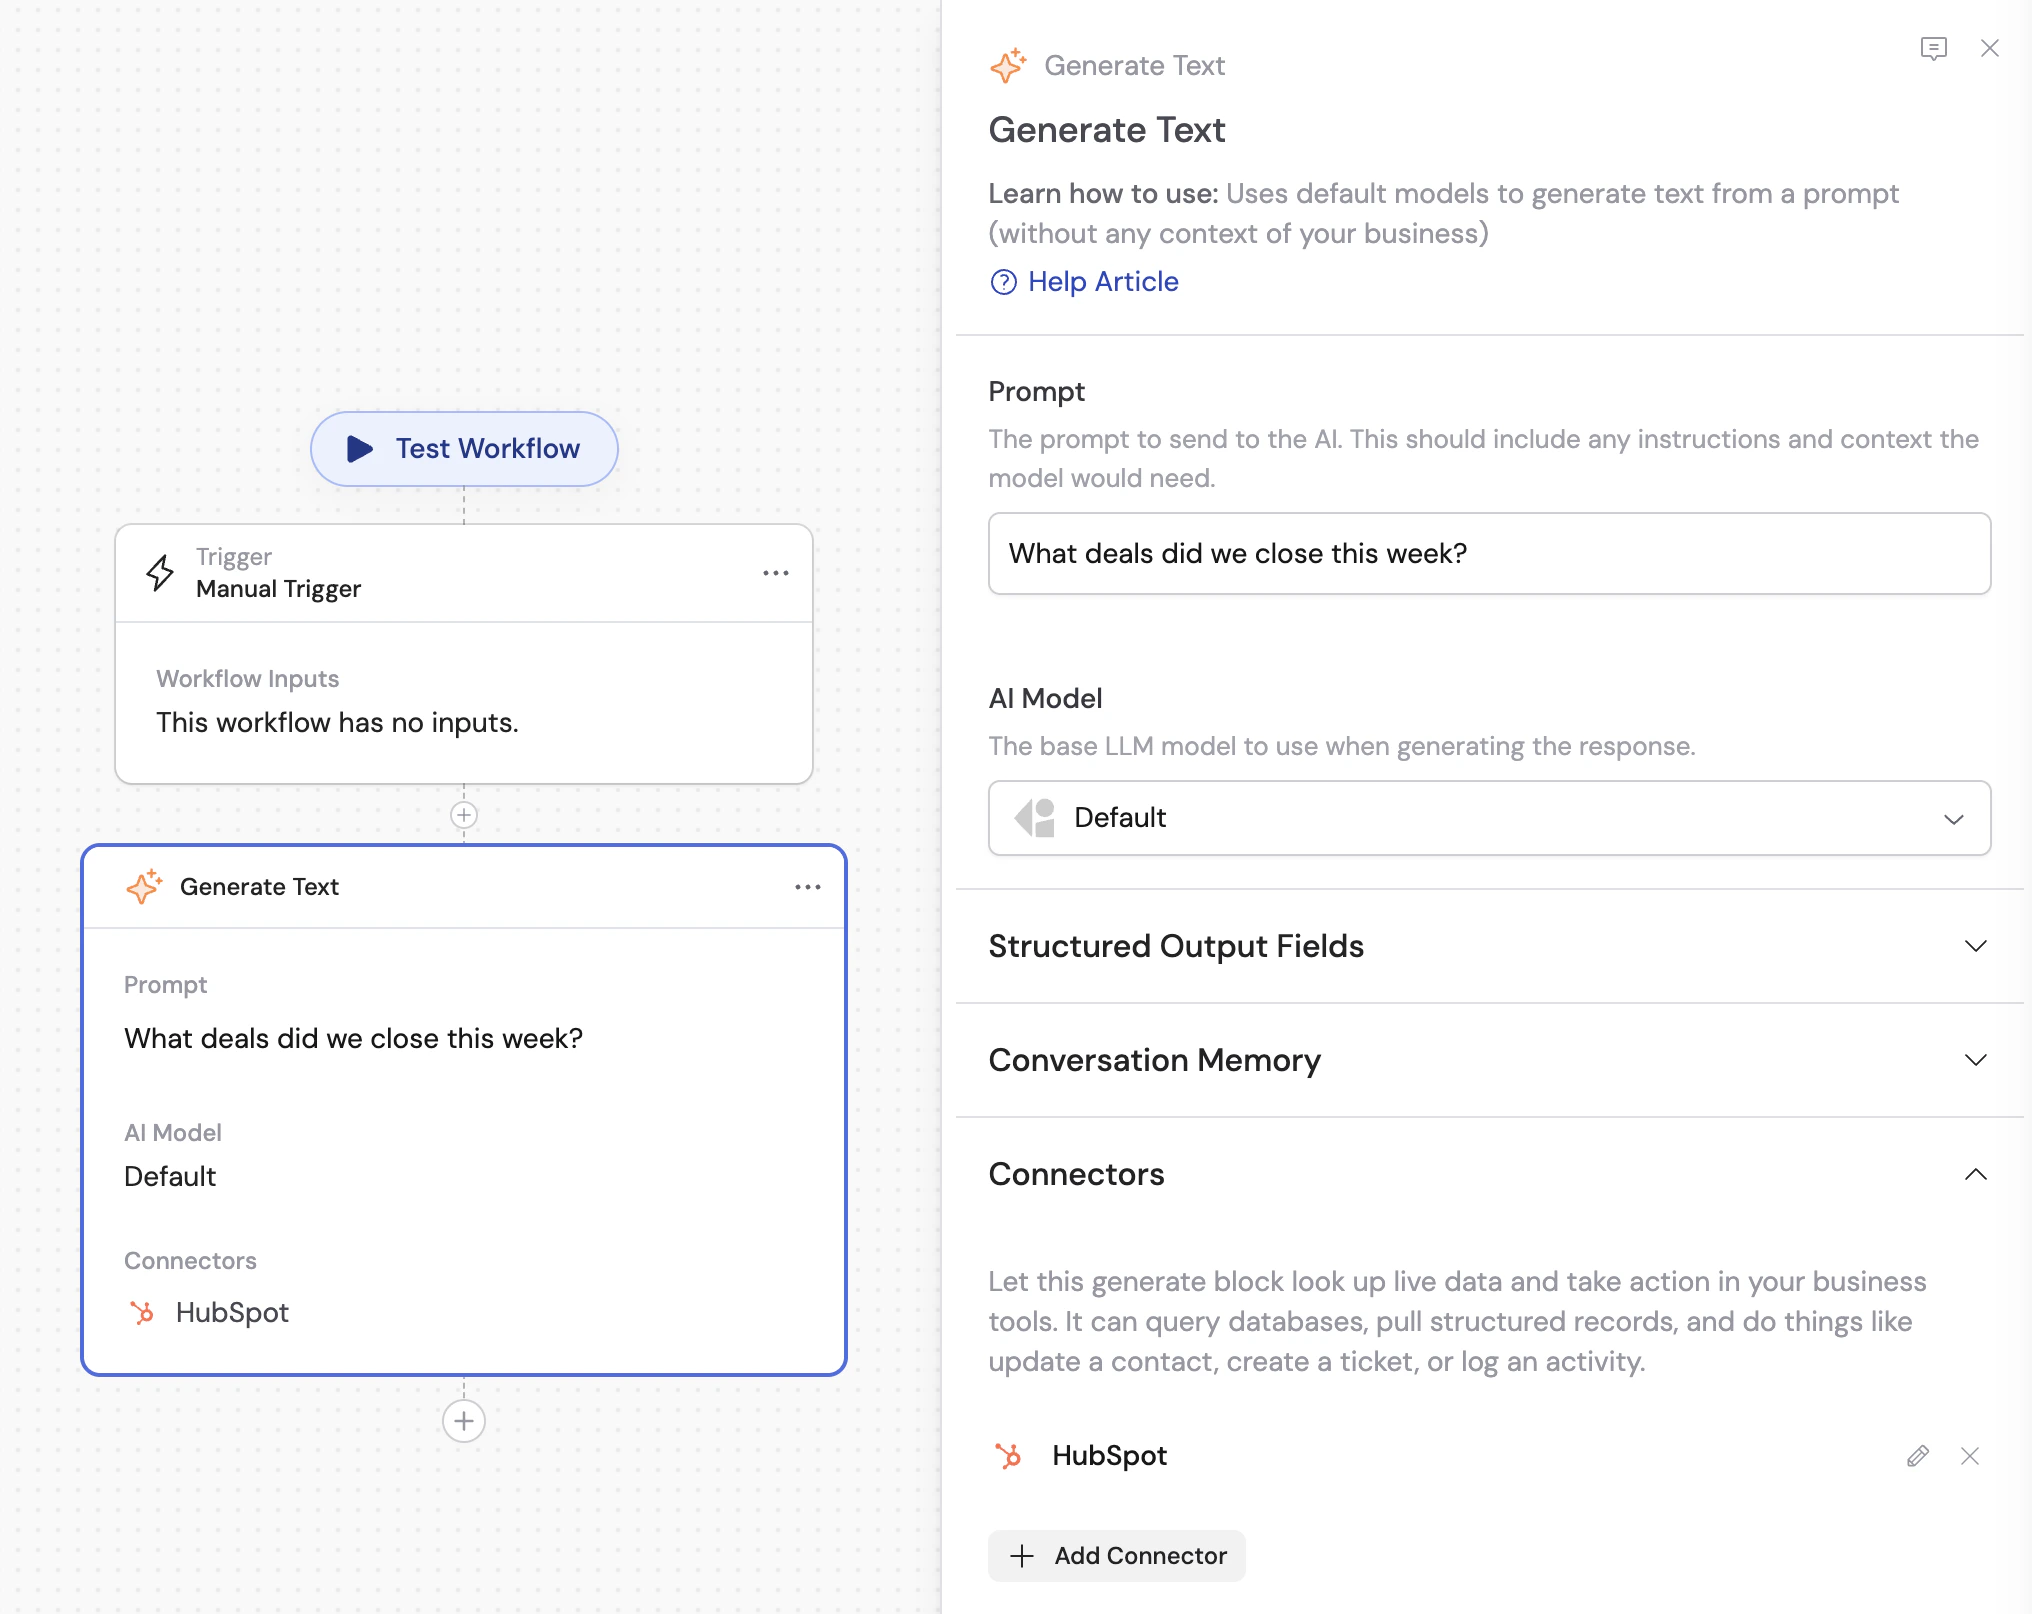
Next steps
Learn about Agents
Understand how Agents use Connectors, Knowledge Base, and Capabilities together.
Explore Capabilities
Add built-in skills like web search, image generation, artifacts, and browser use.
Browse all integrations
See every app Cassidy connects to and the integration types available.
Build a Workflow
Create multi-step automations for repeatable processes.