Prerequisites:
- An Agent created in Cassidy
- Google Workspace admin access
- A Google Cloud project (or the ability to create one)
Connect Cassidy to Google Chat
1
Navigate to your Agent
Go to Agents and select the Agent you want to deploy. Click Edit to open the Agent settings.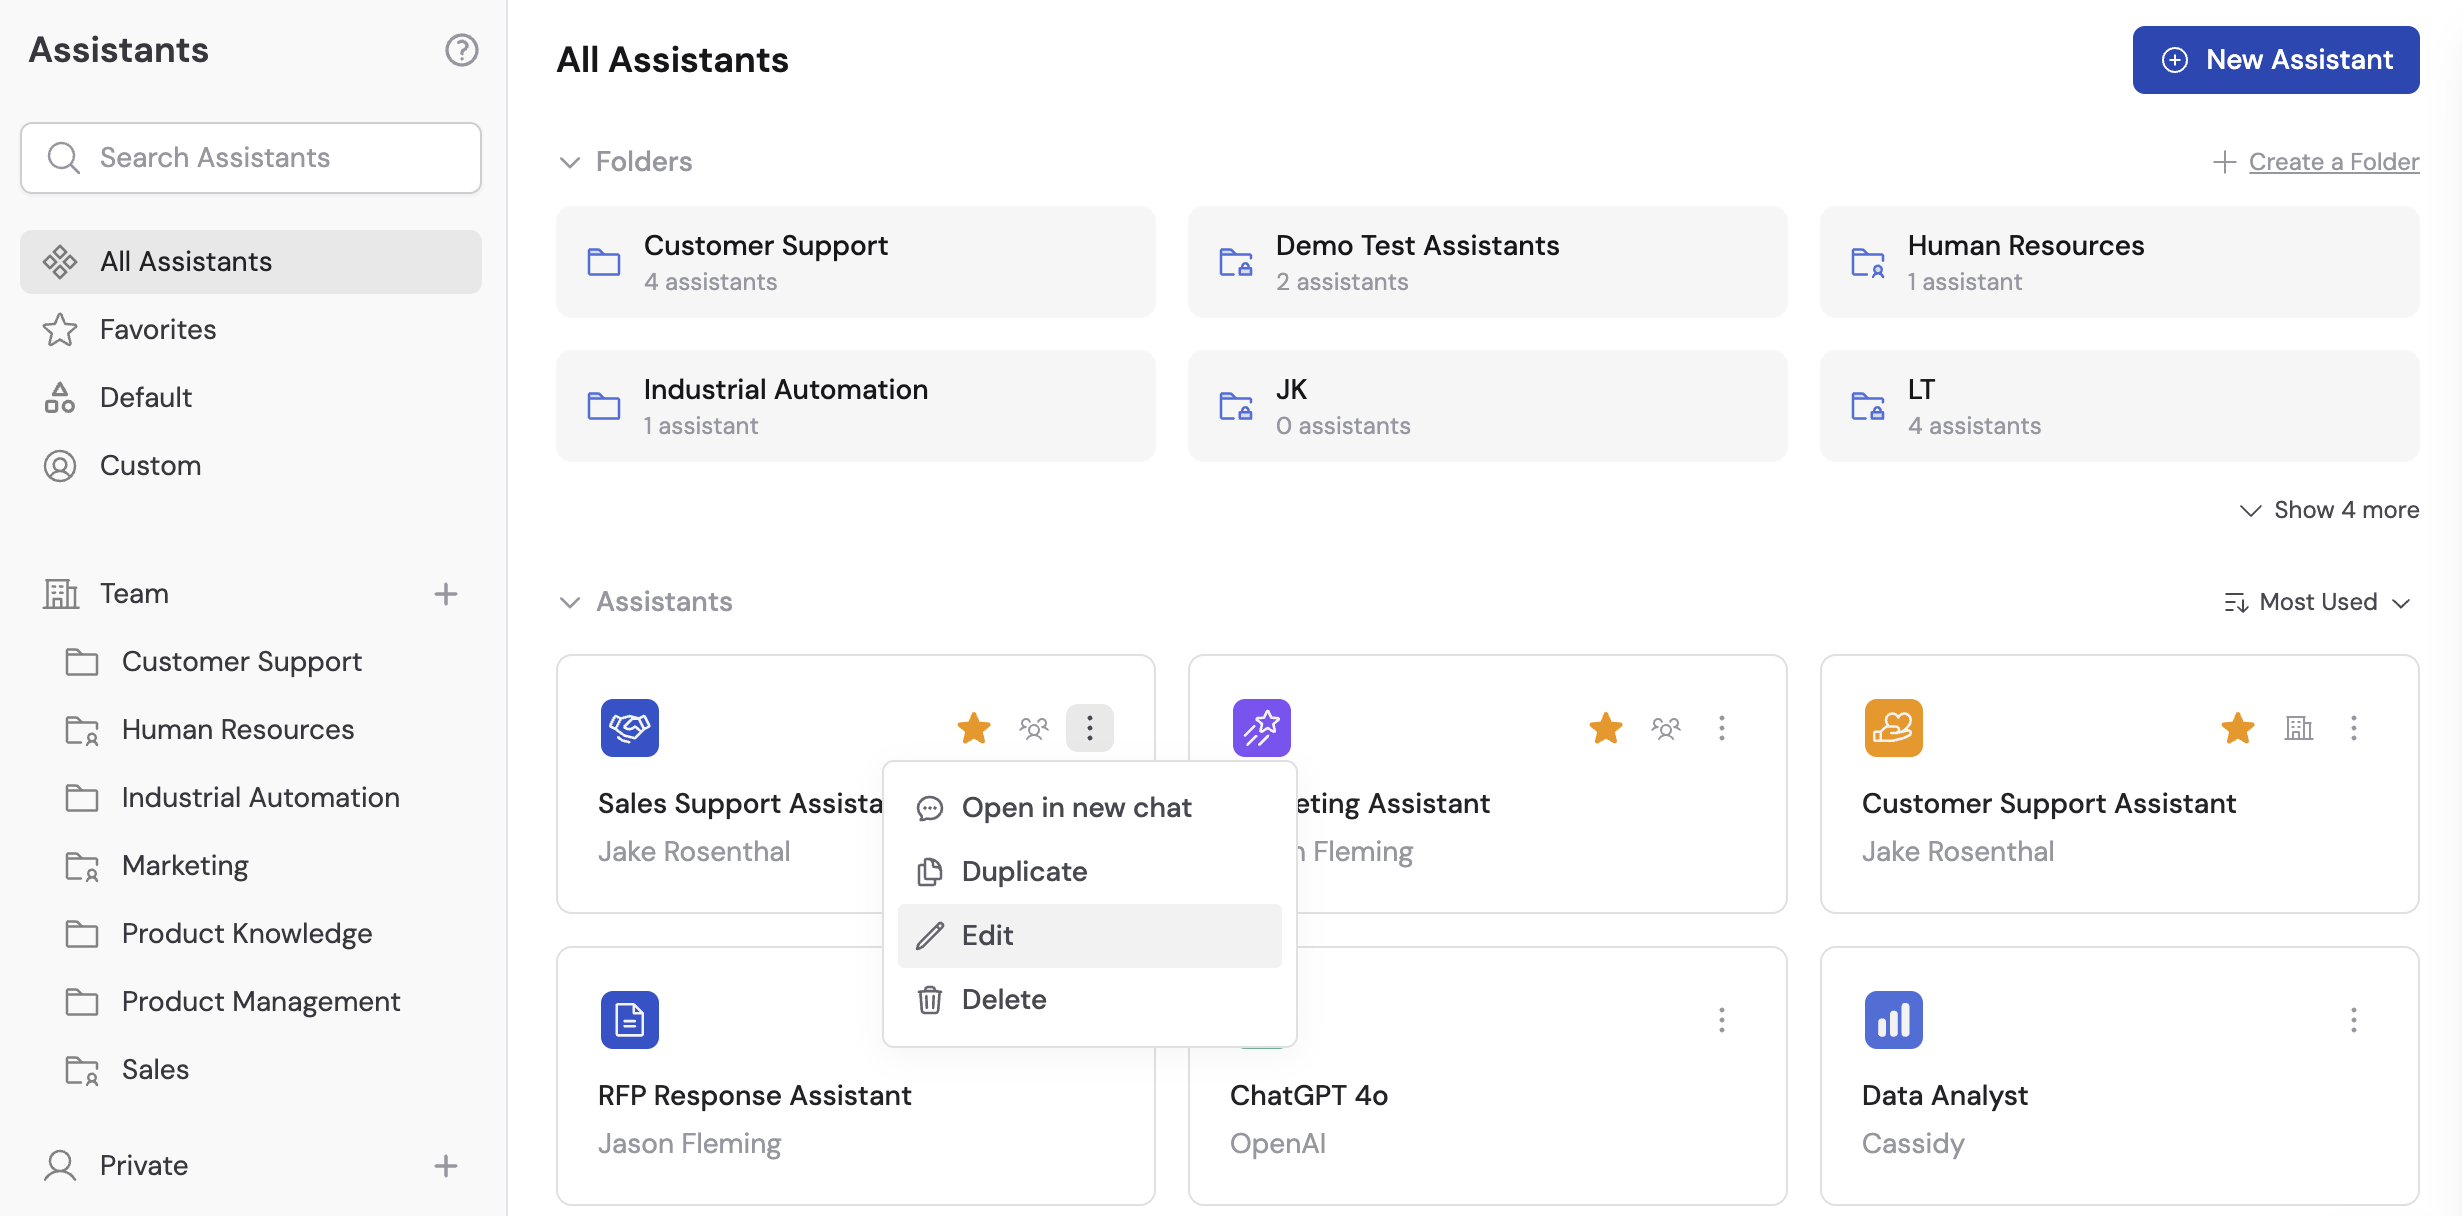
2
Open the Deployments tab
Navigate to the Deployments tab and select Google Chat.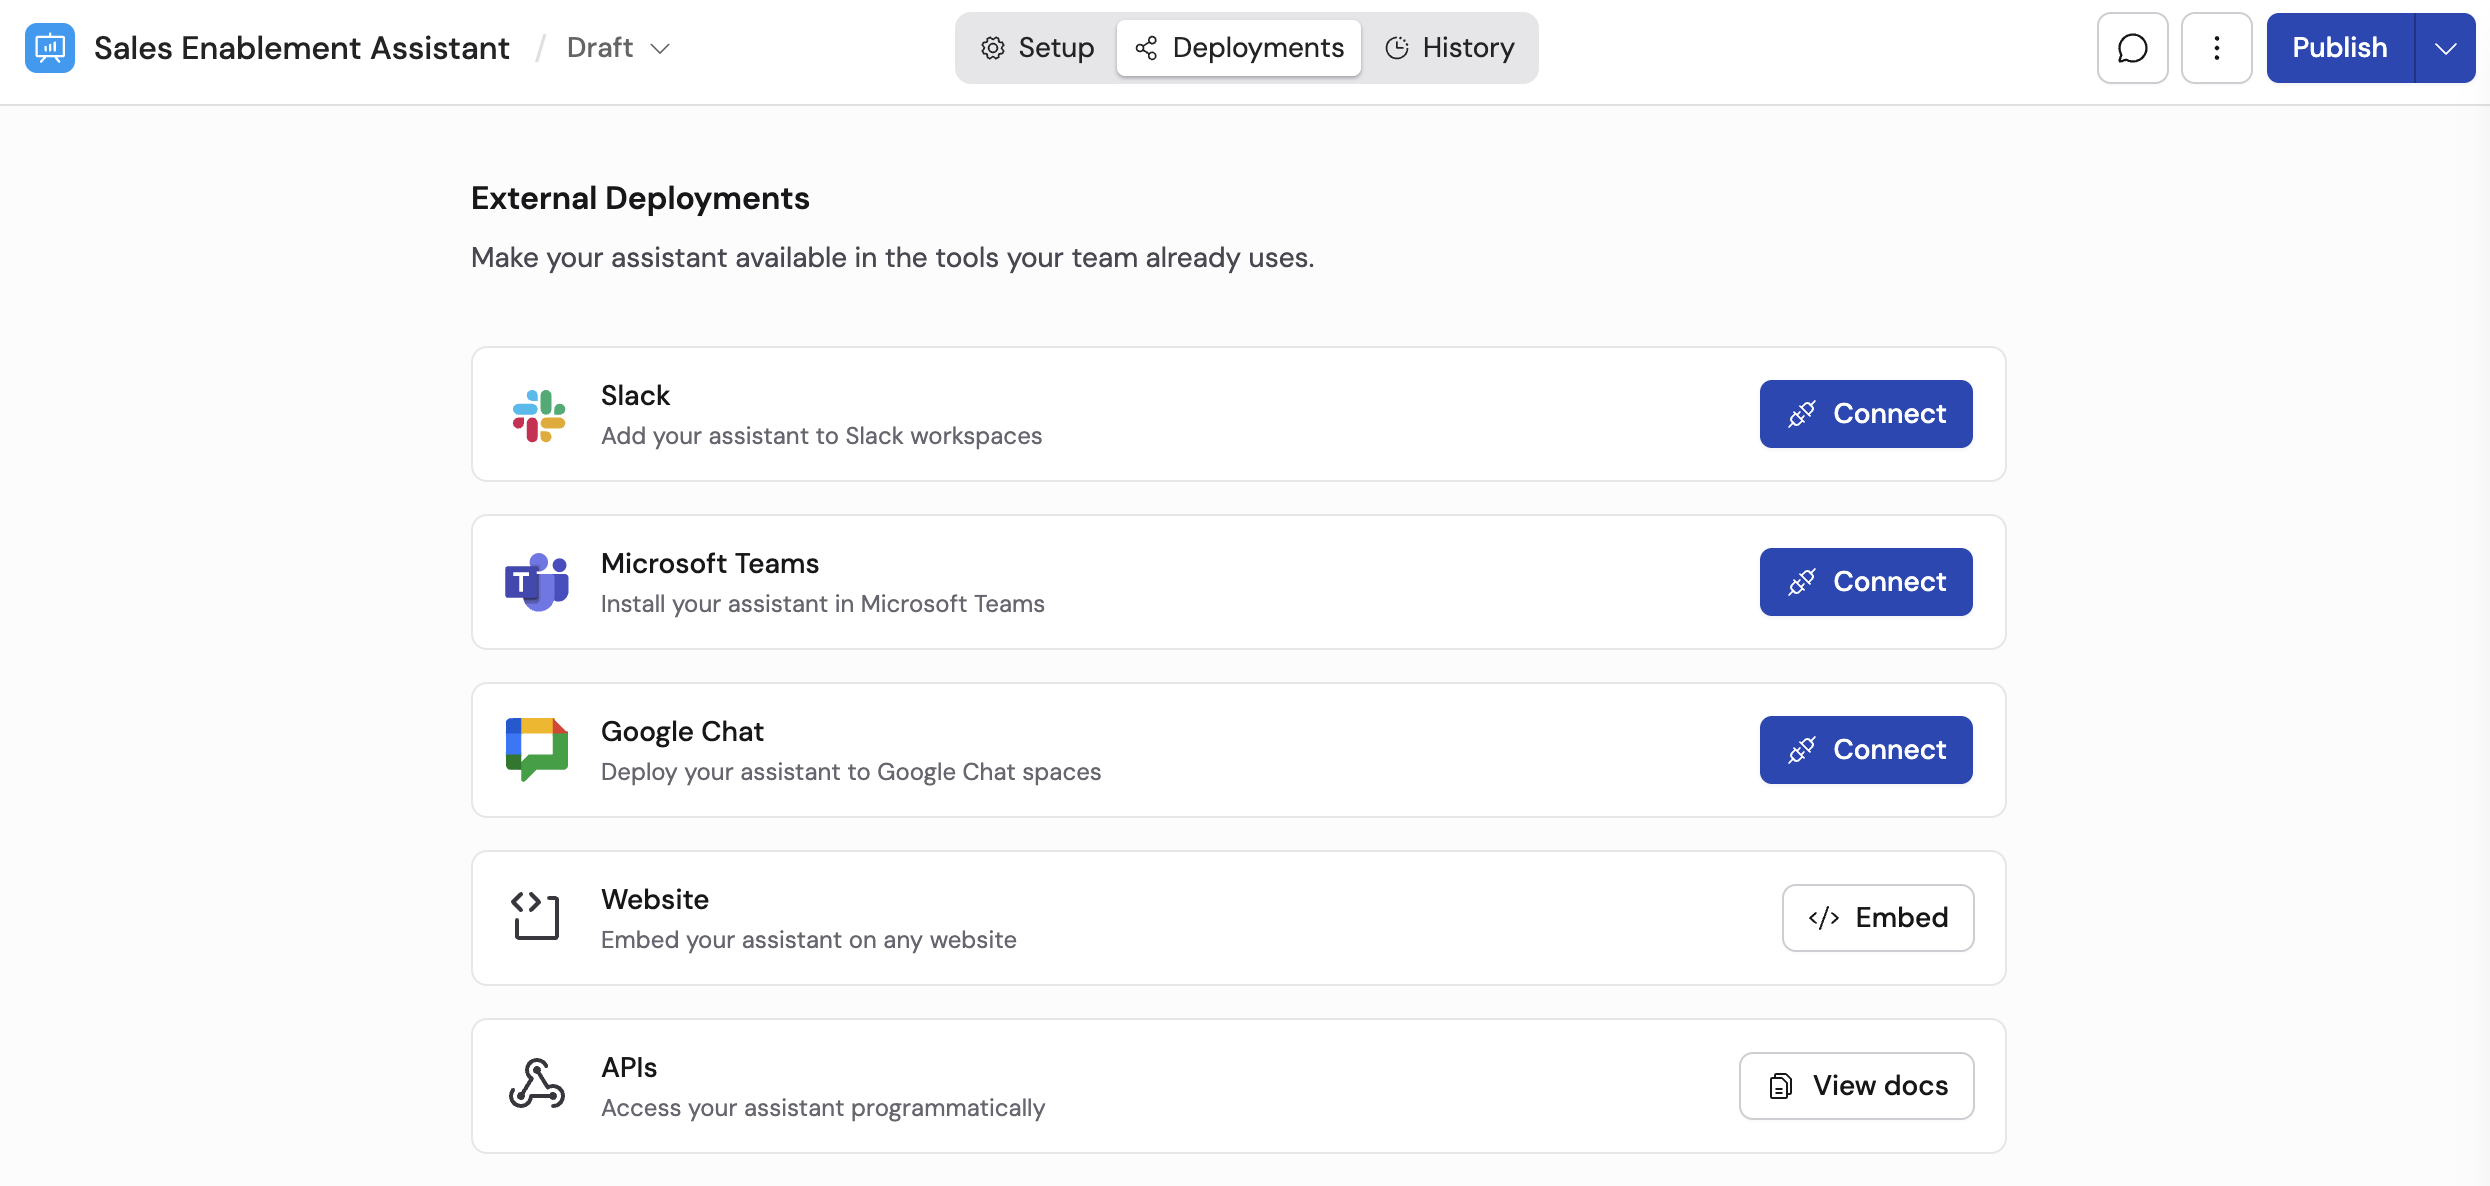
3
Copy the webhook URL
Copy the Webhook URL provided by Cassidy. You’ll need this when configuring the Chat bot in Google Cloud.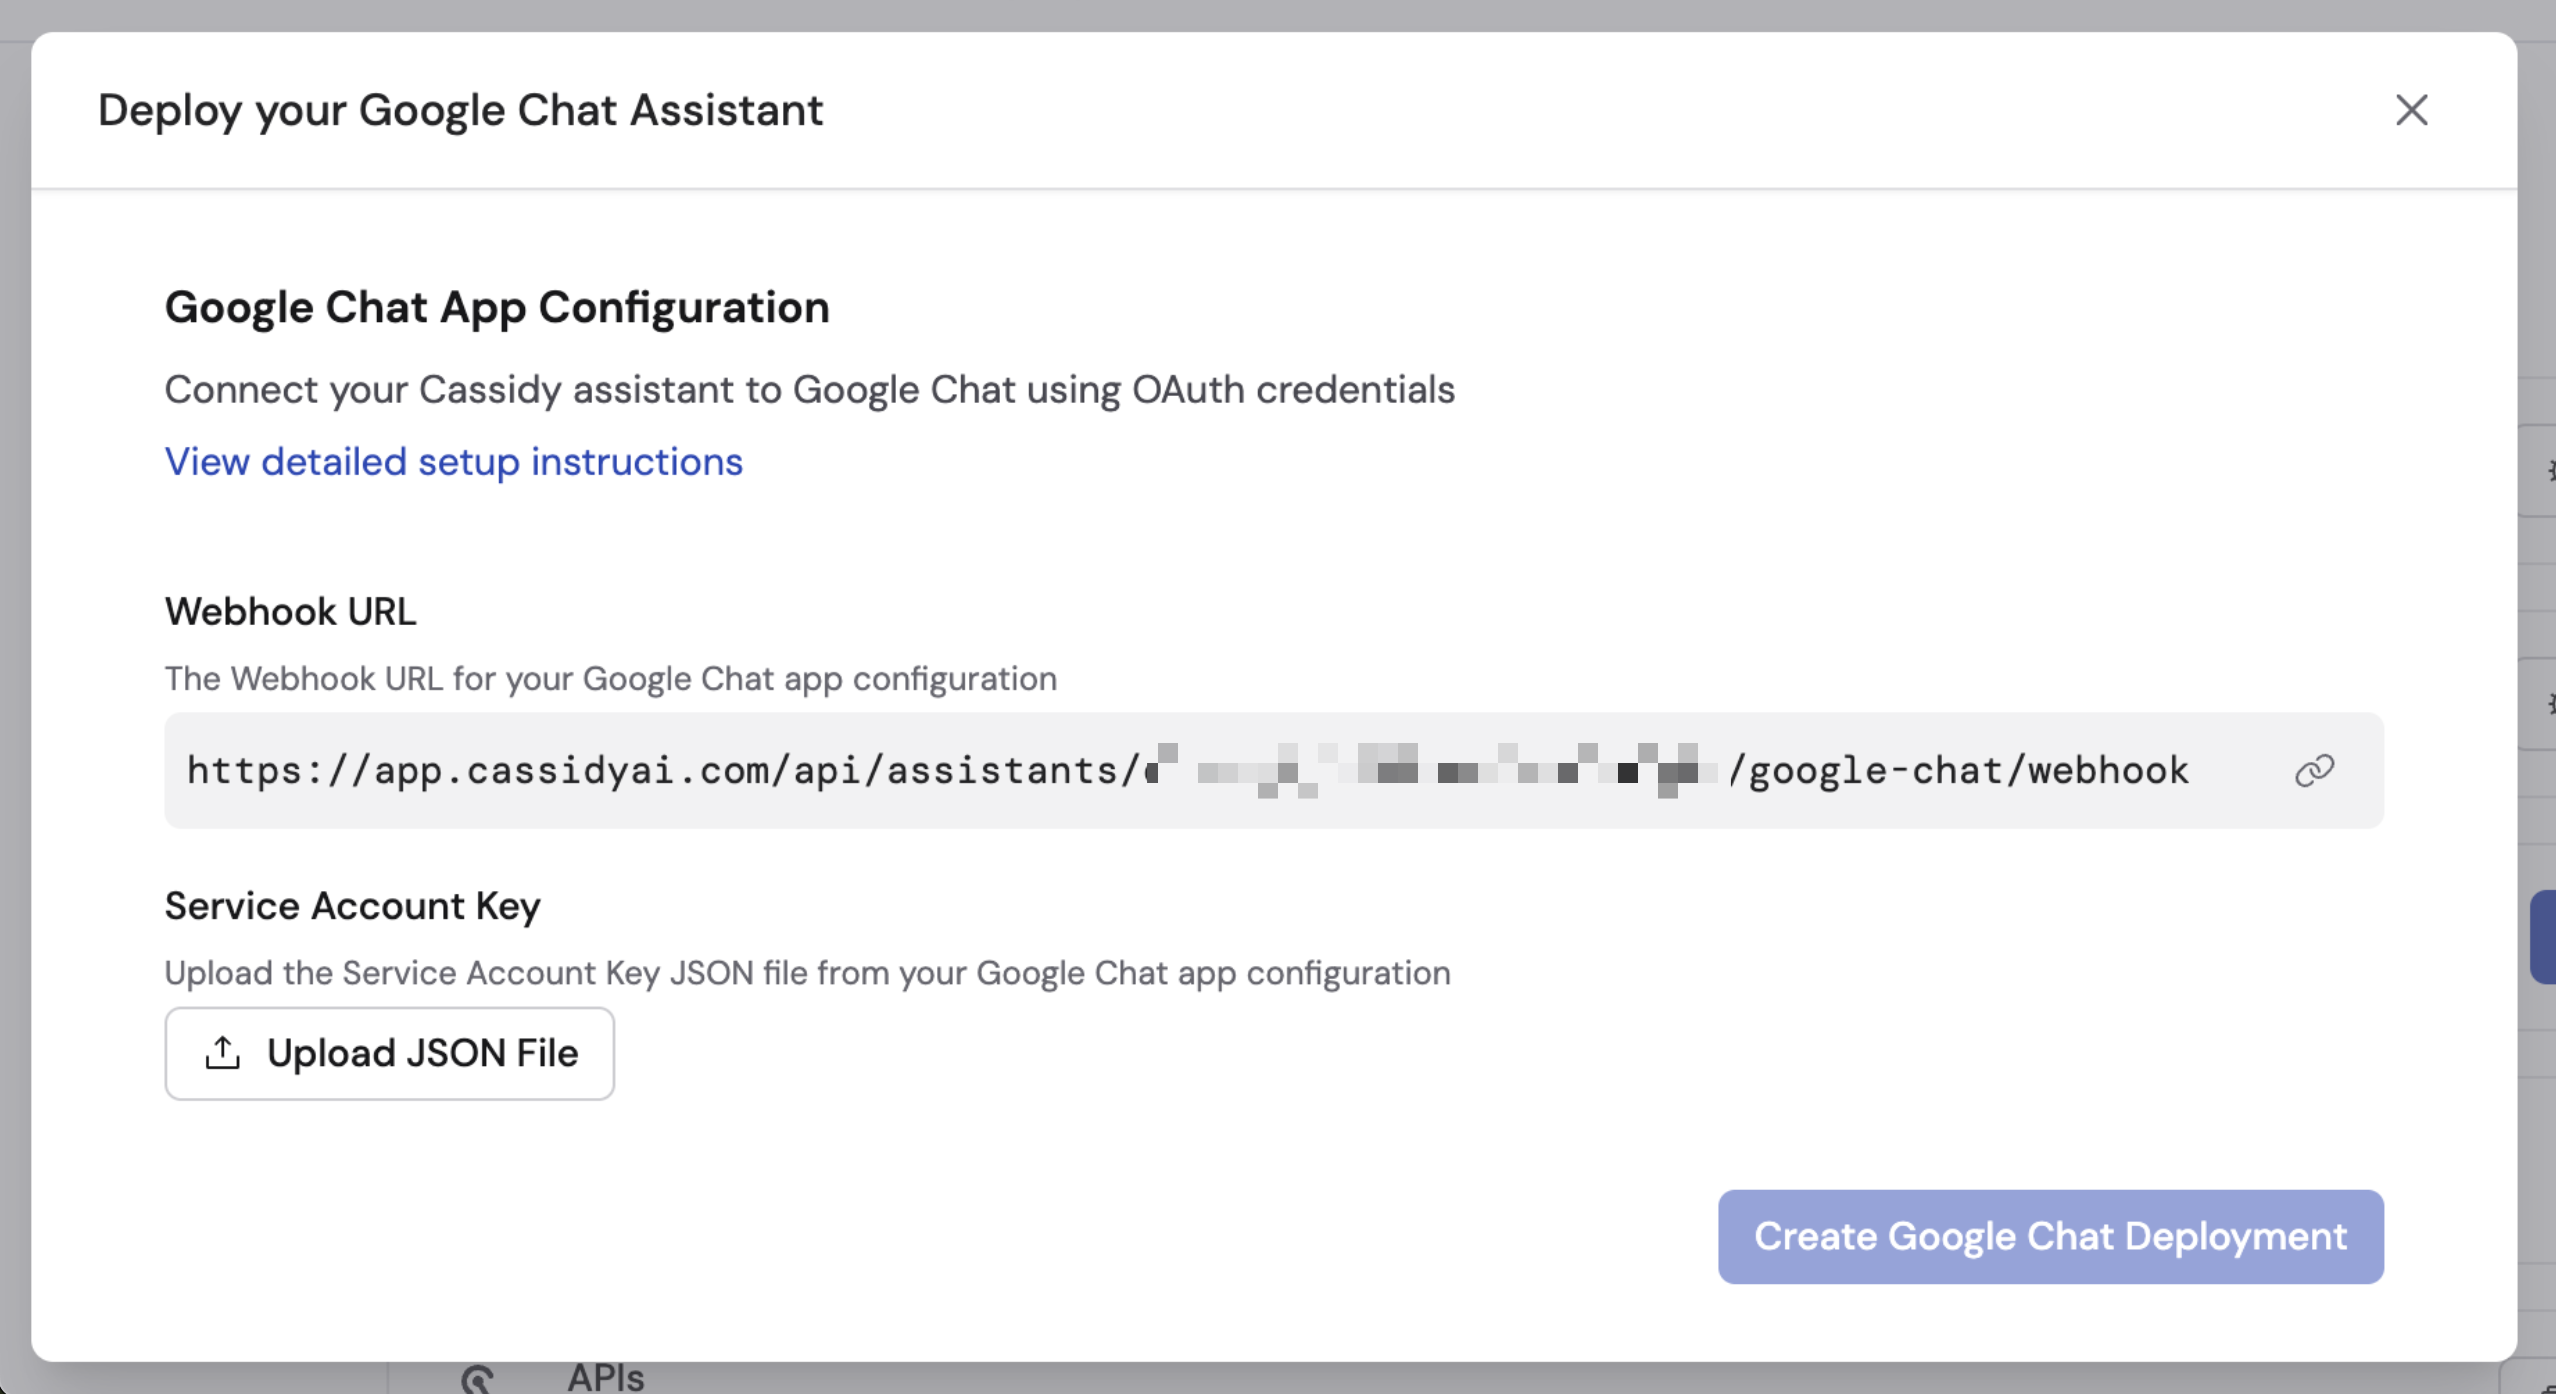
4
Set up a Google Cloud account
Go to the Google Cloud Console. If you don’t have an account, select your country, agree to the Terms of Service, and click Agree and Continue.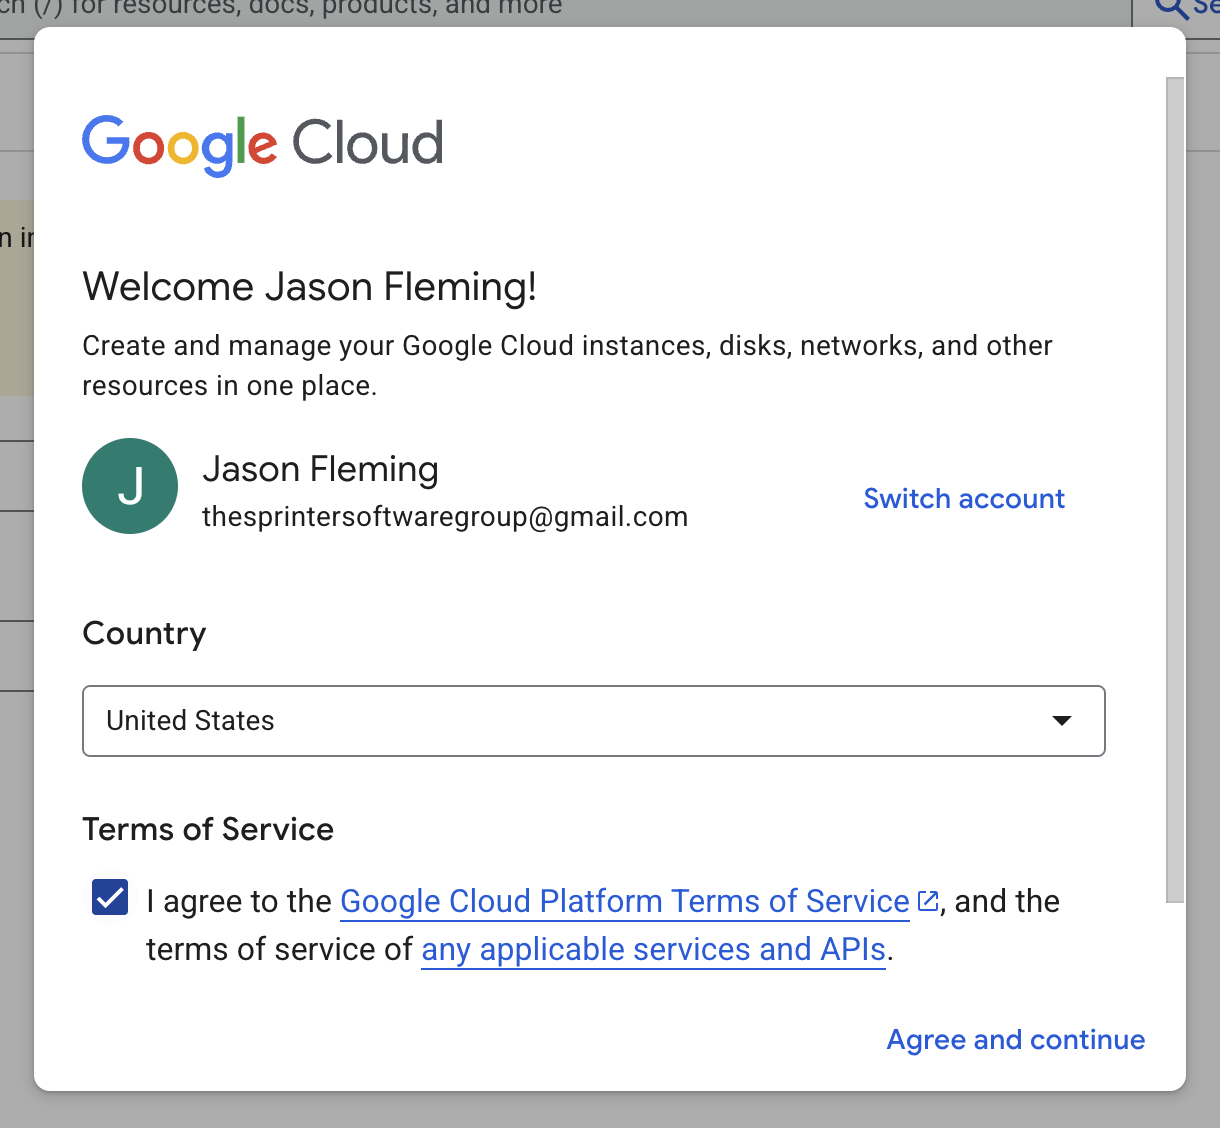
5
Create a Google Cloud project
Go to Create a Project. Enter your project name and organization, select a location, and click Create.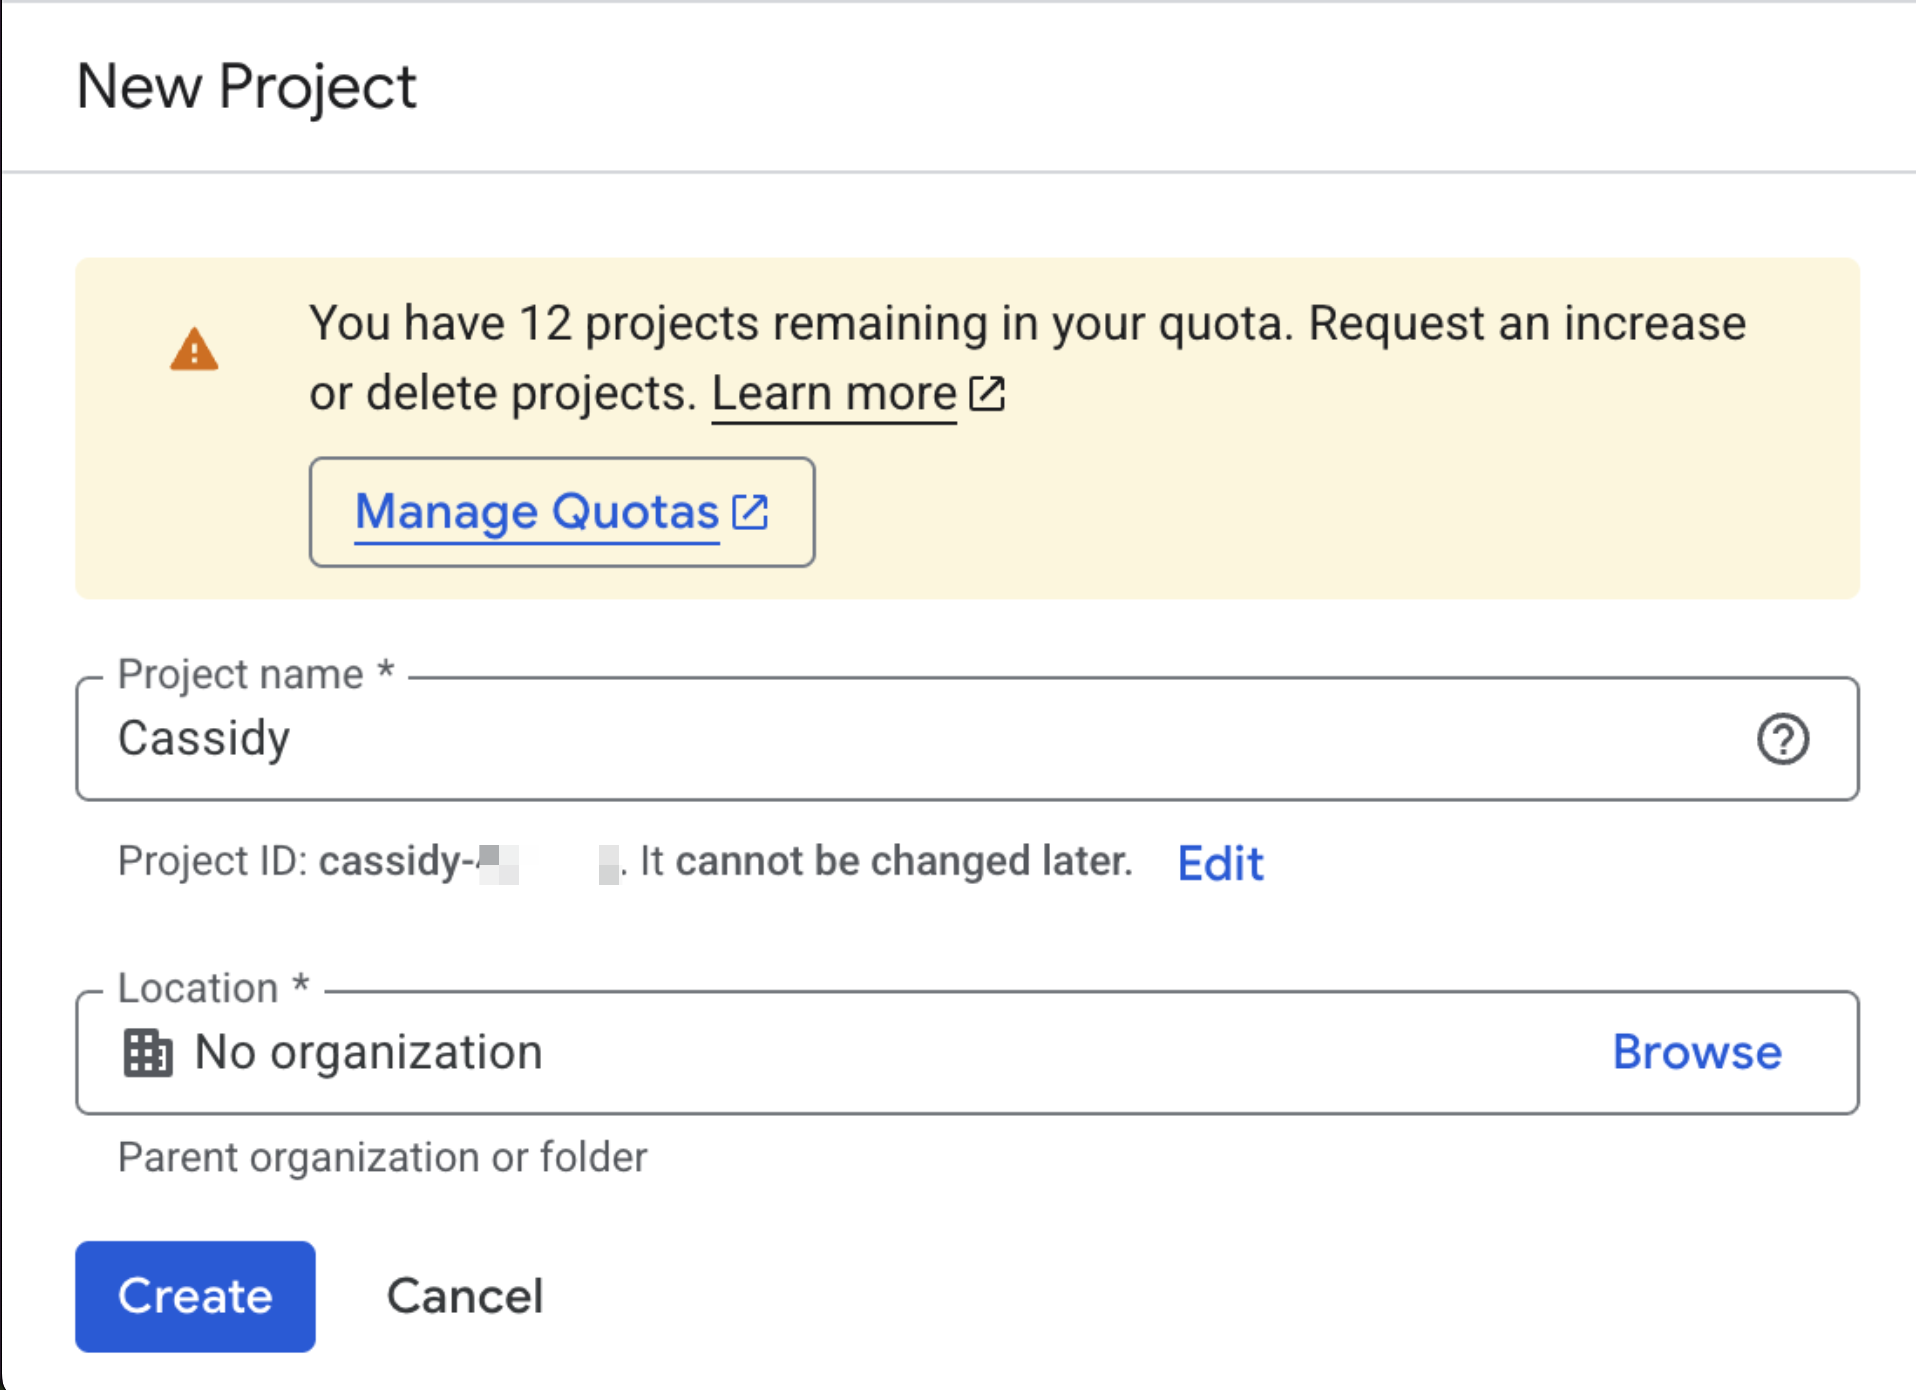
6
Enable the Google Chat API
Navigate to the Chat API Library. Make sure the correct project is selected and click Enable.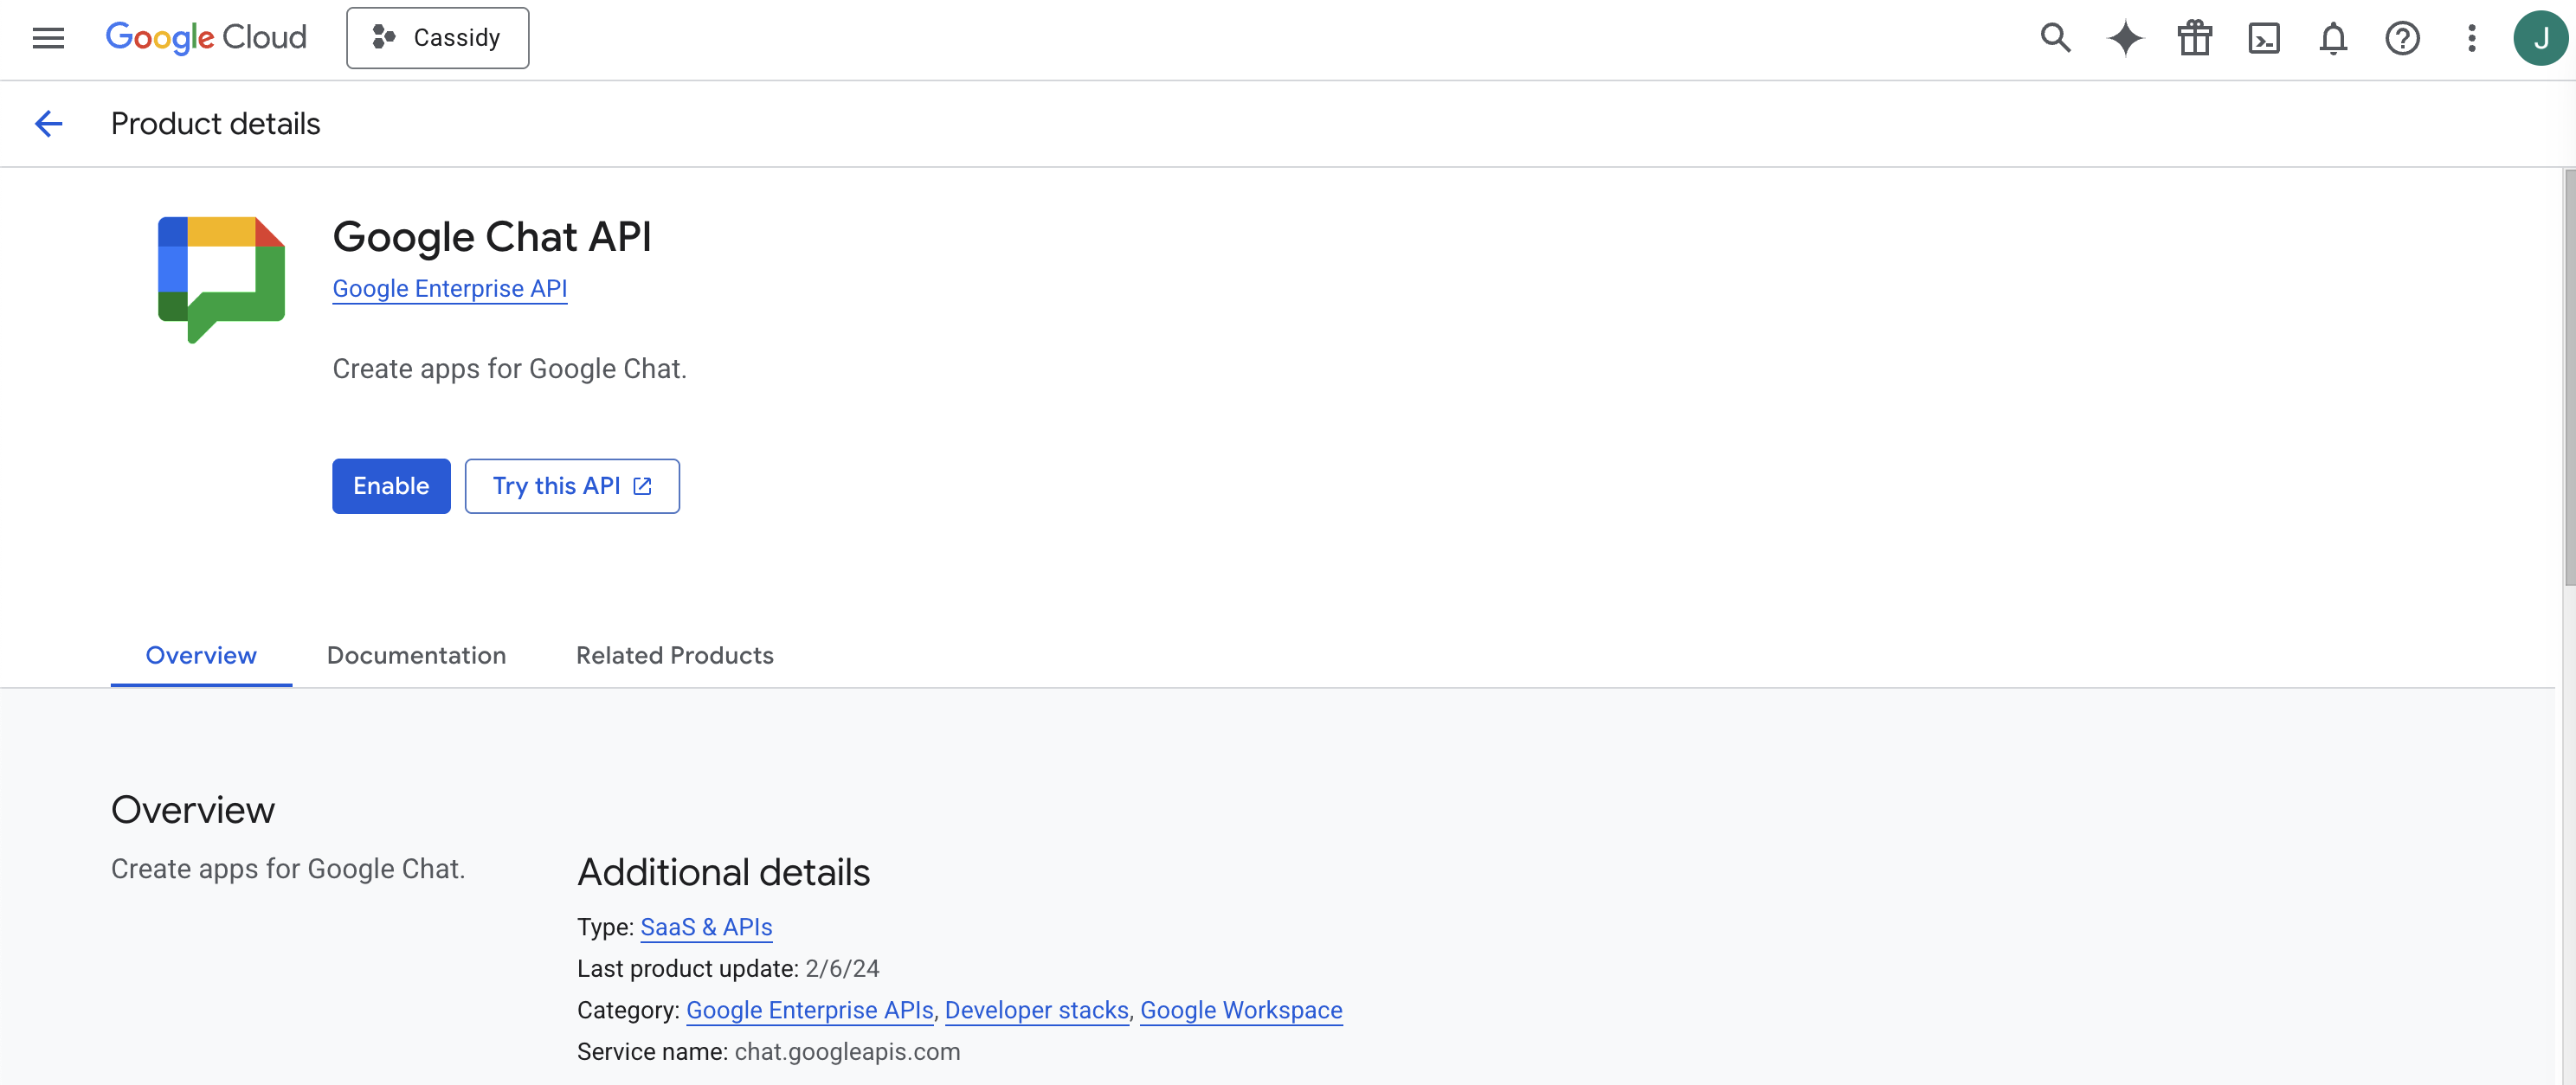
7
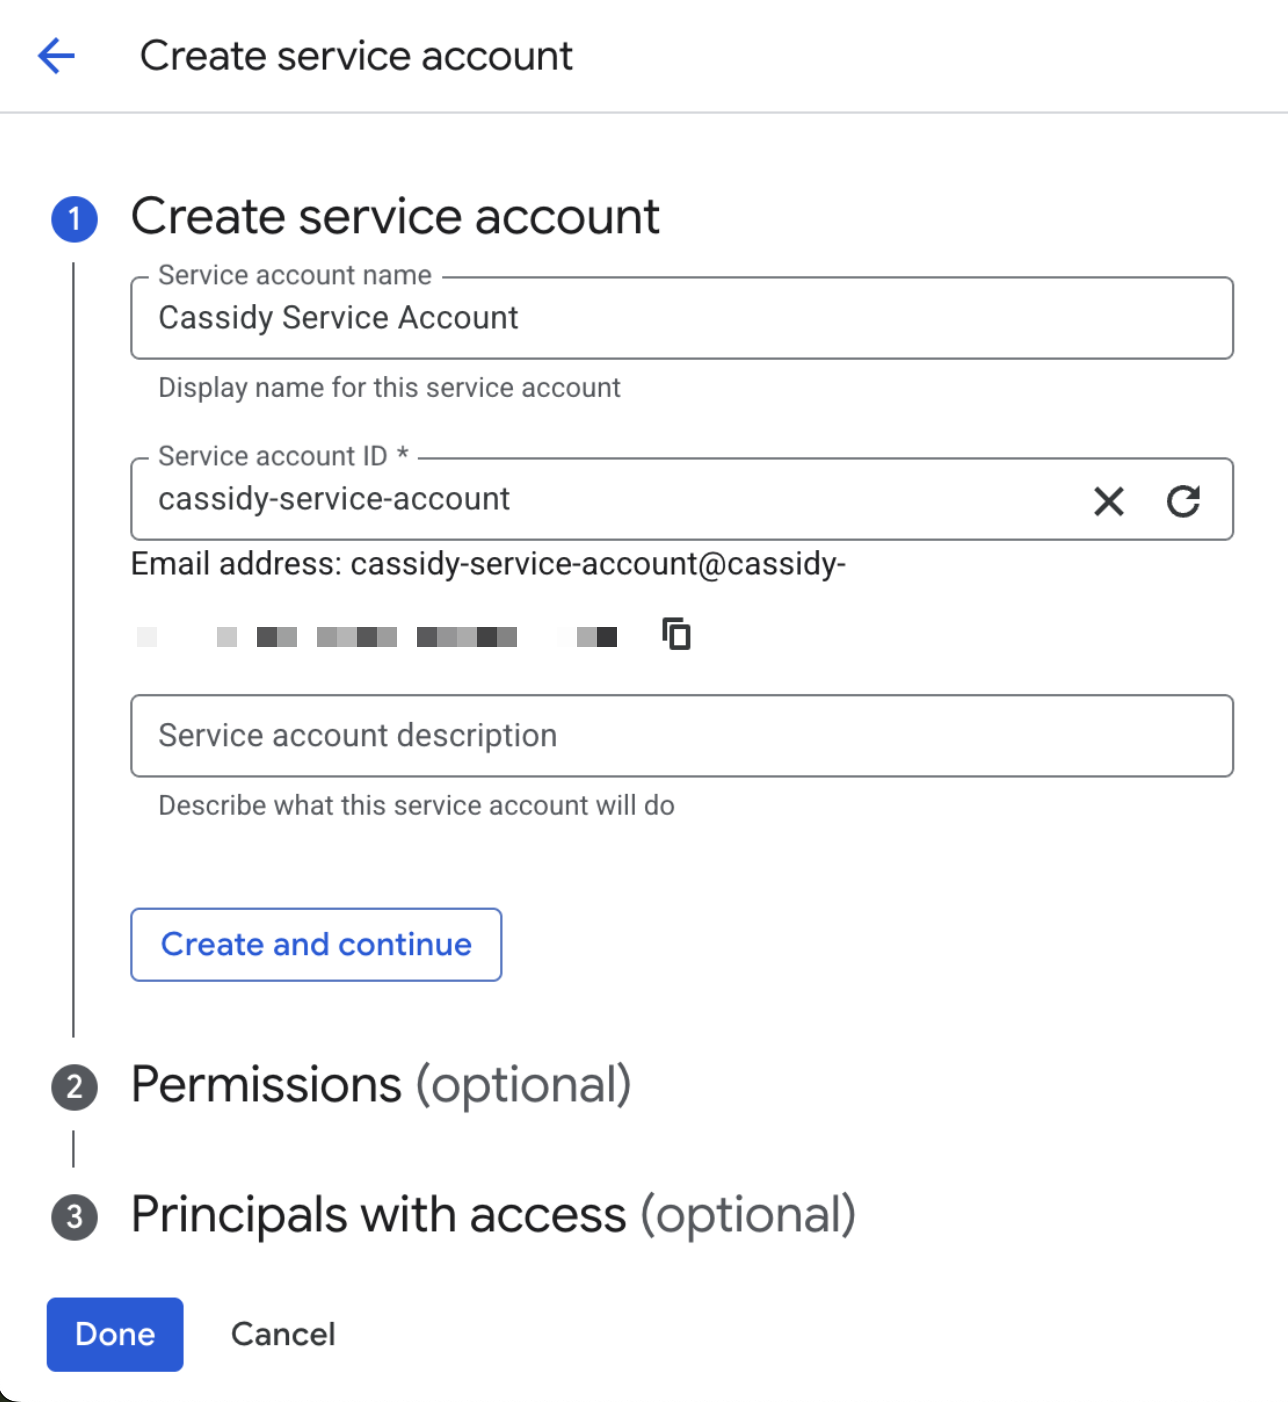
Create a service account
Go to Chat API Credentials. Click the Create Credentials dropdown and select Service Account. Name it (for example, “Cassidy Service Account”) and click Create and Continue. Skip optional steps and click Done.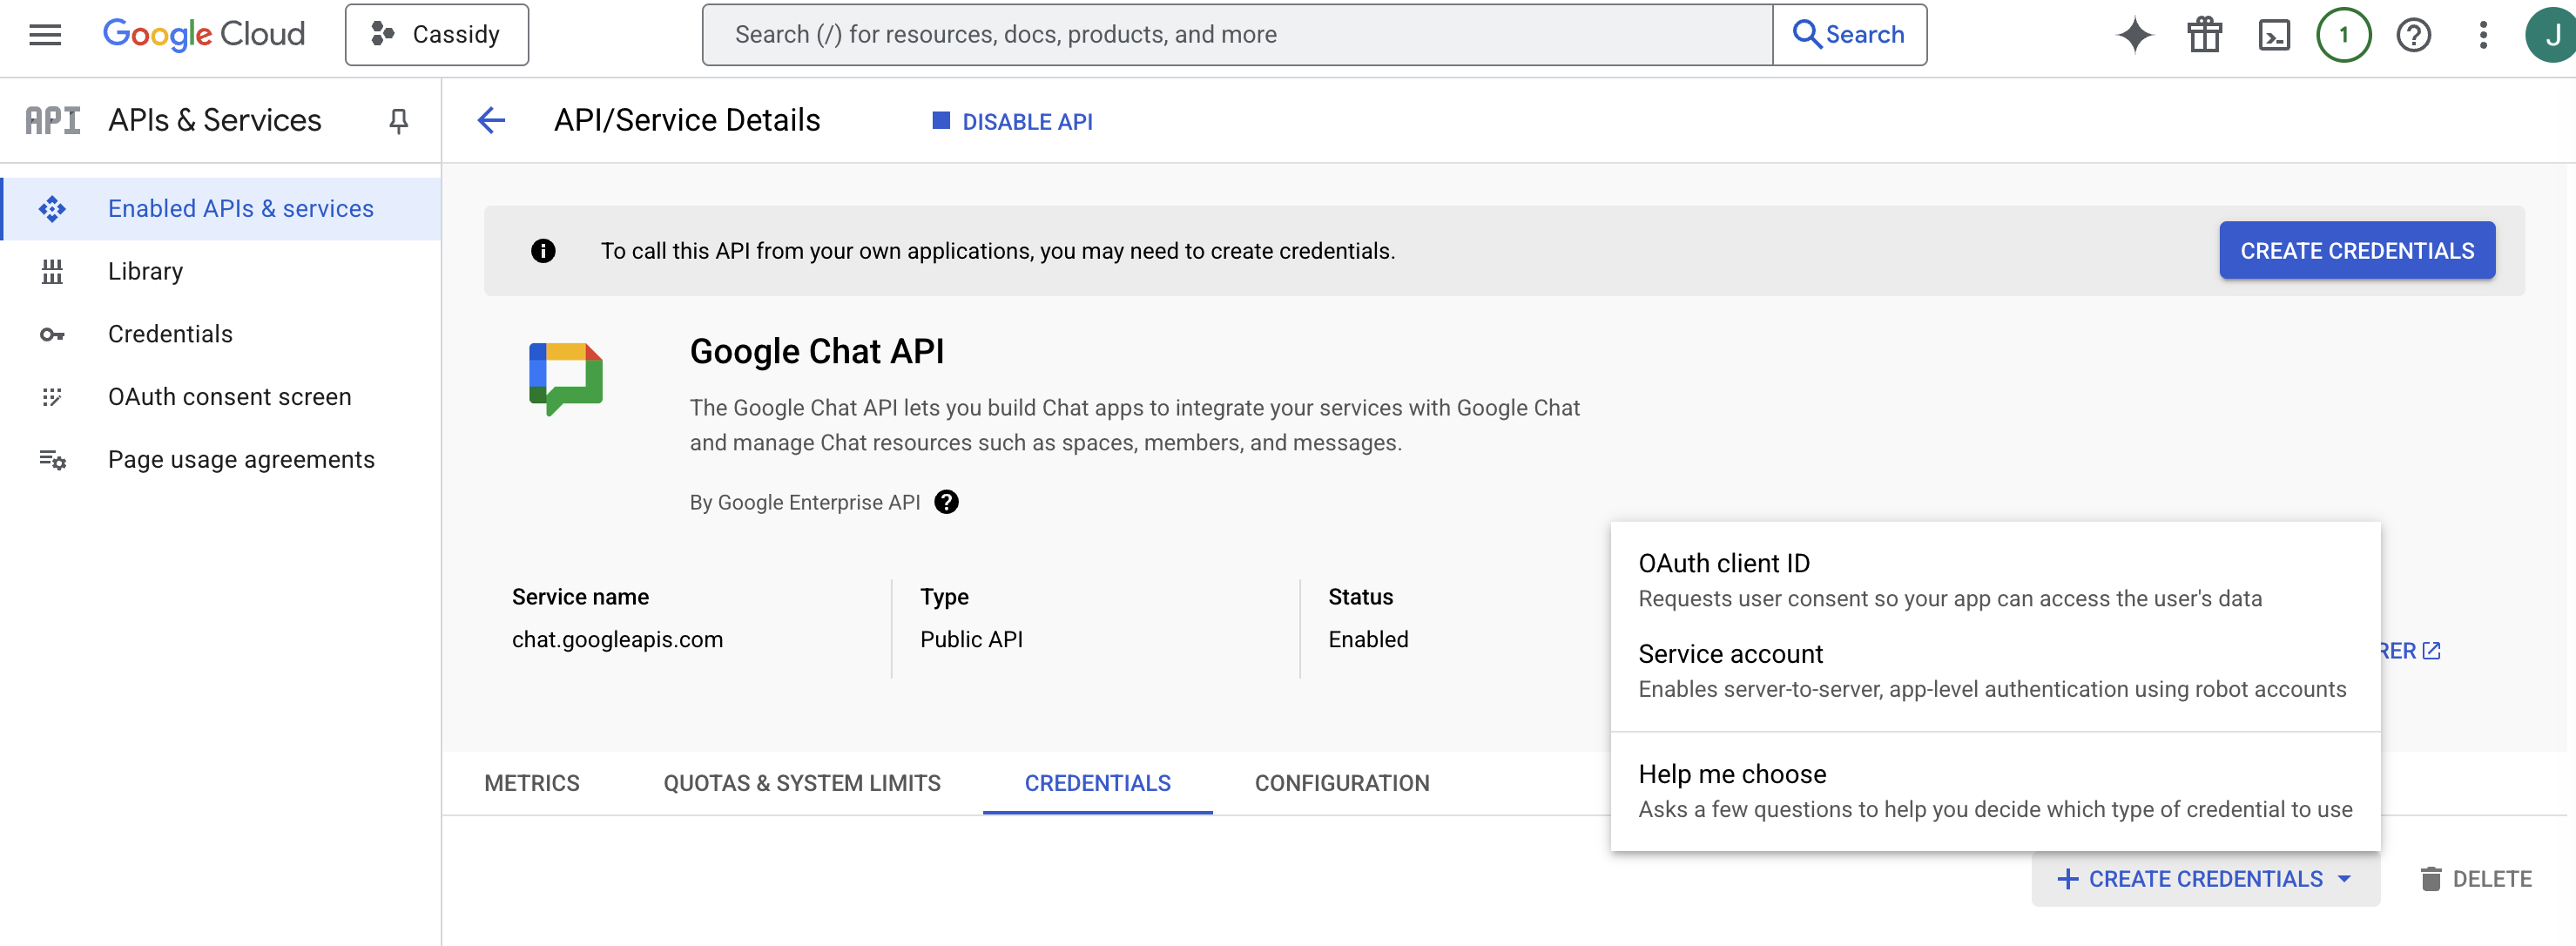
8
Access the service account
On the Credentials tab, click the pencil icon next to the service account you just created.
9
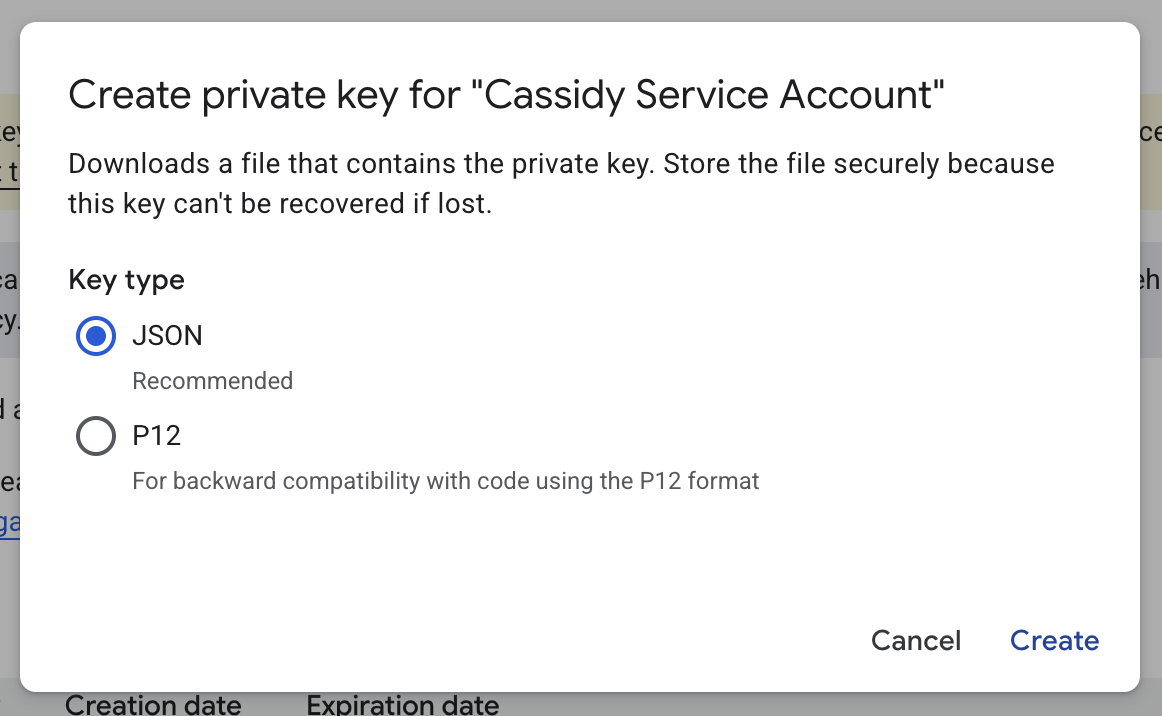
Generate a JSON key
Go to the Keys tab, click Add Key, then select Create New Key. Choose JSON and click Create to download the key file.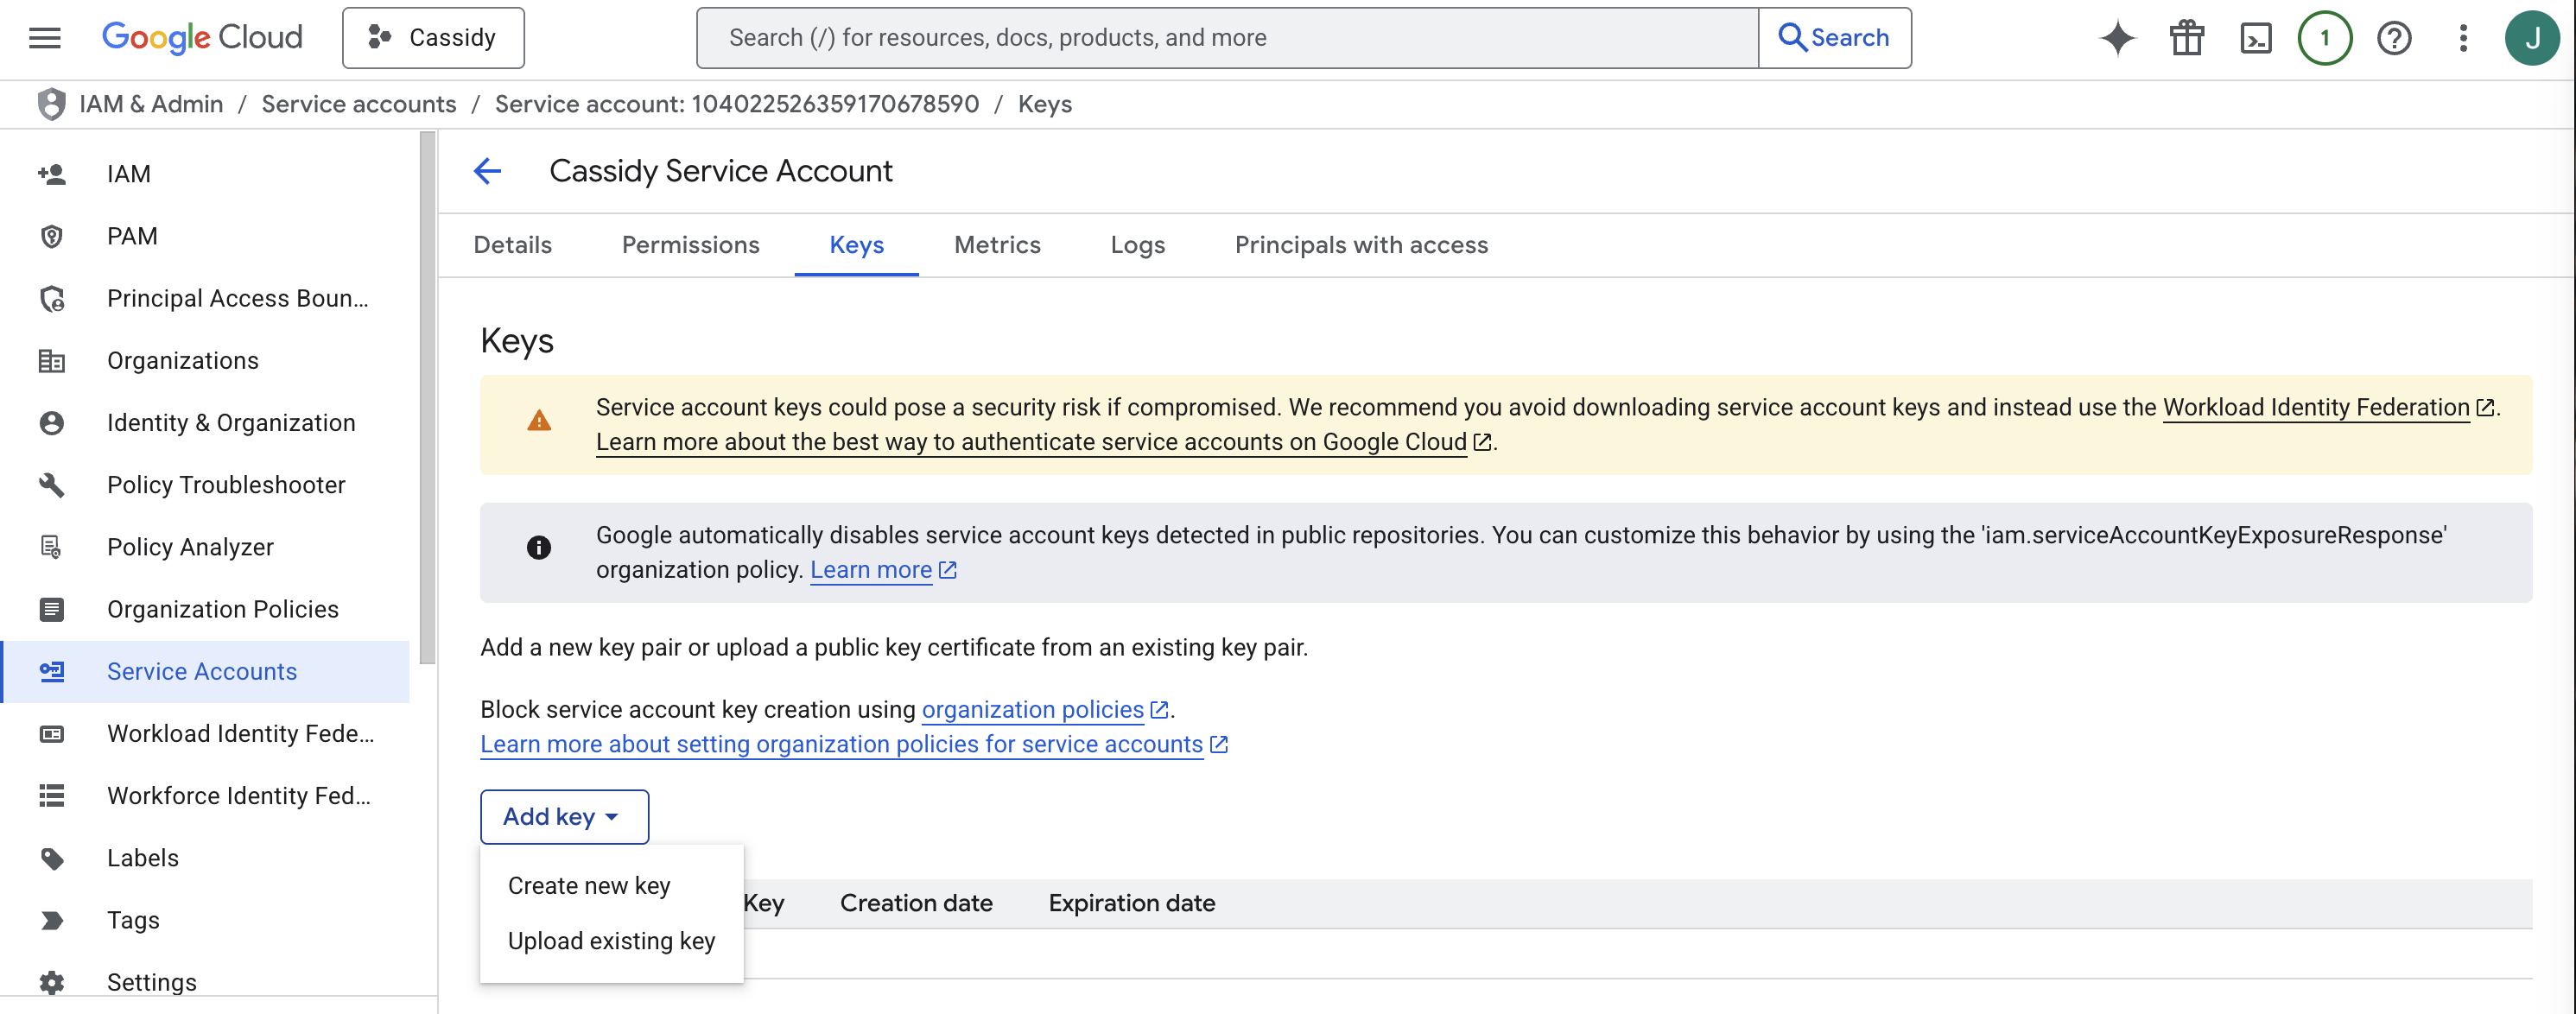
10
Configure the Chat bot
Go to Chat API Configuration and set up the following: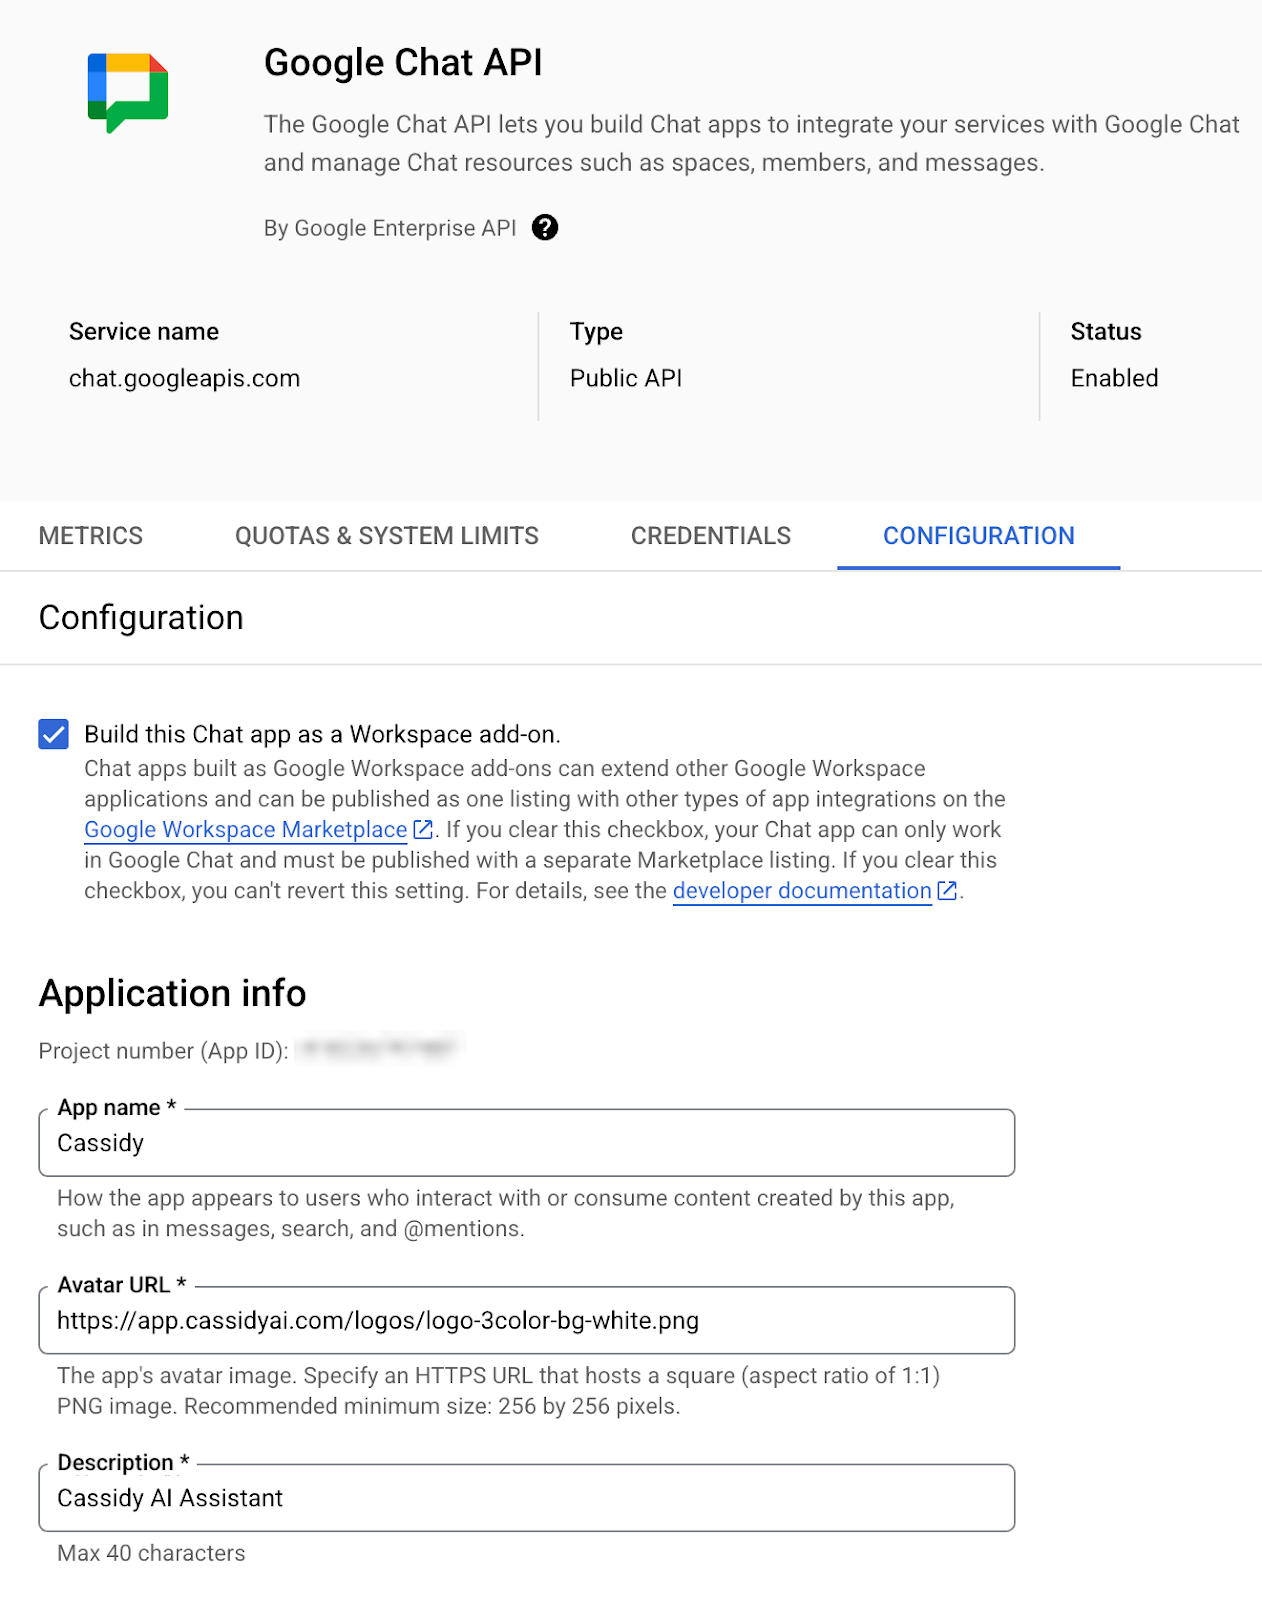
- Check Build this Chat app as a Workspace add-on
- Fill in the Application Info (name, avatar URL, description)
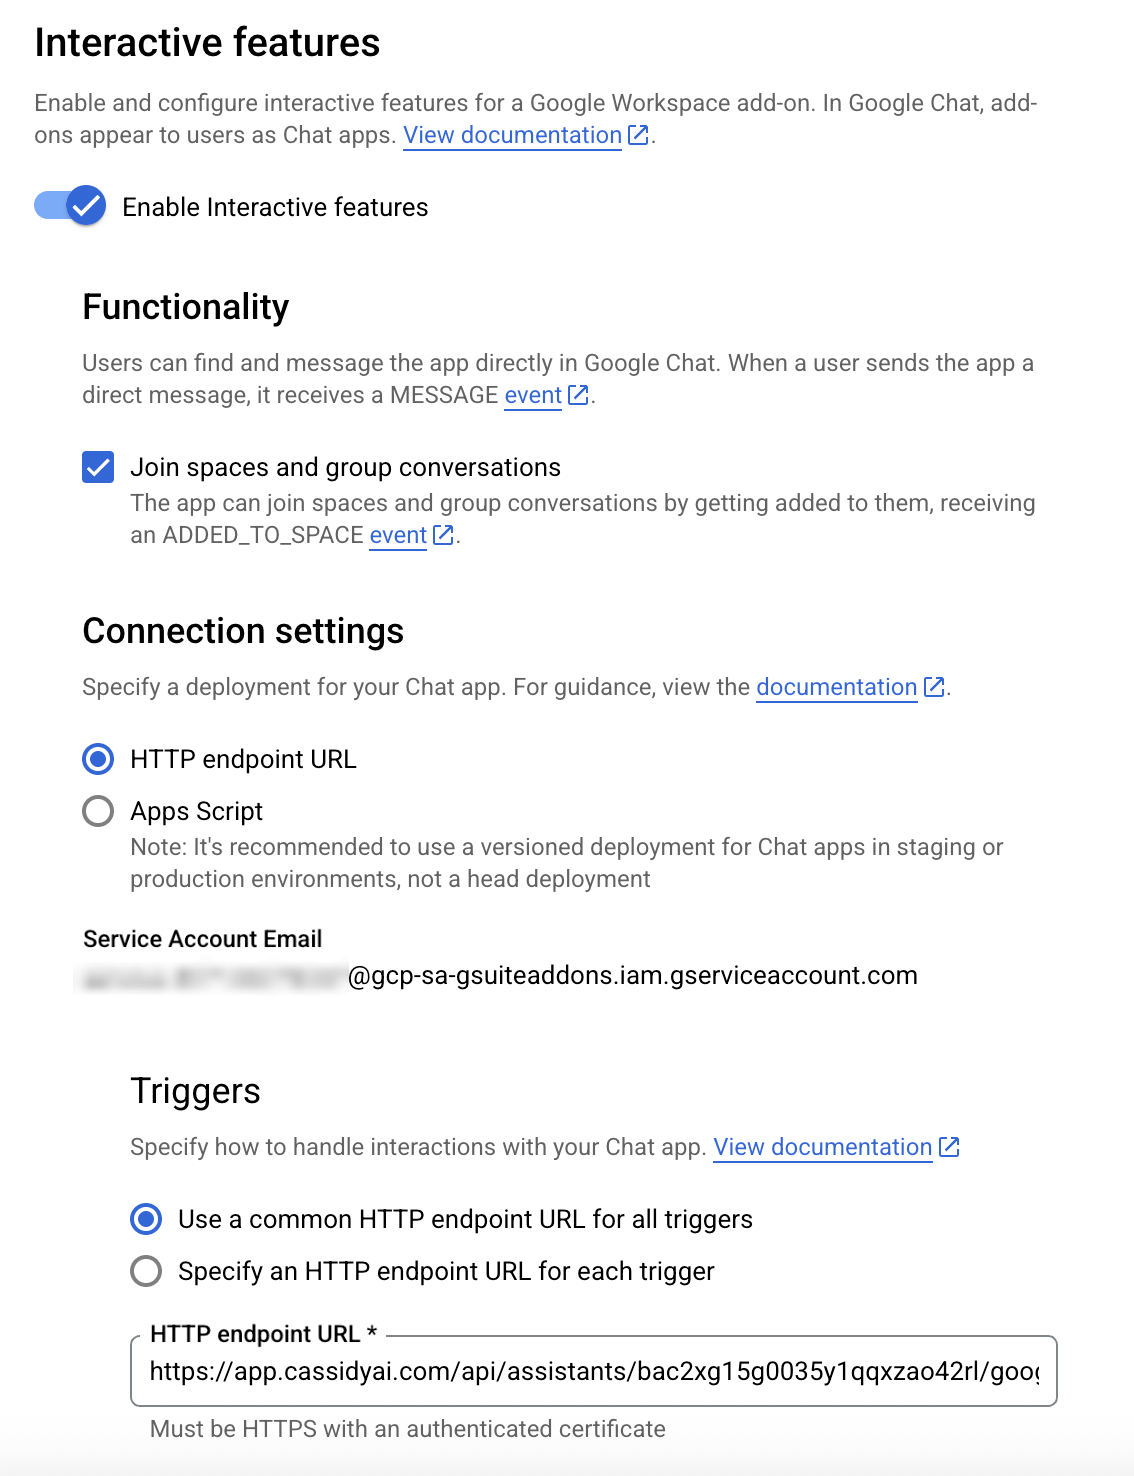
- Ensure Enable Interactive Features is enabled
- Under Connection Settings, select HTTP endpoint URL
- For Triggers, choose Use a common HTTP endpoint URL for all triggers and paste the Webhook URL from Cassidy
- Under Visibility, select Make this Chat app available to specific people and groups and enter your email for testing
11
Upload the service account key in Cassidy
Return to your Agent’s Deployments tab in Cassidy. Under Service Account Key, click Upload JSON File and upload the key file you downloaded.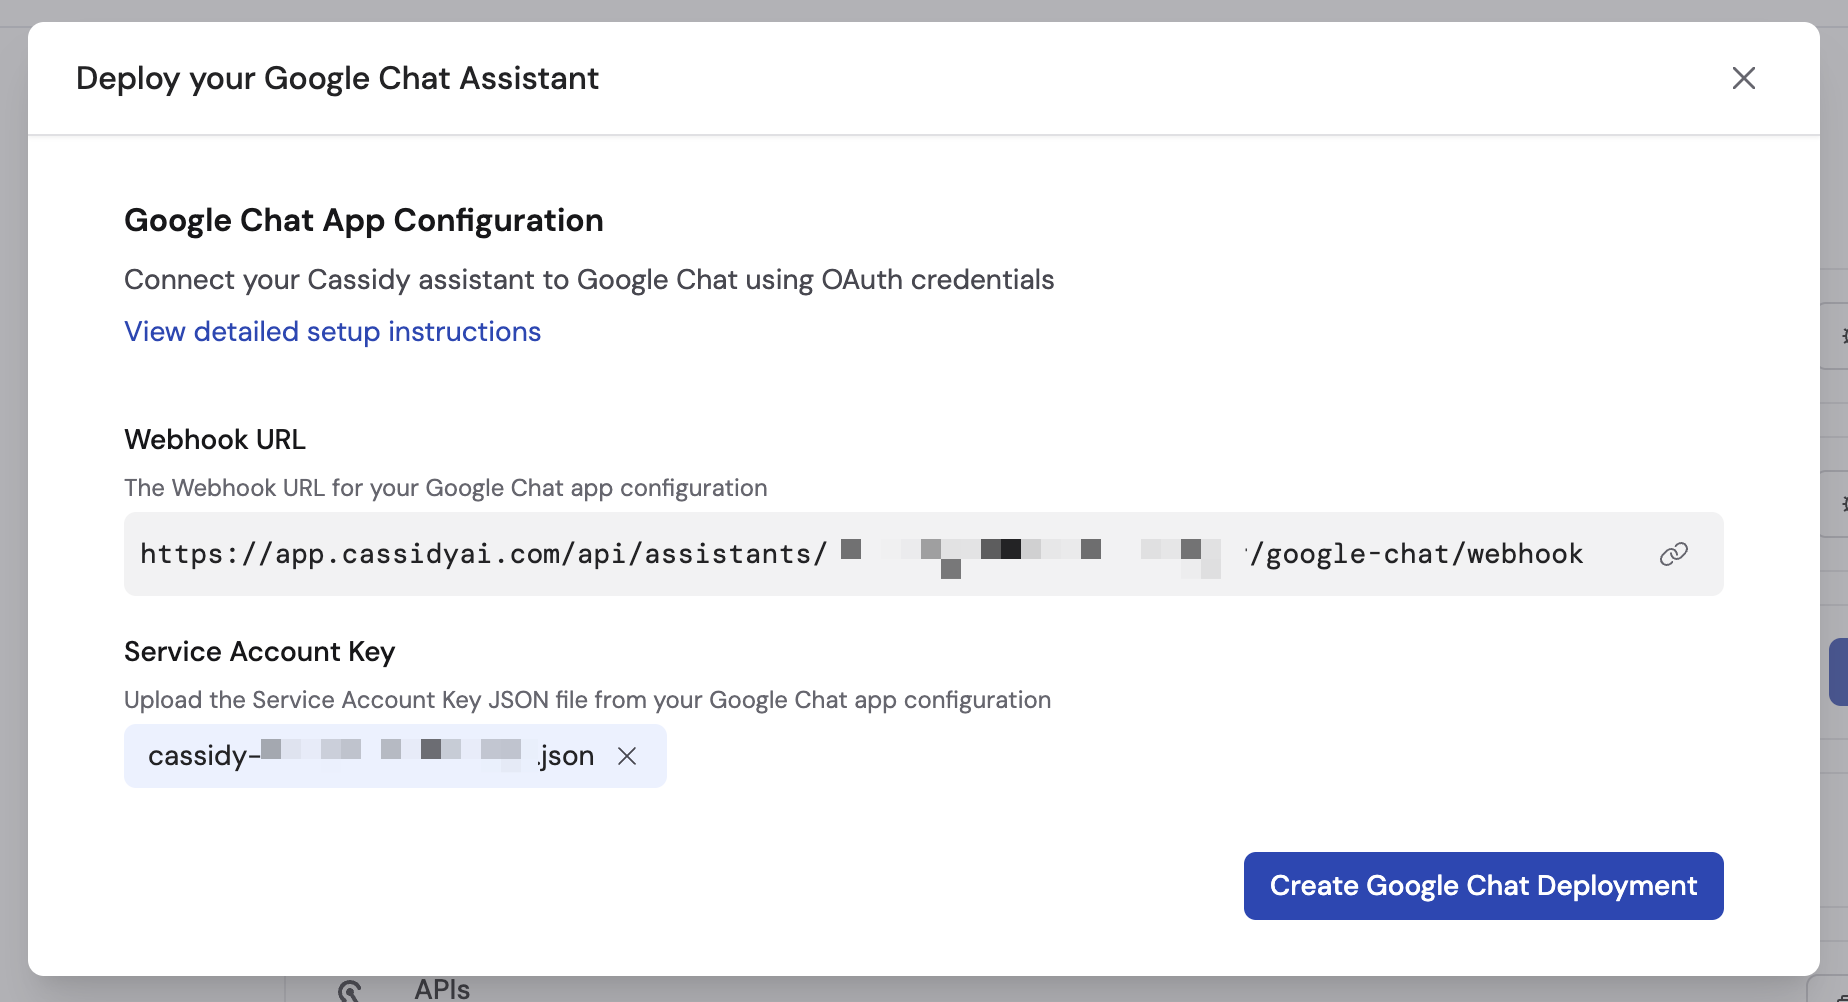
12
Create the deployment
Click Create Google Chat Deployment. Optionally toggle on Show Knowledge Base References to display source citations in responses.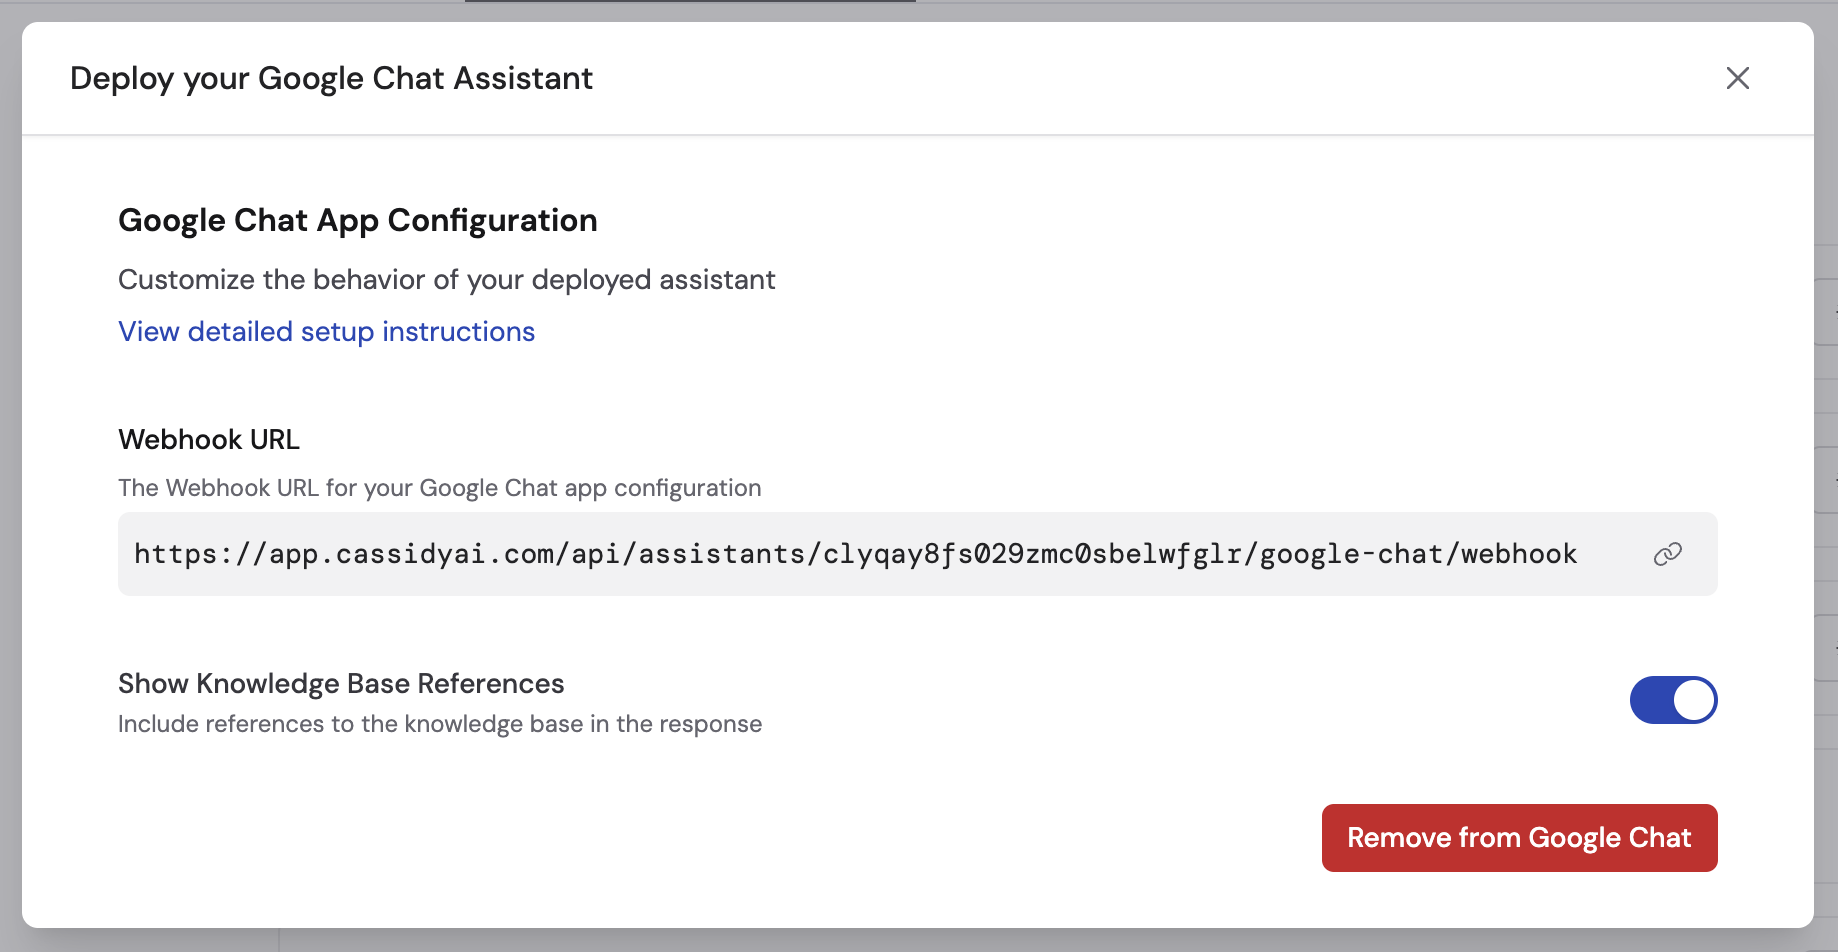
13
Test in Google Chat
Open Google Chat, start a new chat, and search for your Agent name. Send a message to confirm it responds.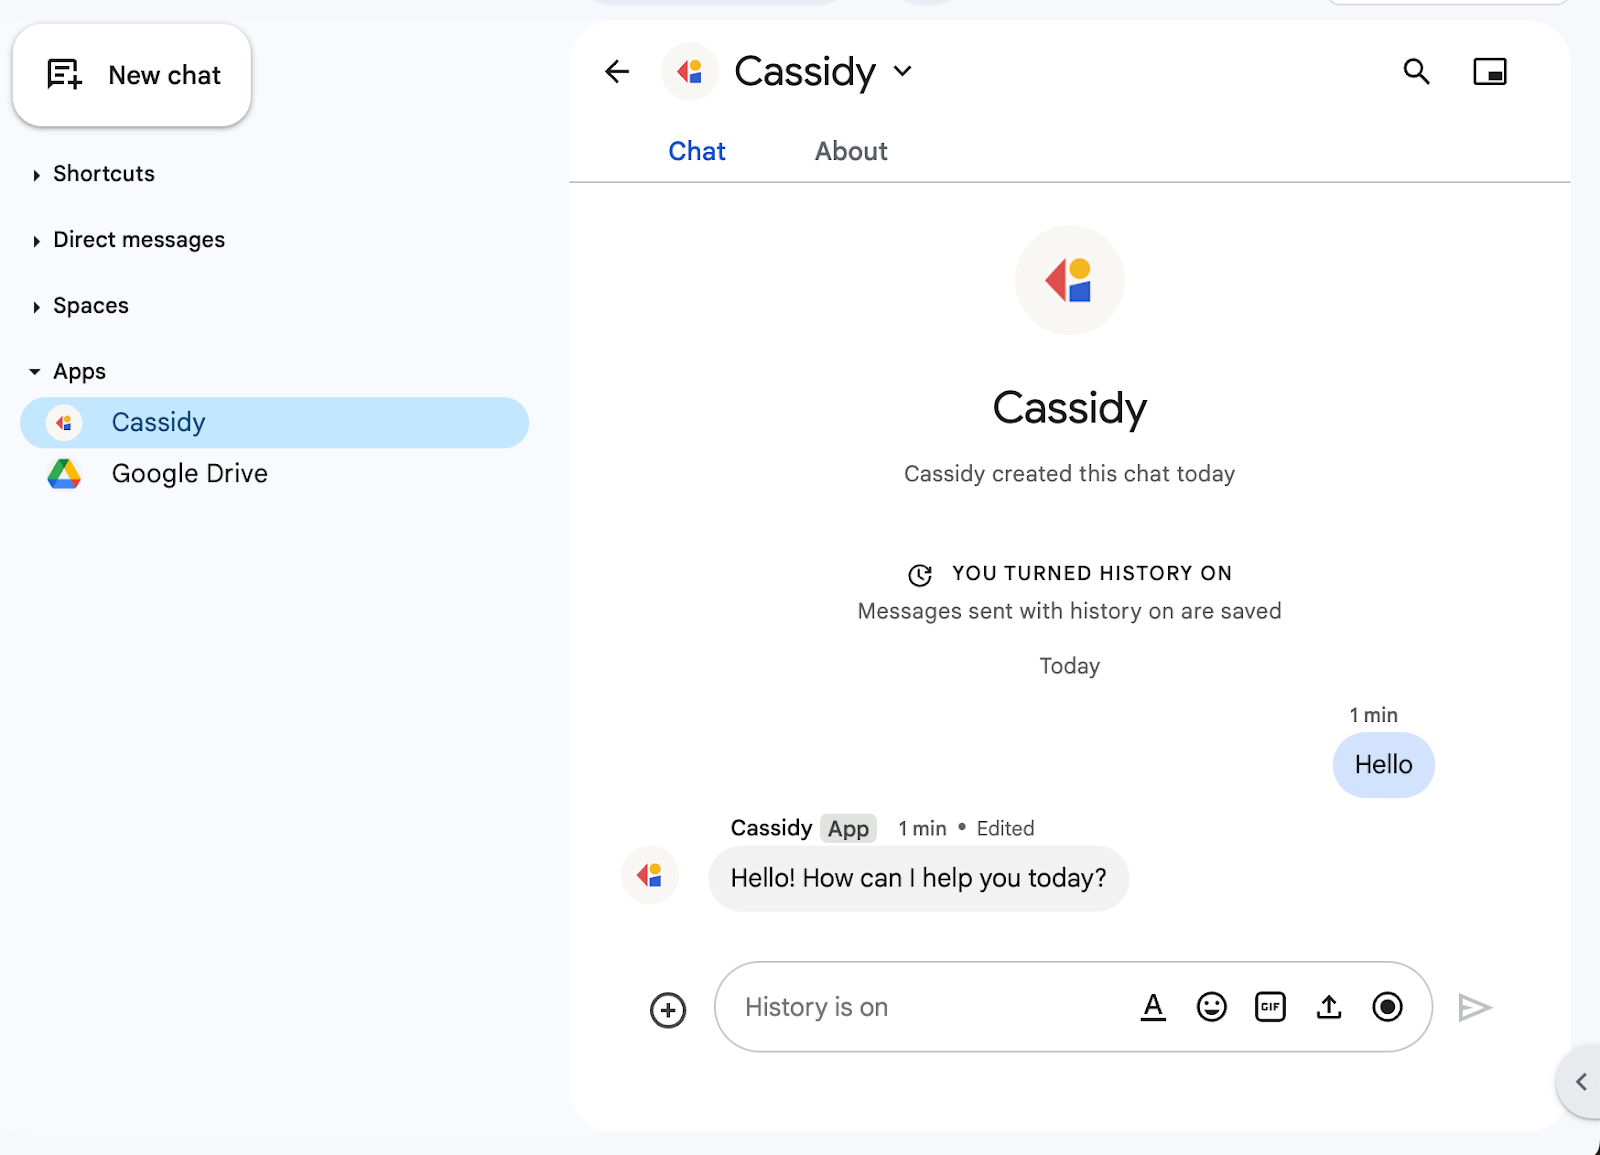
Publish to your workspace
To make the Agent available to your entire Google Workspace organization, publish it through the Google Workspace Marketplace.1
Enable the Workspace Marketplace SDK
Go to the Apps Marketplace API and click Enable.
2
Set up OAuth consent
Go to the OAuth Consent Screen. Click Get Started, enter your app name, support email, and set the audience type to Internal. Click Create.
3
Configure Marketplace settings
In the Google Workspace Marketplace SDK, go to App Configuration:
- Set app visibility to Private
- Set installation settings to Individual + Admin Install
- Ensure Workspace add-on is selected under App Integrations
- Enter your contact info for developer information
4
Create a store listing and publish
Go to the Store Listing tab. Fill in the app details (name, description, graphics), save as draft, then click Publish.Your Agent should now appear in the Google Workspace Marketplace under internal apps.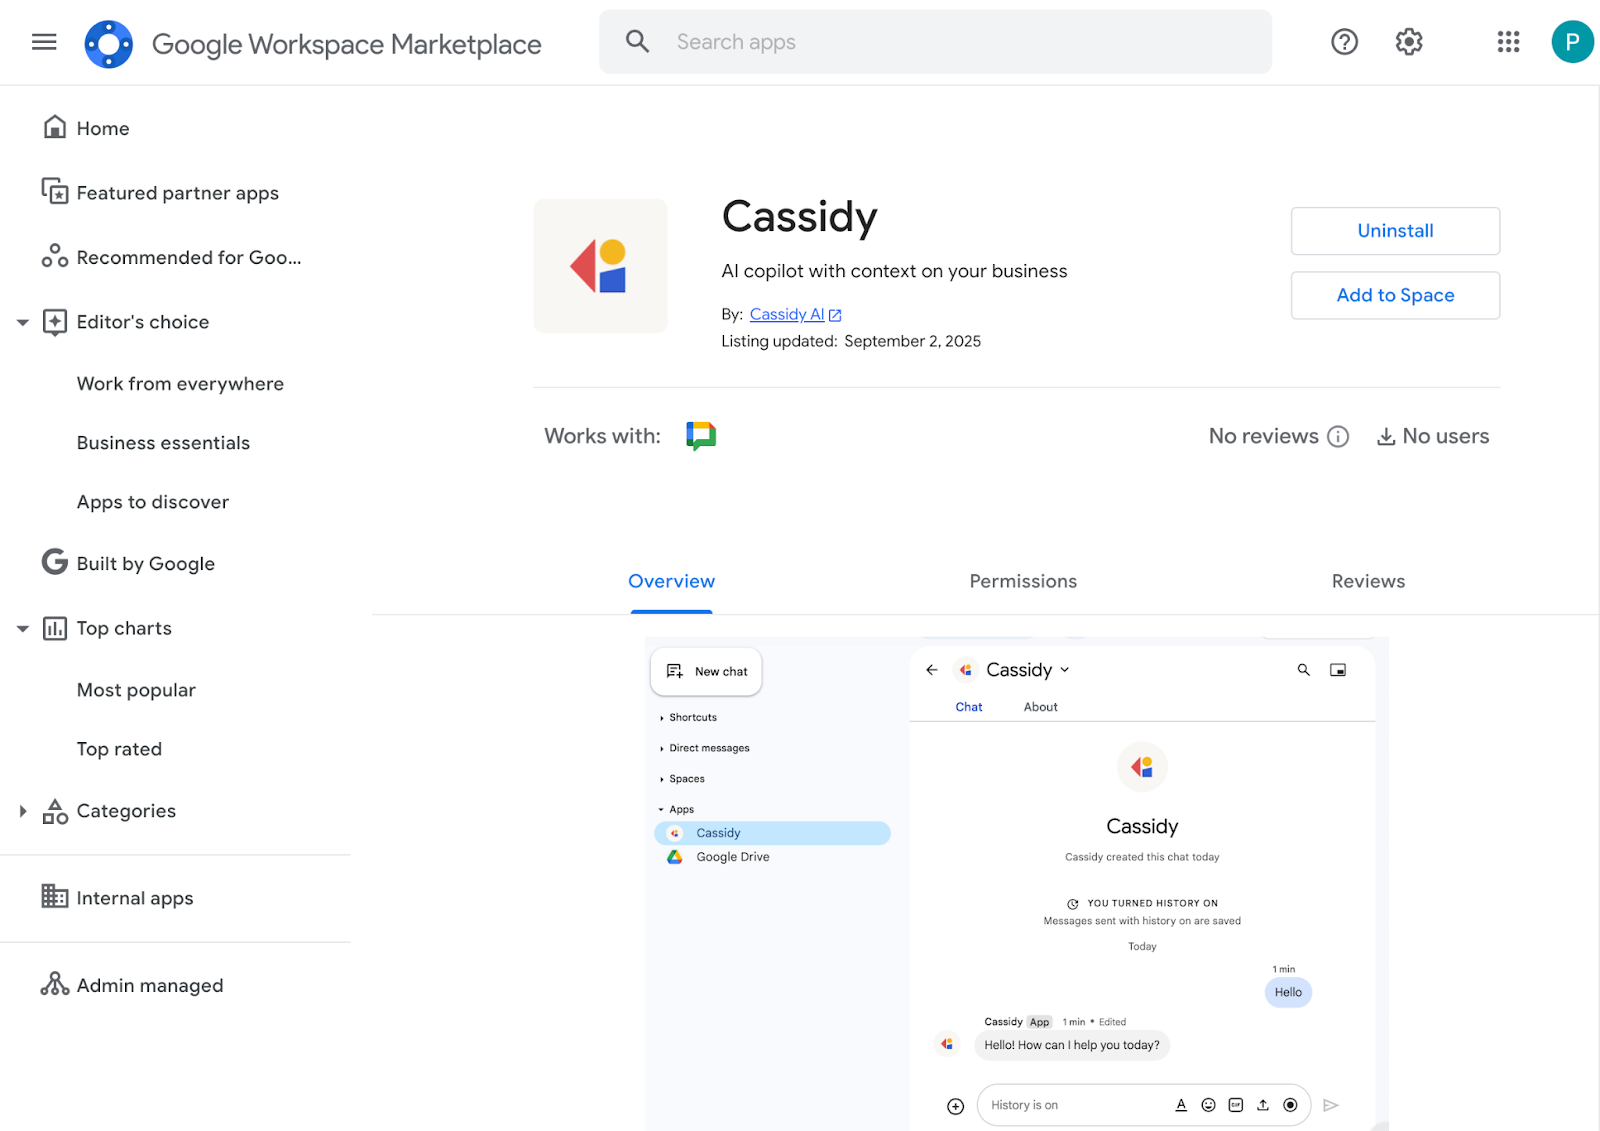
Using your Agent in Google Chat
Direct messages
Search for the Agent by name and start a direct message conversation. The Agent remembers the full conversation history across the thread.Spaces
Add the Agent to a Google Chat Space and @mention it to start a conversation. The Agent replies in-thread and remembers messages where it was mentioned.Next steps
Deploy to Slack
Make your Agent available in Slack channels and DMs.
Deploy via email
Deploy your Agent to a dedicated email address.
Deploy via embed
Embed your Agent on your website for external users.